We know that measuring the speed of light with an Arduino is possible. It’s just that the implementation is hard.
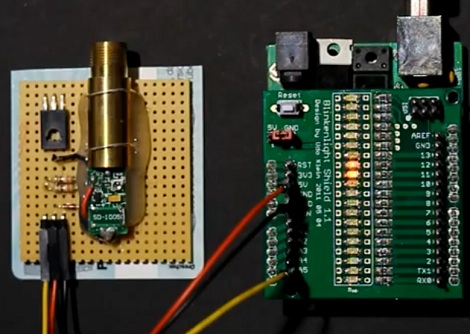
Last month we saw [Udo]’s blinkenlight shield that can be used as a line scan camera. It’s a neat piece of kit, but [Udo] really wants to submit something for the Buildlounge laser cutter giveaway, so he figured measuring the speed of light would be an easy project. If a kid and a chocolate bar can do it, surely it can’t be too hard.
[Udo] hit upon the idea of pulsing a laser pointer and measuring the time of the reflection. Because his blinkenlight shield can be used as a light sensor, all that’s needed is a mirror and a pretty long line of sight. There’s a few problems with the setup though: with the Arduino running at 16 MHz, a photon will travel 19 meters in one clock cycle.
Even with some very clever coding, we’re not really sure detecting an emitted photon is possible at such (relatively) slow clock speeds. We’re thinking [Udo] could source a few hundred meters of optic fiber so the entire experiment could fit on a desk, but feel free to drop a note in the comments if you’ve got a better idea. [Udo]’s demo of his blinkenlight/laser mashup is after the break.
Continue reading “Trying To Measure The Speed Of Light With An Arduino”