Ducted Fan Drone Uses 1 Rotor For VTOL

Multi-rotor fixed-pitch aircraft – quad, hexa, octa copters – are the current flavor of the season with hobby and amateur flight enthusiasts. The serious aero-modeling folks prefer their variable-pitch, single rotor heli’s. Defense and military folks, on the other hand, opt for a fixed wing UAV design that needs a launch mechanism to get airborne. A different approach to flight is the ducted fan, vertical take-off and landing UAV. [Armin Strobel] has been working on just such a design since 2001. However, it wasn’t until recent advances in rapid-prototyping such as 3D printing and availability of small, powerful and cheap flight controllers that allowed him to make some progress. His Ducted Fan VTOL UAV uses just such recent technologies.

Ducted fan designs can use either swivelling tilt rotors that allow the craft to transition from vertical flight to horizontal, or movable control surfaces to control thrust. The advantage is that a single propeller can be used if the model is not too big. This, in turn, allows the use of internal combustion engines which cannot be used in multi-rotor craft (well, they’ve proven difficult to use thus far).

[Armin] started this project in 2001 in a configuration where the centre of gravity is located beneath trust vectoring, giving the advantage of stability. Since there were no hobby autopilots available at the time, it was only equipped with one gyroscope and a mechanical mixer to control the vehicle around the vertical axis. Unfortunately, the craft was destroyed during the first flight, after having managed a short flight, and he stopped further work on it – until now. To start with, he built his own 3D printer – a delta design with a big build volume of 400mm3. 3D printing allowed him to build a structure which already included all the necessary mount points and supports needed to fix servos and other components. The in-fill feature allowed him to make his structure stiff and lightweight too.

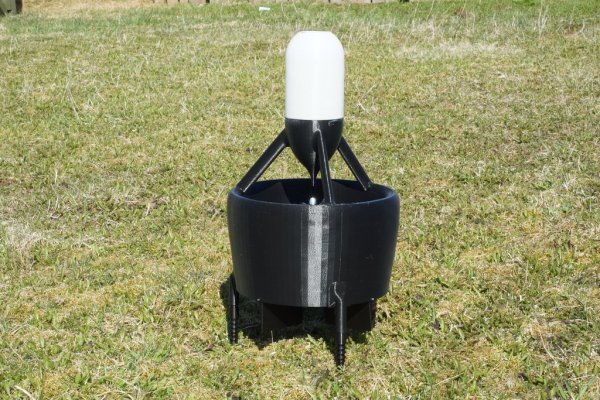
Intending to build his own auto-pilot, he experimented with a BeagleBone Black connected to a micro controller to interface with the sensors and actuators. But he wasn’t too happy with initial results, and instead opted to use the PixHawk PX4 auto-pilot system. The UAV is powered by one 3-cell 3500mAh LiPo. The outside diameter of the duct is 30cm (12”), the height is 55cm (22”) and the take-off weight is about 1.2kg (2.6 pound). It has not yet been flown, since he is still waiting for the electronics to arrive, but some bench tests have been conducted with satisfactory results. In the meantime, he is looking to team up with people who share similar interests, so do get in touch with him if this is something up your alley.

If you want to look at other interesting designs, check this UAV that can autonomously transition from quadcopter flight to that of a fixed-wing aircraft or this VTOL airplane / quadcopter mashup.

Avago Buys Broadcom For $37 Billion

The economy is doing well, and that means companies are spending money. Companies in the chip business are in fact businesses, and spending money to them means acquisitions and mergers. The latest such deal is Avago Technologies buying Broadcom for $37 Billion USD – the largest deal ever made in the semiconductor industry.

The products made by these two companies aren’t usually found in stock at Adafruit, Sparkfun, or in the BOMs on Hackaday.io, but that doesn’t mean these chips aren’t extremely popular in the industry. Avago has a huge catalog of RF goodies and a surprising number of LED products. Broadcom, outside of the SoC found in the Raspberry Pi, likewise isn’t seen very often on workbenches, but their chips are found in everything from set-top boxes to Ethernet and broadband equipment.

Just a few months ago, a merger between NXP and Freescale struck a little bit closer to our hearts, but there is an opportunity for this acquisition to be much more interesting. The company that emerges from the NXP and Freescale merger will be saddled with hundreds of chip lines that all compete with each other – a cornucopia of ARMs, 8051s, Kinetis,  iMX.6, and ColdFires, and that’s just microcontrollers. Avago and Broadcom don’t have a catalog that overlaps nearly as much, and it will be very interesting to see what they can come up with.

Arduino Vs Arduino: These Are Not The Droids…

We’ve been trying to not pick favorites in the Arduino controversy, or at least remain open-minded to both sides of the story. Some businesses, on the other hand, are clearly aligning themselves.  (Full text of e-mail below.)

Reader [Francisco Zabala], from cool robot-supplies store Acrobotic, got this e-mail from an Amazon distributor where he purchased some Arduinos “ages ago” and was angered enough at the brazen tone to drop us a line.


Thank you for our Arduino purchase from our Amazon.com store. We truly appreciate your business.

We are writing to let you know about an important change in Arduino products. The new website for Arduino is now officially Arduino.org. The old website (arduino.cc) should no longer be used.

All new Arduino hardware will be transitioned from the old Arduino.cc badging to the new Arduino.org badging. Please be aware that during this transition, you may receive Arduino hardware with either Arduino.cc or Arduino.org. Both are authentic Arduino-brand hardware.

If you use Arduino.org branded hardware on the old site, you may be presented with an error. Please use the new Arduino.org site.


We know for sure that Arduino SRL sent out a letter to distributors claiming that they were the real Arduino because they’ve been manufacturing the boards. Seeing a distributor recommend against the software at arduino.cc in such stark terms makes us wonder if there have been similar letters sent out concerning the IDE fork. Anyone have anything? Send us a tip if you do.

We find it a little ironic that when arduino.cc added the now-retracted popup that specifically targeted boards made by Smart Projects / Arduino SRL,  that they opened themselves up to this sort of counter-attack: if you see an error popup, just switch over to the “new official” IDE. Oops. Good that it’s gone now.

Finally, we’ve got to say that “the old website should no longer be used” is pretty rich: we’re hackers, we use whatever software / IDE we like, thank you very much! No matter how the legal battles end up, and no matter who tells you to use what codebase, the beauty of open source is that it’s up to you, and not them. Hack on, y’all!

Thanks, [Francisco] for the tip.

Hacklet 47 – Thermal Imaging Projects

Thermal imaging is the science of converting the heat signature of objects to an image visible to humans. Everything above absolute 0 gives off some heat, and thermal imagers allow us to see that – even if there is no visible light in the room. Historically, thermal imaging systems have been large and expensive. Early systems required liquid nitrogen cooling for their bolometer sensors. Recent electronic advances have brought the price of a thermal image system from the stratosphere into the sub $300 range – right about where makers and hackers can jump in. That’s exactly what’s happened with the Flir Lepton module and the Seek Thermal camera. This week’s Hacklet is all about thermal imaging projects on Hackaday.io!

We start with [Pure Engineering] and Flir Lepton Thermal Camera Breakout. Flir’s Lepton thermal camera created quite a stir last year when it debuted in the Flir One thermal iPhone camera. The Lepton module used in the Flir One is a great standalone unit. Interfacing only requires an I2C interface for setup and an SPI interface for image data transfer. Actually using the Lepton is a bit more of a challenge, mainly because of its packaging. [Pure Engineering] made a simple breakout board which makes using the Lepton easy. It’s also breadboard compatible – which is a huge plus in the early phases of any project.


grideyeNext up is [AKA] with GRID-EYE BLE-capable thermal camera. This project is a Bluetooth low energy (BLE) thermal camera using Panasonic’s Grid-EYE 64 pixel thermal sensor. 64 pixels may not sound like much, but an 8×8 grid is enough data to see quite a bit of temperature variation. If you don’t believe it, check the project page for a video of [AKA] using Grid-EYE’s on-board OLED display. Grid-EYE was a Hackaday Prize 2014 semifinalist, and we featured a bio on [AKA] last year. The only hard part with building your own Grid-EYE is getting the sensor itself. Panasonic doesn’t sell them to just anyone, so you might have to jump through a few hoops to get your own.


pylepton[Kurt Kiefer] brought the FLIR Lepton to the Raspberry Pi with pylepton video overlay. This project uses the Lepton to overlay thermal data with images captured by the Raspbery Pi camera module. The Lepton interfaces through the I2C and SPI ports on the Pi’s GPIO pins. The results are some ghostly images of black and white thermal views over color camera images – perfect for your next ghost hunting expedition!  The entire project is implemented in Python, so it’s easy to import and use pylepton in your own projects. [Kurt] even gives an example of capturing an image with just 5 lines of code. Nice work, [Kurt]!


wificamFinally we have [Erik Beall] with WiFi Thermal Camera. [Eric] is using an 82×62 diode array to create thermal images. Unlike microbolometer sensors, diode/thermopile sensors don’t need constant calibration. They also are sturdier than Microelectricomechanical System (MEMS) based devices. This particular project users an array from Heimann Sensor. As the name implies, the sensor is paired with a WiFi radio, which makes using it to capture and display data easy. [Erik] must be doing something right, as WiFi Thermal Camera just finished a very successful Kickstarter, raising $143,126 on a $40,000 initial goal.

Are you inspired? A thermal imager can be used to detect heat loss in buildings, or heat generated by electrical faults – which means it would be a great project for the 2015 Hackaday Prize! If you want to see more thermal imaging projects, check out the thermal imaging projects list!

That’s it for this week’s Hacklet, As always, see you next week. Same hack time, same hack channel, bringing you the best of Hackaday.io!

Raspberry Preserve – A BitTorrent Sync Client In A Mason Jar

[Matt Reed] used a few off-the-shelf parts and built a Raspberry-Pi based BitTorrent Sync client to help backup files. What makes it stand out is the idea of using a Mason Jar as the enclosure and the nice build finish. Mason Jars have long been used to preserve food. [Matt] wanted to use the Mason Jar to help preserve family memories.

Basically, he just stuffed a Raspberry Pi inside a jar with some LED’s and put BitTorrent Sync on it. He started off with a nice, square piece of wood and mounted the lid on it. Holes were drilled to fix the four LED’s and faux crystal drawer pull knobs. The Pi was connected to power and Ethernet and the LED’s wired up. The software is quite straightforward – just install BitTorrent Sync on the Raspberry Pi. He wrote a Node.js script to constantly check if BitTorrent Sync is transferring any data, and if it is, blink the LED’s so it looks cool. If no data is being transferred, the LED’s just glow solid red. Once it is plugged into power and connected to the internet, any photo or video (or any file for that matter) that is put inside a special folder called “Preserve” on any of his devices, gets sync’ed and copied to the “Raspberry Preserve” – preserved for posterity.

VCF East X: Amigas And Non-Apple Macs

The Amiga 1000, the original Amiga, was introduced in 1985, making this the 30th anniversary of the Commodore Amiga. Of course this needed to be represented at the Vintage Computer Festival, and [Bill Winters] and [Anthony Becker] were more than up to the task:

The guys brought with them a representation of nearly every Amiga, and also have a few neat gadgets to plug into these cool little boxes. The Amiga 1200 has been heavily upgraded with a compact flash drive. With the proper adapters and cards, this neat machine can be upgraded with Ethernet, WiFi, or just about every conceivable networking solution.

Attached to the A500 is a Gotek floppy drive emulator, a relatively standard if weird device that turns a PC floppy drive connector into a USB mass storage solution. This floppy emulator did not originally support Amiga disk formats, but with a firmware modification, everything just works. That’s a great story in itself, and something we should probably cover another time.

If you’re wondering what it was like for [Bill] and [Anthony] to dig through their garage for their exhibit, here you go.

Portable Macintoshen

The first Macintosh was released in 1984. Macintosh users wanted a slightly more portable machine, but the first ‘luggable’ Mac wouldn’t be released until late 1989. The market was there to fill the gap, with some bizarre machines exhibited by [Matt Bergeron]:

The Outbound laptop and notebook were unlicensed clones of the Macintosh. Instead of pirating the Apple ROMs, the Outbound computers required buyers to pull the ROM chips from their Macs and install them in the slightly more portable version. This was, of course, inconvenient, and we can imagine there were more than a few ROM chips cloned.

The Dynamac was a different beast, using the entire PCB from a mac SE or SE/30. To this, the creators of the Dynamac added a custom video card and electroluminescent display that was also capable of driving an external monitor. Very cool stuff.

Arduino Vs. Arduino: The Reseller’s Conundrum

Over the last few months, the internal struggles between the various founders of Arduino have come to a head. This began last November when Arduino SRL (the Italian version of an LLC) sued Arduino LLC for trademark infringement in Massachusetts District court. To assuage the hearts and minds of the maker community, Arduino SRL said they were the real Arduino by virtue of being the first ones to manufacture Arduino boards. A fork of the Arduino IDE by Arduino SRL – simply an update to the version number – was a ploy to further cement their position as the true developers of Arduino.

This is a mess, but not just for two organizations fighting over a trademark. If you’re selling Arduinos in your web store, which Arduino do you side with?

[Nate] from Sparkfun is answering that question with a non-answer.

Currently, Arduino SRL is the only source of Arduino Unos. Sparkfun will continue to buy Unos from SRL, but they’re not necessarily siding with Arduino SRL; people demand blue Arduinos with Italy silkscreened on the board, and Sparkfun is more than happy to supply these.

There are, however, questions about the future of Arduino hardware. The Arduino software stack will surely be around in a year, but anyone that will be purchasing thousands of little blue boards over the next year is understandably nervous.

redboard
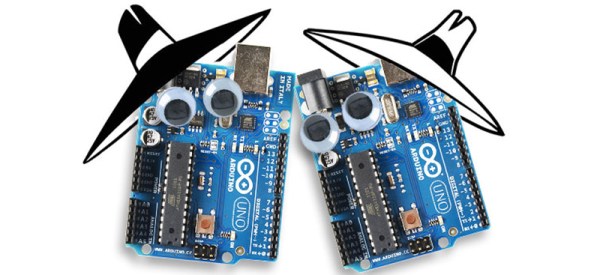
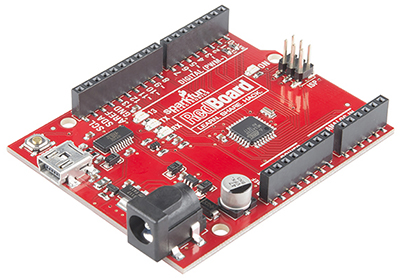
This isn’t the first time Sparkfun has faced a challenge in Arduino supply. In 2012, when the Arduino Uno R3 was released, all the documentation for their very popular Inventor’s Kit was obsoleted overnight. In response to these supply chain problems, Sparkfun created the RedBoard.

Sparkfun has always offered to pay royalties on the RedBoard to Arduino LLC, just as they do with the Arduino Pro and Pro Mini. Effectively, Sparkfun is on the fence, with offers to manufacture the Arduino Zero, Uno, Mega, and Due coming from the LLC.

The reason for this is consumers. If someone wants an Arduino SRL-manufactured board, they’ll buy it. If, however, a customer wants to support Arduino LLC, that option is on the table as well.

It’s not a pretty position to be in, but it does show how someone can support one Arduino over another. In a year or two, there will only be one Arduino, but until then, if you have a preference, at least Sparkfun is giving you a choice.

Credit to Sparkfun for the great Spy vs. Spy image. Why don’t you sell googly eyes?