Hacking A Coffee Machine For A Better Brew

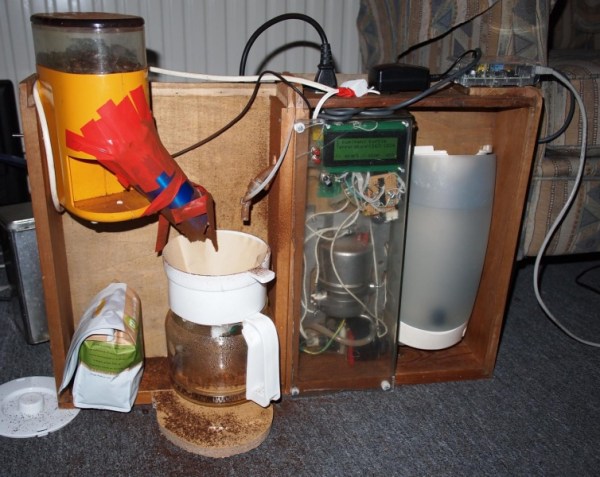
Senseo coffee makers are automated brewers that use coffee pods. [Ronald] had one, but wasn’t satisfied with the quality of the coffee it produced. His solution was to hack it apart and build his own automatic coffee machine with the innards.

The coffee brewing part of the system is controlled by an ATmega8. This reads the temperature using the NTC sensor from the original machine and actuates the various parts of the Senseo machine, and the added grinder. The timing was all done by trial and error, optimizing for the best cup of coffee.

Keeping with the trend of adding Raspberry Pis to everything, [Ronald] connected one to this build for remote control. He runs a very hacked version of LCD2USB which deals with communicating with the RPi. An Apache web server hosts a PHP script to provide a user interface, which runs a C program to tell the system to start brewing.

Unfortunately, [Ronald] didn’t give us a link to his web interface, so we can’t remotely brew him coffee. However he did provide all of the source for the project in his write up.

Minecraft For RPi Released

Minecraft for RPi

Mojang, the folks behind Minecraft, have officially released Minecraft: Pi Edition. This free version of the popular game is optimized to run on the Raspberry Pi hardware, and has an API that exposes the game’s internals to a variety of programming languages.

Mojang intends this release to be an educational tool for teaching and learning programming. Since the API provides instant feedback in the game, it could be an interesting way to make learning to code fun for people of all ages.

Having access to the API on a RPi also means that the game can be connected to the real world. For example, using Python and the RPi.GPIO, pins on the GPIO header can be used for output or input. This creates a slew of possible hacks that interface with the game.

Any ideas on what you’d like to do with Minecraft on a RPi? Let us know in the comments. Also, we coincidentally just printed a minecraft pick on our 3d printer. There’s a time lapse video of it after the break!

Continue reading “Minecraft For RPi Released”

Better PWM On The Raspberry Pi

pi

[Thomas] wanted to play around with a few high-power LEDs and a RaspberryPi. LED controllers usually require some form of PWM to change the brightness of a LED, and unfortunately the Pi only has one PWM pin. [Thomas] could have gotten around this with a custom chip or even an Arduino hanging off the Pi’s USB port. He opted to go with software-based PWM, and did so in a way that is far superior to bit banging a pin.

Conventional wisdom says PWM without a real-time operating system is dumb – right up there with starting a land war in Asia. Turning a pin on and off in a while loop will eat up all the processor power in the Pi, so [Thomas] looked for a better way to do things. He came across the ServoBlaster project by [Richard Hirst] that creates pulses of different lengths by playing with direct memory access; [Richard] created a circular buffer that is read every 10μs. With 2000 values in the buffer, he can control eight different pins with very little impact on CPU usage.

For [Thomas], though, [Richard]’s project wasn’t enough. It was originally written for servos and is only able to drive PWM pins up to about 12%. A quick rewrite of [Richard]’s code allowed [Thomas] to control eight pins with PWM varying from 0% to 100% – and be able to do other things with his Pi in the process.

[Thomas] now has a 40 Watt RGB LED powered by a Raspberry Pi burned into his retina, and the satisfaction of a really clever way of giving the Pi more PWM pins.

NASA Inspired Circadian Rhythm Lights

circadian-rhythm-light-rig

After reading about an initiative between NASA and Boeing to develop lights for the International Space Station [Rasathus] decided to give it a go at building his own. The project uses RGB pixels to build a circadian rhythm light installation. Without the normal rise and fall of the sun the sleep wake schedule for the astronauts can be pretty rough. This uses color and intensity of light in a well-defined schedule to help alleviate that. [Rasathus] is trying to bring his project in well under the $11.1 million mark which was established for the ISS.

The light modules he’s using are from a strand of LEDs from Adafruit. Each is driven by a WS2801 controller, a common driver used for easy and complicated projects like this huge ball of light which our own [Jesse Congdon] tackled. The board above is the start of an adapter board for interfacing with the Raspberry Pi GPIO header. [Rasathus] wanted to make certain he didn’t fry the control electronics so he built some protection into this adapter. The control software is covered in the second portion of  the write up. We’ve embedded the video from that post after the break.

Continue reading “NASA Inspired Circadian Rhythm Lights”

Raspberry Pi Is Right At Home Inside Of A Game Boy

IMG_20130201_163325

[Matt] still has his original Game Boy from when he was a kid. He wanted to pull it out and play some of the classics but alas, the screen was broken and he couldn’t find a source for a drop-in replacement. In the end he ordered a used unit and pulled the screen from that one. This left him with a pile of leftover Game Boy parts which turned into a Raspberry Pi case project.

Since the RPi doesn’t have a power switch he thought it would be pretty neat to incorporate the Game Boy power switch. He was able to cut out one section of the original PCB that included the switch and one mounting hole. This kept the switch aligned with the case and gave him some pads to solder the incoming USB cable and the jumper wires to the RPi board. In the image above the power LED is on. He mentions that there was an issue with that circuit; the voltage drop across the LED was messing up the feed to the Pi so it’s disabled for now.

We’ve embedded a couple of images of everything inside the case after the break. If you’re a fan of this hack you should also take a look at the Game Boy hard drive enclosure which uses the same pixel art printed on paper effect for the screen window.

Continue reading “Raspberry Pi Is Right At Home Inside Of A Game Boy”

WebSockets, Raspis, And GPIO

socket

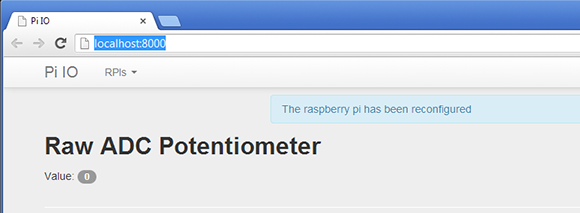
A while back, [Blaise] tried his hand at getting the WebSocket protocol working with PIC microcontrollers, WiFi adapters, and a few pots, knobs, and switches. It was an excellent project for its time, but now [Blaise] has a Raspberry Pi, and the associated GPIO pins and Ethernet connection. He decided it was time to upgrade his build to the Pi, this time with a project he calls PiIO.

The basic idea of [Blaise]’s project requires a Pi, a server, and a computer running a browser for the end user. On the Pi side of the build, [Blaise] connected a Microchip MCP3008 eight input, 10-bit ADC via the SPI bus. The Pi takes the ADC sensor values from pots, buttons, or any other analog source and sends them to a server with the WebSocket protocol.

The server hosts a web site written with Django, Autobahn, and Python to communicate with the Pi and host the web page for the data received from the Pi. There’s support for multiple Pis in [Blaise]’s build, making complicated projects we can’t even conceive very possible.

[Blaise] put up an awesome demo video of PiIO up; you can check that out after the break.

Continue reading “WebSockets, Raspis, And GPIO”

Quantifying Cloudiness With OpenCV

What Can I see From the Shard?

The Shard is the tallest building in Western Europe, and has a great view of London.  The condos in the building are very expensive, and a tourist ride to the top of the building costs £24.95.

Since the value of the view is so high, [Willem] wanted to quantify the quality of the view at any given time. His solution is the Shard Rain Cam. This device combines a Logitech webcam with a Raspberry Pi to capture a time-lapse set of images. These images are fed to a Python script using OpenCV which quantifies the cloudiness.

[Willem] also had to build a weatherproof enclosure with a transparent window for the camera and RPi. ‘Clingfilm’, which is British for saran wrap, and mineral oil is used to improve the waterproofing of an IP54 rated enclosure.

The resulting data is displayed on www.whatcaniseefromtheshard.com, which provides an indication of whether or not the view is worth £24.95. All of the Python code is available, and is a good starting point for learning about image processing with OpenCV.