Toner Transfer For Resist And Silk Screen Using Printable Vinyl

This toner transfer method uses a different material than we normally see. The red sheet being peeled back isn’t toner transfer paper. It’s printable vinyl used for both the resist and the silk screen.

The application process is almost the same as any other toner transfer PCB fabrication material. The printable vinyl stick is first adhered to a piece of paper before feeding it through a laser printer. It is acceptable to clean the vinyl with alcohol before printing if you think there may be a finger print or other oil on its surface. After printing it is carefully aligned with the board and ironed on.

[Mincior Vicentiu] thinks there are a few big benefits to this material. It seems that as you heat the toner it expands and hardens, but the vinyl actually softens to make room for this. We can imagine that this helps alleviate the smudging that sometimes occurs when ironing toner that is simply printed on paper. The other advantage is that the vinyl peels off quite easily after ironing, where as you need to soak paper in water and carefully massage it off of the toner.

[via Dangerous Prototypes]

Buzzed Buzzer Gives You A Breathalyzer Test While Ringing In The New Year

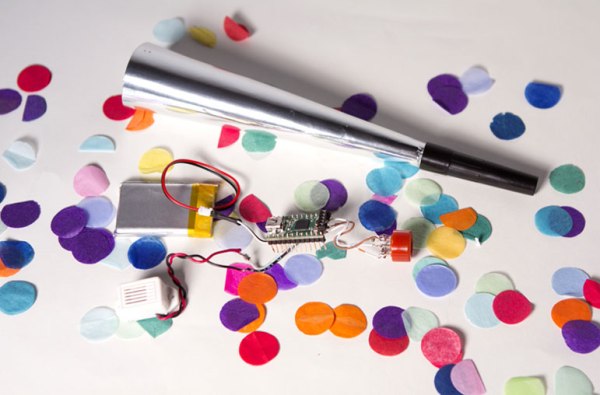
We’re not sure if there’s enough time to get a parts order delivered, but no geeky New Year’s party will be complete without a party buzzer that doubles as a Breathalyzer. The Buzzed Buzzer hides all of the necessary bits inside of a paper and plastic party favor. We guess it only buzzes if you’re over the limit? Actually that’s not the case at all. The accuracy of the sensor used in the project really just measures the presence of alcohol and can’t quantify BAC.

A Teensy 2.0 microcontroller board drives the project. Powered by a Lithium cell, it monitors an MQ-3 Alcohol gas sensor and drives a buzzer. The components are just small enough to be hidden by the cone of the party buzzer. You can see a demonstration of this in the short clip after the jump.

This is a fun project, but we’re still big fans of getting the crowd involved with this large LED meter which is hooked up to the same style of alcohol sensor.

Continue reading “Buzzed Buzzer Gives You A Breathalyzer Test While Ringing In The New Year”

Raspberry Pi Used As A Squeezebox Server

rpi-squeezebox-server

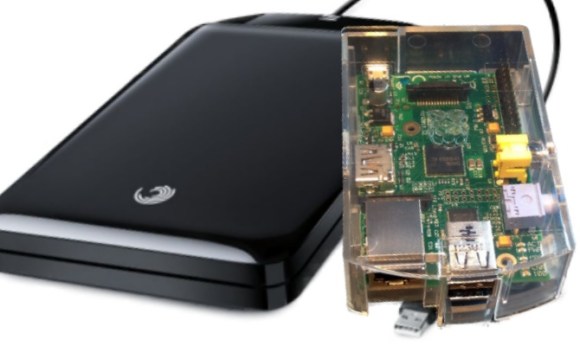
[Jacken] loves his lossless audio and because of that he’s long been a fan of Squeezebox. It makes streaming the high-bitrate files possible. But after Logitech acquired the company he feels they’ve made some choices which has driven the platform into the ground. But there is hope. He figured out how to use a Raspberry Pi as a Squeezebox server so that he can keep on using his client devices and posted details about the RPi’s performance while serving high-quality audio.

First the bad news: the RPi board doesn’t have the horsepower necessary to downsample on the fly. He even tried overclocking but that didn’t really help. The good news is that this issue only affects older Squeezebox clients (he had the issue with V3) and only when playing tracks that are much higher quality than a CD (24-bit at 88.2Khz). He has no problem streaming those files to devices that can play them, and can even stream multiple files at once without any issues.

You can install the Sqeezebox server on your own Raspberry Pi by following this guide.

Interfacing A GPU With A CPU

interfacing-a-gpu-with-a-cpu

[Quinn Dunki] pulled together many months worth of work by interfacing her GPU with the CPU. This is one of the major points in her Veronica project which aims to build a computer from the ground up.

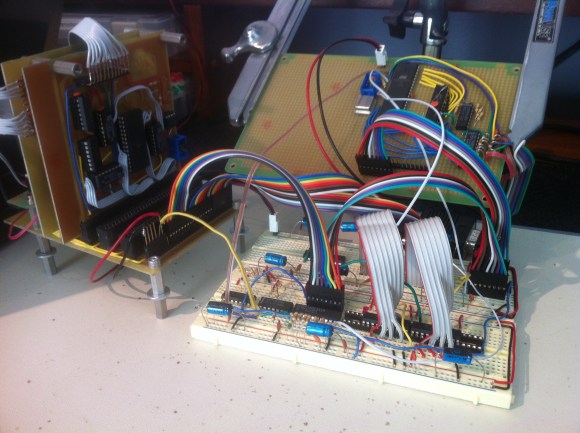
We’ve seen quite a number of posts from her regarding the AVR-powered GPU. So far the development of that component has been happening separately from the 6502 centered CPU. But putting them together is anything but trivial. The timing issues that were so important to consider when developing the GPU get even hairier when it comes writing to the VRAM from an external component. Her first thought was to share a portion of the external RAM between the CPU and GPU as a way to push rendering commands from one to the other. This proved troublesome both in timing and in the number of pins available on the AVR chip. She ended up using something of a virtual register on the AVR chip that can receive commands from the CPU asynchronously. Timing dictates that these commands be written only during vertical blanking so this virtual register also acts as a status register to let the CPU know when it can send the next command.

Her post is packed with the theory behind the design, timing tests on the oscilloscope, and a rather intimidating schematic. But the most important part is the video showing her success in the end.