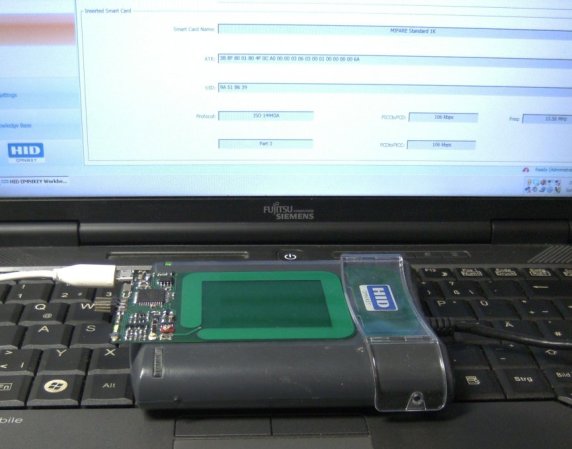
An Awesome Wireless Motion Sensor

Wireless sensor networks are nothing new to Hackaday, but [Felix]’s wireless PIR sensor node is something else entirely. Rarely do we see something so well put together that’s also so well designed for mass production.

For his sensor, [Felix] is using a Moteino, a very tiny Arduino compatible board with solder pads for an RFM12B and RFM69 radio transceivers. These very inexpensive radios – about $4 each – are able to transmit about half a kilometer at 38.4 kbps, an impressive amount of bandwidth and an exceptional range for a very inexpensive system.

The important bit on this wireless sensor, the PIR sensor, connects with three pins – power, ground, and out. When the PIR sensor sees something it transmits a code the base station where the ‘motion’ alert message is displayed.

The entire device is powered by a 9V battery and stuffed inside a beautiful acrylic case. With everything, each sensor node should cost about $15; very cheap for something that if built by a proper security system company would cost much, much more.

A DIY NFC Tag

[Nicholas] built a simple NFC tag using an ATtiny84 microcontroller, four resistors, three capacitors, a diode, and an antenna. It implements ISO 14443-3, a standard for identification cards, and can communicate with the NFC chip sets found in most new smartphones.

This standard uses on-off keying for communication, which makes the hardware slightly more complex than the AVR RFID tag that we saw a few years back. The antenna and a variable capacitor form an LC circuit tuned at 13.56 MHz, which is the carrier frequency for the protocol. The diode acts as an envelope detector, letting the microcontroller recover the signal.

It may not be fully compliant with the standard, but [Nicolas] successfully tested out the device with his Lumia 620 phone. The firmware is available on Google Code so you can program your own tag data into main.c, build the firmware, and send some NFC packets. You can also check out a demo of the device after the break.

Continue reading “A DIY NFC Tag”

RFID Reader Snoops Cards From 3 Feet Away

Security researcher [Fran Brown] sent us this tip about his Tastic RFID Thief, which can stealthily snag the information off an RFID card at long range. If you’ve worked with passive RFID before, you know that most readers only work within inches of the card. In [Fran’s] DEFCON talk this summer he calls it the “ass-grabbing method” of trying to get a hidden antenna close enough to a target’s wallet.

His solution takes an off-the-shelf high-powered reader, (such as the HID MaxiProx 5375), and makes it amazingly portable by embedding 12 AA batteries and a custom PCB using an Arduino Nano to interpret the reader’s output. When the reader sees a nearby card, the information is parsed through the Nano and the data is both sent to an LCD screen and stored to a .txt file on a removable microSD card for later retrieval.

There are two short videos after the break: a demonstration of the Tastic RFID Thief and a quick look at its guts. If you’re considering reproducing this tool and you’re picking your jaw off the floor over the price of the reader, you can always try building your own…

Continue reading “RFID Reader Snoops Cards From 3 Feet Away”

Learn Wireless Sensor Networks With Nanode

wicked

Getting a device on the internet is great – but what if you want to monitor multiple wireless sensors? The [WickedDevice] crew have been publishing a tutorial series focusing on just that. Their weapon of choice is the Nanode, an Arduino based wireless sensor system we’ve seen a few times in the past. So far the first and second parts have been posted up. Part one starts with an explanation of the Arduino and Nanode platform, and takes us through connecting the Nanode to a wireless temperature sensor. Part two walks through the hardware and code changes to add multiple wireless sensors to the system. Part three will focus on getting the entire network up on the internet, and piping data onto the Xively data hosting site.

This tutorial does begin a bit on the basic side, covering the installation of the Arduino software environment. This may seem a bit simplistic for some of our readers, but we think this type of tutorial is necessary. It helps ‘newbies’ get started down what could otherwise be a difficult path. For more advanced readers, it’s easier to skip past steps you already know than it is to try to hunt down information that isn’t there.

Cracking GSM With RTL-SDR For Thirty Dollars

Theoretically, GSM has been broken since 2003, but the limitations of hardware at the time meant cell phone calls and texts were secure from the prying ears of digital eavesdroppers and all but the most secret government agencies. Since then, the costs of hardware have gone down, two terabytes of rainbow tables have been published, and all the techniques and knowledge required to listen in on cell phone calls have been available. The only thing missing was the hardware. Now, with a super low-cost USB TV tuner come software defined radio, [domi] has put together a tutorial for cracking GSM with thirty dollars in hardware.

Previous endeavours to listen in and decrypt GSM signals used fairly expensive software defined radios – USRP systems that cost a few thousand dollars a piece. Since the advent of RTL-SDR, the price of software defined radios has come down to about $30 on eBay, giving anyone with a Paypal account the ability to listen in on GSM calls and sniff text messages.

The process of cracking GSM first involves getting the TMSI – Temporary Mobile Subscriber Identifier – a unique ID for each phone in a certain cell. This is done by sending a silent SMS that will send back and acknowledgement an SMS has been received on the victim’s phone, but won’t give the victim any indication of   receiving a message.

From there, the attacker listens to the GSM signals in the cell, receiving bursts attached to a TMSI, and cracking the encrypted stream using 1.6 TB of rainbow tables.

[domi] put up a four-part tutorial series (part 1 above; part 2, part 3, and part 4) that goes over the theory and the actual procedure of cracking text messages and voice calls with a simple USB TV tuner. There are a few limitations; the attacker must be in the same cell as the victim, and it looks like real-time voice decoding isn’t yet possible. Cracking GSM for $30, though, that’s good enough for us.

Making Use Of The Trancend WiFi SD Card

had

[CNLohr] spends most of his time on the Internet, but sometimes real life drags him away from his keyboard. These “vacations”, as he calls them, don’t have a good Internet connection and forces him to rely on flaky cell phone connections that go up and down at the drop of a hat. Figuring this would be a great opportunity for some hardware hacking, [CNLohr] came up with an ‘Internet-o-mometer’ – a device powered by a Trancend WiFi SD card that uses an 8×8 LED display to show the current status of his phone’s Internet connection.

This build uses the Trancend WiFi SD card motherboard we’ve seen before. When the card boots, it tries to connect to his phone’s WiFi connection.  When it connects, a green smiley face is displayed on the LED matrix. When a whole lot of files are downloaded or, more specifically, the ping to google.com is more than 4 seconds, a red frowny face indicates the Internet connection is down.

In other Trancend WiFi SD card news, a whole lot of people including [Dan Krause] (thanks for the tip) have been working on a complete replacement OS for these neat little cards. Right now the OS is in very rough shape, but there is a pre-built system available should anyone want to experiment. [CNLohr] is also working on a compact, double-sided version of his SD card motherboard and we’ll be happy to feature a link to his Tindie store when he sends that in.

A Motherboard For A WiFi Enabled SD Card

Over the last few months, a few very capable hackers have had a hand in cracking open a Transcend WiFi-enable SD card that just happens to be running a small Linux system inside. The possibilities for a wireless Linux device you can lose in your pocket are immense, but so far no one has gotten any IO enabled on this neat piece of hardware. [CNLohr] just did us all a favor with his motherboard for these Transcend WiFi SD cards, allowing the small Linux systems to communicate with I2C devices.

This build is based upon [Dmitry]’s custom kernel for the Transcend WiFiSD card. [CNLohr] did some poking around with this system and found he could use an AVR to speak to the card in its custom 4-bit protocol.

The ‘motherboard’ consists of some sort of ATMega, an AVR programming header, a power supply, and a breakout for the I2C bus. [Lohr] wired up a LED array to the I2C bus and used it to display some configuration settings for the WiFi card before connecting to the card over WiFi and issuing commands directly to the Linux system on the card. The end result was, obviously, a bunch of blinking LEDs.

While this is by far the most complex and overwrought way to blink a LED we’ve ever seen, this is a great proof of concept that makes the Transcend cards extremely interesting for a variety of hardware projects. If you want your own Transcend motherboard, [CNLohr] put all the files up for anyone who wants to etch their own board.