The idea behind a dummy security camera is that people who are up to no good might think twice about doing anything to your property when they think they’re being recorded. Obviously a real security camera would be even better, but sometimes that’s just not economically or logistically possible. Admittedly they’re not always very convincing, but for a few bucks, hopefully it’s enough to make the bad guys think twice.
 But what if that “fake” camera could do a little more than just look pretty up on the wall? [Chris Chimienti] thought he could improve the idea by adding some electronics that would notify him if motion was detected. As an added bonus, any would-be criminals who might be emboldened by the realization the camera itself is fake might find themselves in for a rude surprise when the notifications start firing off.
In the video after the break, [Chris] really takes his time walking the viewer through the disassembly of the dummy camera. As it turns out, these things look like they’d make excellent project enclosures; they come apart easily, have nothing but empty space inside, and even have an integrated battery compartment. That alone could be a useful tip to file away for the future.
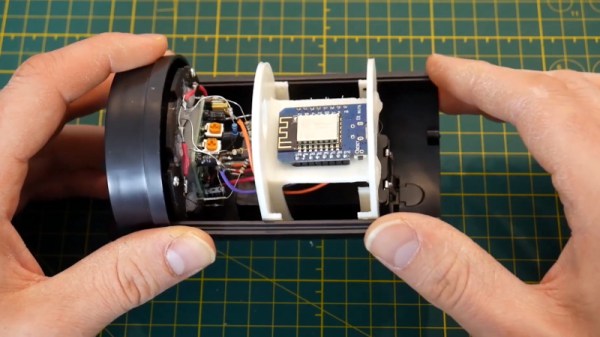
He then goes on to explain how he added some smarts to this dummy camera. Up where the original “lens” was, he installed a PIR sensor, some white LEDs, a light sensor, and the original blinking red LED. All of this was mounted to a very slick 3D printed plate which integrates into the camera’s body perfectly. The new hardware is connected up to a similarly well mounted Wemos D1 Mini inside the camera. The rest of the video goes through every aspect of the software setup, which is sure to be of interest to anyone who’s ever thought of rolling their own IoT device.
This type of PIR sensor is hacker favorite, and we’ve seen a number of projects using them for all sorts of creative purposes. We’ve even seen them paired with the ESP8266 before for Internet-connected motion sensing, albeit without the tidy security camera enclosure.
Continue reading “Dummy Security Camera Is Smarter Than It Looks”