A Double-Hybrid Mini-Lathe, From Scratch

It’s a treadle lathe! No, it’s a power lathe! It’s a wood lathe! No, it’s a metal lathe! Actually, [Uri Tuchman]’s homebrew lathe is all of the above, and it looks pretty snazzy too.

To say that [Uri]’s creations are quirky is a bit of an understatement – birds, crustaceans, hands, and feet all appear repeatedly as motifs in his work – but there’s no overstating his commitment to craftsmanship. [Uri] turns wood and metal into wonderful tools, nonsense machines, and finely detailed instruments, like this exquisitely engraved astrolabe we featured a while back.

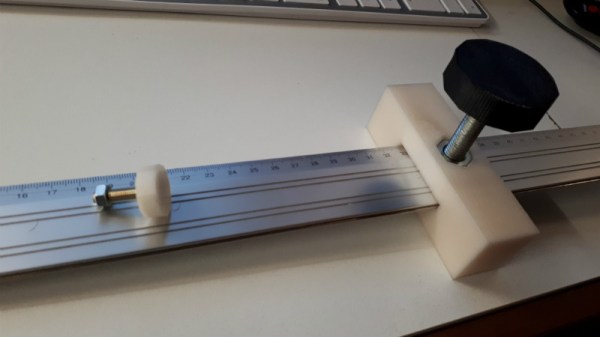
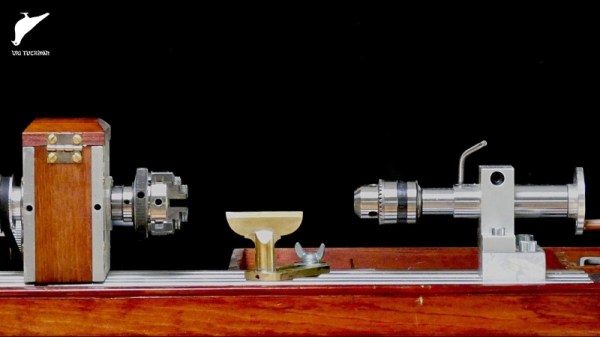
[Uri] mostly works with hand tools, supplemented by an old Singer treadle-powered sewing machine that he turned into a scroll saw. The video below shows how he added a small scratch-built lathe to the treadle base. His first pass at a headstock, using pillow blocks for bearings, didn’t work as well as he wanted, so he built a new headstock around off-the-shelf lathe parts. The aluminum extrusion bed holds the headstock, tailstock, and a custom-built tool rest of heavy brass, all of which look great alongside the rich wood accent pieces and base. And for those times when his feet are tired, he added a surplus electric motor to turn the spindle. We especially like the two settings on the motor speed control: “0” and “>0”. Classic [Uri].

If you haven’t heard of [Uri] before, do yourself a favor and go check out his YouTube channel right now. Or start with our other coverage of his unique projects, from building an intricately detailed hammer to his lobster claw ink-dipping machine and even this unusual take on preserved lemons.

Continue reading “A Double-Hybrid Mini-Lathe, From Scratch”

Printed Parts Turn Ruler Into Marking Gauge

For Hackaday readers who spend more time with a soldering iron than a saw, a marking gauge is a tool used to put parallel lines on a piece of wood (and occasionally metal or plastic) for cutting. The tool is run across the edge of the piece to be marked, and an adjustment allows the user to set how far in the line will be made. As an example, if you wanted to cut a board into smaller strips, a marking gauge would be an ideal choice for laying out your lines ahead of time.

But as with many niche tools, it’s not something you’re going to use every day. For [chaosbc], this meant he wanted to see if he could come up with a DIY solution on the cheap. Plus he could have it in hand now, rather than waiting for it to take the slow boat from overseas. With the addition of a few clever 3D printed components, he was able to turn his trusty aluminum ruler into a serviceable marking gauge for the cost of filament and a few bits of hardware.

The general design of a marking gauge is fairly simple: there’s a block that rides up and down a graduated shaft (known as the headstock) which allows you to set the depth of the line, and then a piece on the end which holds your marking tool. The marking tool could be a blade if you’re working with something soft enough, but for wood is usually going to be a pencil.

[chaosbc] provides all the STL files for his DIY marking gauge, though they might need adapting as they were created for his specific ruler. Luckily the parts aren’t that complex so it shouldn’t be too difficult to get it sorted out. He also has a useful hint for anyone looking to duplicate his work: a few drops of super glue on the bolt used to lock down the headstock is enough to create a non-marring surface so you don’t tear up your ruler.

We’ve got a few other tips for woodworking on a budget, as well as a primer about this whole making stuff with dead trees concept.

Continue reading “Printed Parts Turn Ruler Into Marking Gauge”

Hackaday guide to Lathes

Lathe Headstock Alignment: Cutting A Test Bar

Let’s say you’ve recently bought a lathe and set it up in your shop. Maybe you’ve even gone and leveled it like a boss. You’re ready to make chips, right? Well, not so fast. As real machinists will tell you, you can use all the levels and lasers and whatever that you want, but the proof is in the cut. Precision leveling gets your machine in the ballpark (machinists have very small ballparks) but the final step to getting a machine to truly perform well is to cut a test bar. This is a surefire way to eliminate any last traces of twist in the bed.

There are two types of test bars. One is for checking headstock-to-ways alignment, which is what we’re doing here. There’s another type used for checking tailstock alignment, but that’s a subject for another day.

Continue reading “Lathe Headstock Alignment: Cutting A Test Bar”