4 Axis Delta Router Says Hello World

deltaRouter

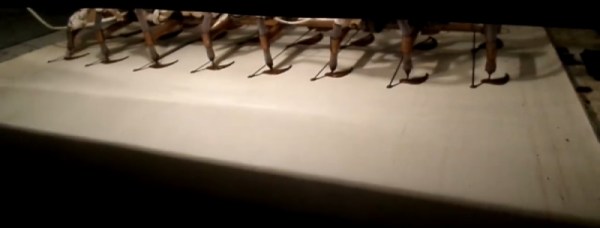
[Bart] stood upon the shoulders of the delta 3D printer giants and created this 4 axis delta router. The router was originally created for ORD Camp, an invite only hackers gathering. Each year he creates a new thing with one main purpose: to spark conversation. In his own words “Practicality and suitability are way down the list, so go ahead and snark away. If you do, you are missing the point.”

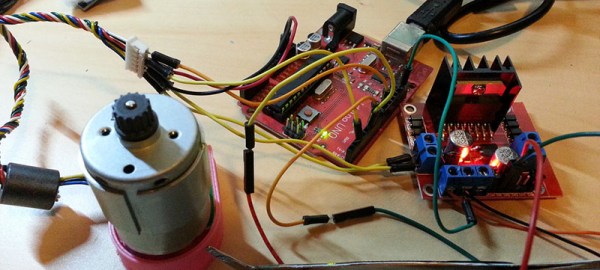
[Bart] did things a bit differently with his delta. For motors, he went with non captive steppers. “Non captive” means that rather than a shaft, the motor has a hollow threaded nut which rotates. A lead screw (usually with an acme thread) is passed through this nut. As the motor’s nut turns, the screw is pushed or pulled through the motor, creating a linear actuator. The only major downside is that a non captive stepper motor can’t be adjusted by hand. The screw doesn’t turn and neither do any external parts of the motor. For structure, the router uses MakerSlide and v-grove wheels. The spindle is a simple brushless hobby motor and 30 amp speed control. Rather than the outrunner motors we’ve seen lately, [Bart] wisely chose an inrunner motor normally used on R/C cars. Inrunners generally have less torque than their outrunner counterparts, but they make up for this in RPM. [Bart’s] motor is capable of 30,000 RPM, which is plenty for spindle duty. We think the motor bearings will probably need an upgrade, as the original motor bearings weren’t designed for side loads. For a controller, [Bart] utilized an  Azteeg X3 running Repetier.

The router made a great showing at camp, and [Bart] decided it needed a 4th axis. He sourced a rotary axis from eBay. To keep the software simple, he connected the rotary axis to the extruder outputs on his controller. He was then able to hack the mach3 wrapped rotary post processor to output extruder commands. The results look great. [Bart] says the system definitely needs a tailstock, and we agree. We’re looking forward to the next update on this machine!

Continue reading “4 Axis Delta Router Says Hello World”

Ask Hackaday: What’s Up With This Carbon Fiber Printer?

The Hackaday Tip Line has been ringing with submissions about the Mark Forg3D printer, purportedly the, “world’s first 3D printer that can print carbon fiber.”

Right off the bat, we’re going to call that claim a baldfaced lie. Here’s a Kickstarter from a few months ago that put carbon fiber in PLA filament, making every desktop 3D printer one that can print in carbon fiber.

But perhaps there’s something more here. The Mark Forged site gives little in the way of technical details, but from what we can gather from their promo video, here’s what we have: it’s a very impressive-looking aluminum chassis with a build area of 12″x6.25″x6.25″. There are dual extruders, with (I think) one dedicated to PLA and Nylon, and another to the carbon and fiberglass filaments. Layer height is 0.1mm for the PLA and Nylon, 0.2mm for the composites. Connectivity is through Wifi, USB, or an SD card, with a “cloud based” control interface. Here are the full specs, but you’re not going to get much more than the previous few sentences.

Oh, wait, it’s going to be priced at around $5000, which is, “affordable enough for average consumers to afford.” Try to contain your laughter as you click the ‘read more’ link.

Continue reading “Ask Hackaday: What’s Up With This Carbon Fiber Printer?”

A Quick And Simple Filament Joiner For Multi-Color Prints

Filament splicer

[Malcolm] was having a grand time with his new 3D printer. He was getting tired of monochromatic prints, though. Not having a machine with multiple extruders, he went looking for a way to join pieces of filament. There were a few designs on Thingiverse, but they required milled parts that he didn’t have the tools to recreate. Rather than invest in a mill, [Malcolm] decided to build his own filament joiner. He started by raiding his wife’s hair care tools. His first test was a curling iron. It had the heat, but lacked a good surface to join the filament. [Malcolm’s] next test was a ceramic hair straightener, which he found to be the perfect tool.

The splicing process is simple. Start with a hot iron, then lay two pieces of filament on top of the short end of the iron. They soften quickly and melt together. [Malcolm’s] real trick is to slightly pull the joint once the two pieces have joined. Pulling causes the filament to stretch, slightly reducing the diameter of the joint. A thinner joint helps prevent extruder jams as the joint passes through. This method works great for PLA. We’d love to see if it works for ABS as well.

Click past the break for an example piece and for [Malcom’s] instructional video.

Continue reading “A Quick And Simple Filament Joiner For Multi-Color Prints”

3DMonstr Printer: 8 Cubic Feet Of Build Volume

3D Monster

So you’re looking at 3D printers, but the build volumes for the current offerings just aren’t where you’d like them to be. [Ben Reylblat] had the same problem and came up with the 3DMonstr, an enormous printer that has (in its biggest configuration) a two foot cubed build volume, four extruders, and the mechanical design to make everything work.

Most of the ginormous 3D printers we’ve seen are basically upgraded versions of the common table-top sided models. This huge Ultimaker copy uses the same rods as its smaller cousin, and LeBigRap also uses woefully undersized parts. The 3DMonstr isn’t a copy of smaller machines, and instead uses very big motors for each axis, ball screws, and a proper welded frame. It’s highly doubtful anyone will call this printer a wobblebot.

The 3DMonstr comes in three sizes: 12 inches cubed, 18 inches cubed, and 24 inches cubed, with options for two to four extruders.  We caught up with the 3D Monstr team at the NYC Maker Faire, and from first impressions we have to say this printer is freakin’ huge and impeccably designed.

Custom Rostock 3D Printer Makes Use Of IKEA Components

After discovering 3D printers, [Turi] had to make one. This past summer he did, and it looks fantastic.

He chose the Rostock design not only because it can print big parts quickly, but also because of its mesmerizing operation. 3D printers are generally fun to watch for the first few minutes, but Rostocks tend to have an even more robotic appeal in the motion of its end effector (robotics lingo for tool head).

The cool part of this build is [Turi’s] choice of enclosure. He had an IKEA cabinet collecting dust in his basement, so he decided to make use of its drawers for the main structure of the Rostock. A bit of wood work and some matte black spray paint later, and he has one great looking enclosure! The rest of the build was pretty standard, making use of 3D printed parts, a RAMPS 1.4 control board mounted on an Arduino Mega, and a computer power supply. He did make his own control arms using carbon fiber arrows, though!

To see it up close and in action, check out the quick video after the break.

Continue reading “Custom Rostock 3D Printer Makes Use Of IKEA Components”

The 3D Printed Ukulele

uke

The creator of everyone’s favorite slic3r – [Alessandro Ranellucci] – has been hard at work putting his 3D modeling skills to the test. He’s created a ukulele that’s nearly entirely 3D printed (Google translation). Everything on the uke, short of the strings and tuning pegs came from a MendelMax 3D printer, all without any support material at all.

In the video, [Alessandro] and uke virtuoso [Jontom] show off how this instrument was put together and how good it can sound. The body of the uke is made of two parts, and the neck – three parts including the headstock and fretboard – all fit together with surprisingly traditional methods. A dovetail joint connects the neck to the body and a tongue and groove-like joint holds the headstock to the neck.

[Allessandro] puts the print time of all the uke parts at about 120 under 20 hours and about 20 Euros worth of plastic. As far as ukuleles go, this sounds just as good as the average instrument, but [Jontom] says the action is a little bit high. That’s why files were invented, we guess.

Thanks [iant] for sending this one in.

Continue reading “The 3D Printed Ukulele”

3D Printering: Making A Thing With OpenSCAD

This week, we’re starting off with OpenSCAD, a 3D modelling program that’s more like programming than drawing. A lot of useful 3D printable objects – including the parts for a lot of RepRaps – are designed in OpenSCAD, so hopefully by the end of this you’ll be able to design your own parts.

This isn’t meant to be a complete tutorial for OpenSCAD; I’m just demoing SCAD enough to build a simple part. Next week I’ll most likely be designing a part with AutoCAD, but if you have an idea of what software tools I should use as a tutorial to make a part, leave a note in the comments. Check out the 3D Printering guide to making a part with OpenSCAD below.

Continue reading “3D Printering: Making A Thing With OpenSCAD”