If your jealousy for Festo robots is festering, fret not! [mikey77] has shown us that, even without giant piggy banks, we can still construct some fantastic soft robotics projects with a 3D printer and a visit to the hardware store. To get started, simply step through the process with this 3D Printed Artificial Muscles: Erector Set project on Instructables.
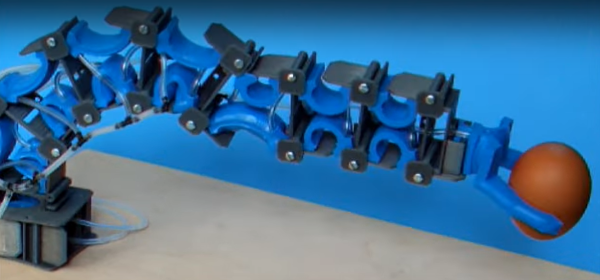
In a nutshell, [mikey77] generously offers us a system for designing soft robots built around a base joint mechanism: the Omega Muscle. Fashioned after its namesake, this base unit contains an inflatable membrane that expands with pressure and works in tandem with another Omega Muscle to produce upward and downward angular movement. Each muscle also contains two endpoints to connect to a base, a gripper, or more Omega Muscles. Simply scale them as needed and stack them to produce a custom soft robot limb, or use the existing STLs to make an articulated soft gripper.
This project actually comes in two parts for robot brawns and brains. Not only does [mikey77] take us through the process for making Omega muscles, we also get a guide for building the pressure system designed to control them. Taken together, it’s a feature-complete setup for exploring your own soft robotics projects with a great starting project. Stay tuned after the break for a demo video in action. There’s no audio, but we’re sure you’ll be letting off an audible pssssh in satisfaction to follow along.
It’s not every day that we see FFF-based 3D printers making parts that need to be airtight. And [mikey77’s] success has us optimistic for seeing more air muscles in future projects down the road. In the meantime, have a look at the silicone-silicon half-breeds that we’ve previously caught pumping iron.
Continue reading “Squishy Robot Hardware Does Well Under Pressure”