MAC TIP Diagnoses Your Old Zip And Jaz Drives

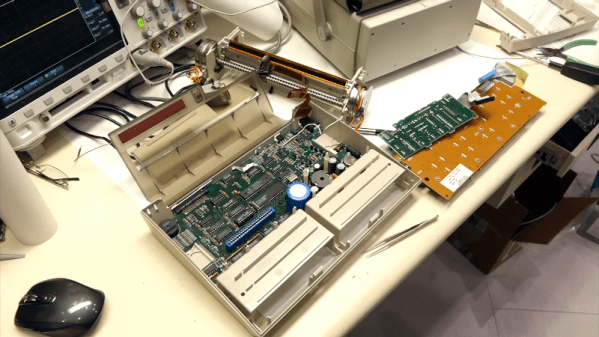
Trouble In Paradise (TIP) was a popular Windows-only tool for troubleshooting  Iomega Jaz and Zip drives way back when. The drives have fallen out of favor with PC, but the drives are still highly prized amongst classic Mac collectors, who use the SCSI versions as boot disks for the vintage machines. Thus, [Marcio Luis Teixeira] set about porting the TIP tool to the platform.

Macintosh utilities used to have so much personality about them.

It all came about because running the original TIP recovery tool became difficult in the modern era. One must dig up a old Windows 98 machine and SCSI adapters in order to use it with Macintosh-compatible Zip or Jaz drives. This inspired [Marcio] to reach out to the developer, [Steve Gibson], who provided the original x86 assembly code for the tool.

[Marcio] then ported this line-by-line into C and compiled it with a retro Macintosh compiler to get TIP up and running on the classic Mac platform. Now, it’s possible to check and test Zip and Jaz drives and media on your old Mac without having to mess around with a vintage Windows machine.

It took plenty of effort, and the generous donation of code from [Steve Gibson], and all involved should be applauded for their work. It’s not every day we see such an impressive port, but they come along every now and then.

Meanwhile, if you’ve been tinkering on your own projects with Iomega’s classic removable storage, don’t hesitate to let us know! Video after the break.

Continue reading “MAC TIP Diagnoses Your Old Zip And Jaz Drives”

Almost-Modern TeleType Is Silent

If you’ve ever used a real TeleType machine or seen a movie with a newsroom, you know that one TeleType makes a lot of noise and several make even more.[CuriousMarc] acquired the silent replacement, a real wonder of its day, the TI Silent 703. The $2,600 machine was portable if you think hauling a 25-pound suitcase around is portable. In 1971, it was definitely a step up.

The machine used a thermal printer, could have a built-in acoustic coupler for talking over the phone. You could also get a dual tape drive that acted like a mostly silent paper tape reader and punch.

Continue reading “Almost-Modern TeleType Is Silent”

(Getting Rid Of) The Ghost In The LED

Multiplexing is a very old technology in which control signals are intermixed for the sake of being able to control more devices than there are control signals. For [mihai.cuciuc], the problems started when he multiplexed some very efficient LEDs.

The problem? In two banks of six LEDs each, both LEDs connected to a single Arduino pin would light, even when only one bank was turned on at the ground side. The LED In the bank that was switched on lit brightly, and its corresponding LED in the bank that was off would also be very dimly lit. [mihai] was able to determine that the problem was not due to a leaky transistor, but rather due to a quality of the LEDs themselves.

What is an LED but a diode, and it’s well known that diodes also have capacitance. In fact, this quality is exploited in varactor diodes, a specialty diode whose capacitance can be changed by varying the voltage on the cathode. [mihai] deduced that this capacitance was causing current to flow in the bank that was off. Where was the current going? From the Arduino pin that was on, through its attached LED, and then into the rest of the bank of LEDs, charging them like capacitors. [mihai] hasn’t seen this before, but theorizes that for the latest batch of high efficiency LEDs, this minute current is enough to light the LED through which the current is flowing.

[mihai]’s solution is an elegant hack which he’s made available for your perusal. You might also enjoy this introduction to diode basics by W2AEW. If you have any great diode or LED hacks of your own, be sure to drop us a line!

An Easy Music Visualizer With The Arduino Nano

Flashing LEDs are all well and good, but they’re even better if they can sync up with ambient sounds or music. [mircemk] has built the LUMAZOID visualizer to do just that, relying on some staple maker components to do so.

The build is open-source, and designed to work with strings of 60, 120, or 180 WS2812B LEDs. An Arduino Nano is charged with running the show, capturing audio via its analog-to-digital converter. A sensitivity pot enables the input level to be set appropriately.

From there, a Fast Fourier Transform is taken, providing data on the intensity of the audio in various frequency bins. The LUMAZOID can be set up to respond to just bass or to all frequencies as a whole. This data is then used to pulse the LEDs in time with the beat.

It’s a fun project that demonstrates the basic techniques required to build an audio-reactive visualizer. We’ve seen some other great builds in this space before, too. Video after the break.

Continue reading “An Easy Music Visualizer With The Arduino Nano”

3D printed moon lamp

3D Printed Lithographic Moon Lamp

After years of being a software developer, [Chris] was excited to get back into embedded development and we’re glad he did. His 3D printed lithographic moon lamp combines a number of hacker and maker skills, and is sure to impress.

3D-printed lithographic moons have gotten pretty popular these days, so he was able to find a suitable model on Thingiverse to start with. Gotta love open-source. Of course, he needed to make a few modifications to fit his end design. Namely, he put a hole at the bottom of the moon, so he could slide the LED and heatsink inside. The 3 watt LED is pretty beefy, so he definitely needed a heat sink to make sure everything stayed cool.

Otherwise, the circuit itself is pretty straightforward. He has an ESP32 to drive the RGB LED through a transistor, and fitted the components onto a custom-designed circuit board to ensure everything stayed neat and organized. You don’t want a ton of loose wires and breadboards cluttering this build. Since he used an ESP32, he was able to create a simple web interface to control the color of the LEDs. Gotta make it connected somehow, right?

What’s great is in addition to the project write-up, [Chris] includes video tutorials, walking the readers through each individual step of the build. By doing so he really makes it easy for readers to follow along and reuse his work. If you’re still looking for ideas, one of these could make a really good Christmas present.

Continue reading “3D Printed Lithographic Moon Lamp”

Fail Of The Week: Hackaday Writer Attempts XBox Repair

Like a lot of Hackaday readers, I pride myself on being “the fix-it guy” in my family. When something breaks, I get excited, because it’s a chance to show off my skills. It’s especially fun when something major breaks, like the fridge or the washing machine — repairs like that are a race against time, since I’ve got to get it fixed faster than it would take to hire someone to do it. I usually win the race; I can’t remember the last time I paid someone to work on something. Like I said, it’s a point of pride.

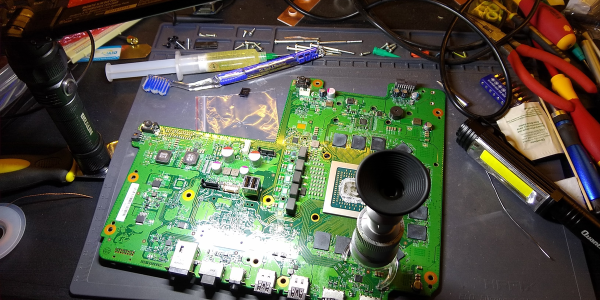
And so when my son came home on Thanksgiving break from his first semester away at college, eager to fire up his Xbox for some mindless relaxation from his biochemistry studies, only to be greeted with a black screen and no boot-up, it was go-time for me. I was confident that I’d be able to revive the dead box in time for him to have some fun. The fact that he’s back at school and the machine is still torn apart on my bench testifies to my hubris, but to be fair, I did get close to a fix, and may still yet get it done. But either way, the lessons I’ve learned along the way have been really valuable and worth sharing.

Continue reading “Fail Of The Week: Hackaday Writer Attempts XBox Repair”

Squishy Robot Hardware Does Well Under Pressure

If your jealousy for Festo robots is festering, fret not! [mikey77] has shown us that, even without giant piggy banks, we can still construct some fantastic soft robotics projects with a 3D printer and a visit to the hardware store. To get started, simply step through the process with this 3D Printed Artificial Muscles: Erector Set project on Instructables.

In a nutshell, [mikey77] generously offers us a system for designing soft robots built around a base joint mechanism: the Omega Muscle. Fashioned after its namesake, this base unit contains an inflatable membrane that expands with pressure and works in tandem with another Omega Muscle to produce upward and downward angular movement. Each muscle also contains two endpoints to connect to a base, a gripper, or more Omega Muscles. Simply scale them as needed and stack them to produce a custom soft robot limb, or use the existing STLs to make an articulated soft gripper.

This project actually comes in two parts for robot brawns and brains. Not only does [mikey77] take us through the process for making Omega muscles, we also get a guide for building the pressure system designed to control them. Taken together, it’s a feature-complete setup for exploring your own soft robotics projects with a great starting project. Stay tuned after the break for a demo video in action. There’s no audio, but we’re sure you’ll be letting off an audible pssssh in satisfaction to follow along.

It’s not every day that we see FFF-based 3D printers making parts that need to be airtight. And [mikey77’s] success has us optimistic for seeing more air muscles in future projects down the road. In the meantime, have a look at the silicone-silicon half-breeds that we’ve previously caught pumping iron.

Continue reading “Squishy Robot Hardware Does Well Under Pressure”