Taig Mill Anointed With Ball Screws (at Last!)

Yup, we can hear a crowd full of “not-a-hack” loading their cannons as we speak, but this machine has a special place in the community. For years, the Taig milling machine has remained the go-to micro mill for the light-duty home machine shop. These machines tend to be adorned and hacked to higher standards, possibly because the community that owns these tools tends to enjoy machining for machining’s sake–or possibly because every single component of the mill is available as a replacement part online. For many, this machine has been a starting point to making chips at home. (In fact, Other Machine Co’s CTO, Mike Estee, began his adventure into machining with a Taig.)

For years, Taig has sold their machines with a leadscrew and a brass nut that could be tensioned to cut down the backlash. Backlash still remains an issue for the pickiest machinists, though; so, at long last, Taig has released a backlash-free ball-screw variant in two incarnations: an all-in-one machine pre-fitted with ballscrews and an upgrade kit for customers that already decorated their garage with the lead-screw model.

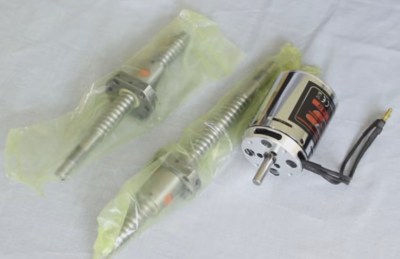
In the clip below [John] takes us on a tour of the challenges involved in cramming 3, 12-mm ballscrews into the original topology. As we’d expect, a few glorious chunks of metal have been carved away to make space for the slightly-larger ballnut. Despite the cuts, the build is tidy enough to fool us all into thinking that ballscrews landed in the original design from the start.

Confused why ballscrews are such a giant leap from leadscrews? Lend your eyes and ears a few moment to take in [Al]’s overview on the subject.

Continue reading “Taig Mill Anointed With Ball Screws (at Last!)”

Mastering Ball Screws

Most inexpensive 3D printers use a type of lead screw to move some part of the printer in the vertical direction. A motor turns a threaded rod and that causes a nut to go up or down. The printer part rides on the nut. This works well, but it is slower than other drive mechanisms (which is why you don’t often see them on the horizontal parts of a printer). Some cheap printers use common threaded rod, which is convenient, but prone to bad behavior since the rods are not always straight, the threads are subject to backlash, and the tolerances are not always the best.

More sophisticated printers use ACME threaded rod or trapezoidal threaded rods. These are made for this type of service and have thread designs that minimize things like backlash. They typically are made to more exacting standards, too. Making the nut softer than the rod (for example, brass or Delrin) is another common optimization.

However, when lead screws aren’t good enough, mechanical designers turn to ball screws. In principle, these are very similar to lead screws but instead of a nut, there is a race containing ball bearings that moves up and down the screw. The ball bearings lead to less friction.

Misumi recently posted a few blog articles about ball screws. Some of the information is basic, but it also covers preloading and friction. Plus they are promising future articles to expand on the topic. If you prefer to watch a video, you might enjoy the one below.

Continue reading “Mastering Ball Screws”

A Very Professional Homemade CNC Router

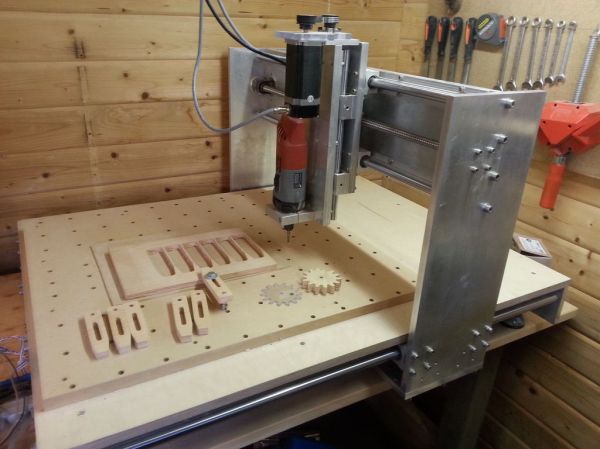
[Benne] has a small workshop at home so he decided to make a very versatile CNC router for his final project at school. It took him around 6 months to arrive at the result you can see in the image above and what is even more impressive is that he was only 17 years old at the time.

[Benne] used the free cad program Google Sketchup to draw the different parts he needed around the linear rails and ball screws he already had lying around. The CNC’s travel is 730x650x150mm, uses Nema 23 (3Nm) steppers, 15mm thick aluminum plates and 30x60mm aluminum extrusions. In his article, [Benne] gives great advice to those who would like to design their CNC like his, providing very useful links to manufacturers. He estimated the cost of his CNC to be around 1500 euros (about $2000). We’ll let you browse the many lines of his very detailed build log, which makes us wish to be as talented as him even at our age…

CNC Router Built With 80/20 Rail

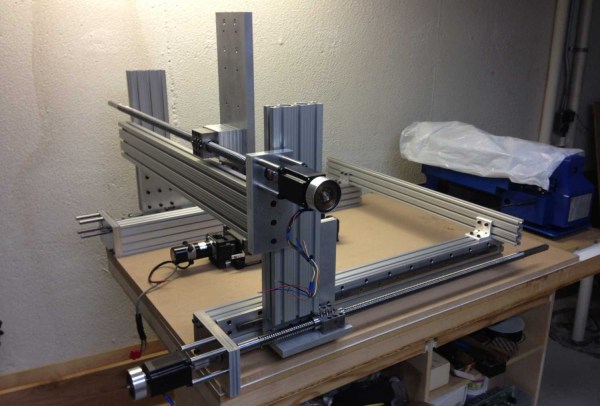
There’s still quite a bit of machining that goes into a CNC mill build of this size. But using 80/20 brand extruded rail optimizes most of the build process into tasks manageable by the average basement hacker. That’s not to say that we think [Jim] is average. He took this mill from start to finish in just two weeks.

He picked up the set of three ball screws on eBay for $180. Two of them drive the X axis with the third moving the cutter assembly along the Y axis. The X axis travels along a set of precision rails instead of precision rods. He machined his own mounting plates to which those are attached. For now he’s not running the motors at full speed because the vibration starts to make the table shake. He may end up bolting the base to the floor once all is said and done.

We see this extruded rail used all over the place. We could highlight some other mill builds or 3d printers, but instead we think you’ll enjoy an extruded rail robotic bass guitar.

Oh, one last thing. We’re not against a bit of pandering. Below you can see the mill cutting out the Hackaday logo:

Continue reading “CNC Router Built With 80/20 Rail”