Bare-bones Electronic Advent Calendar

It’s officially September now (in some parts of the world), and that means we’ve been watching the Christmas decorations go up on the floor of Costco, Walmart and Target for the last few weeks. As a small test of reality, [Eric] decided to build an electronic advent calendar that counts down the days until Christmas. As a simple build using parts lying around on the bench, [Eric] did a pretty good job at deferring his kid’s questions of, “How long until Christmas?” to a machine.

The build is fairly bare-bones, using only an Arduino Pro Mini, RTC and LCD display. For the real-time clock, [Eric] used the ever popular DS3231 RTC. The software reads the time from the clock and calculates the number of seconds between the present time and the hard-coded target date.

Everything is powered by a 9 Volt battery that wouldn’t last the remaining 115 days until Christmas. There is a power switch and the RTC has a battery backup, so the build will probably suffice for all but the most fanatical child.

360 Degree Photography Uses Very Easy Post-processing

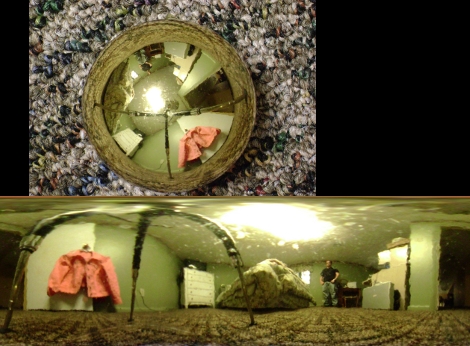
[Pixel_Outlaw] has been working on a method to capture 360 images with his camera. He’s using a shiny Christmas ball ornament to reflect the entire room into the lens of the camera. In the unwrapped image you can make out the three legs of his tripod. In that snapshot he laid the ornament on the floor and pointed the camera straight down from above.

What catches our attention is the post processing he used to unwrap the image. He loaded up The Gimp, an open source image manipulation program, and used just three steps to unwrap the image. First he cropped the picture so that it was square and the spherical ornament was perfectly centered. Then he ran the polar coordinates filter. Finally he scaled the image, setting the width to be Pi times the height. Works pretty darned well for something that doesn’t take much fiddling.

The ornament wasn’t perfectly smooth (or maybe it was a bit dirty) but you can get a much better starting image if you use a bulb with a silver reflector like we saw in this older hack.

Reverse Geocaching Christmas Gift Box

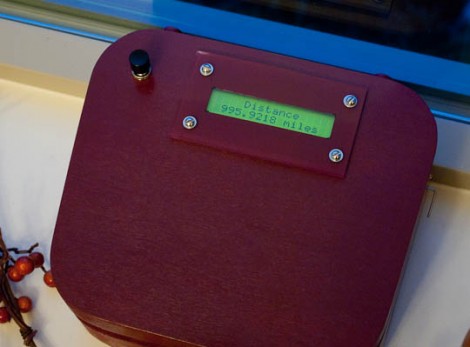
This is the reverse geocache box that [William Dillon] built as a Christmas gift this year. He started with an interestingly shaped wooden box from the craft store. The clasp to keep it shut uses a servo motor on the lid with a wooden arm that grasps a screw on the base. As with the original geocache box, the Frustratomatic, and the smaller geocache, the box is designed to open only when in the correct geographic location thanks to the GPS module inside. That was a problem for [William] when a bug in his firmware locked the box during development while the key location was 1000 miles away. Luckily the box uses hinges that are attached from the outside with screws. We wonder how feasible it would be to use the mounting screws from the LCD screen to implement a coded emergency entry, using one as ground and the others as paths to microcontroller pins.

Jumbo Size New Years Countdown

New Years celebrations tend to get bigger and bigger every year for most people, and [Brian] takes no exception. In order to top his lighted tree of a few years ago, he has concocted a 40’x40′ set of Seven-Segment displays made out of Christmas lights, hung from nearby trees. These displays would start counting down the minutes an hour before the ball drop, and be synchronized with music. Also in the spirit of a New Years party, the music he has chosen is in the form of a Power hour. The control board [Brian] is using also comes with two extra outputs, which he plans to use for the most exciting possible additions: Fireworks and Flamethrowers.

Be sure to check back after New Years to see a video of the device in action. Be sure to Hack, Drink, and Party Responsibly out there.

The Twelve Days Of… Self-replicating

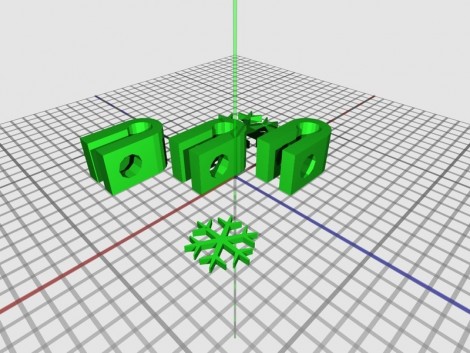
Okay, it’s more like the 23 days but who’s counting? [Kliment] is giving the gift of self-replication this holiday season by uploading one new printable part a day. If you follow along and print each one you’ll have a Prusa Mendel by Christmas (this started on 12/2 so you’ll need to catch up). The Prusa is a variation on the Mendel that uses bushings wherever possible, reducing the need for bearings down to just two.

So yeah, you need to have access to a 3D printer in order to make the parts for this 3D printer, but that’s how it always works. [Kliment] has gone the distance to make this little exercise enjoyable. The parts that take longer to print are reserved for the weekends, some have been altered to include a holiday theme, and all of them have been optimized to fit on a Makerbot build platform.

[Thanks Christopher]

2010 Hacker Gift Guide

You’ve probably been fantasizing about getting amazing gifts this December, like robots with servo-mounted laser pointers and authentic battle damage. It’s time to realize that it’s unlikely that this will happen. Stay calm. You can still get sweet hacky things if you just forward this gift-giving guide to your friends and loved ones.

Join us after the break to see what we want and be sure to let us know what you’ve got your eye on.
Continue reading “2010 Hacker Gift Guide”

20-channel DMX Controller

[Joshua] shares his details on building this 20-channel DMX controller. He’s sourced some extension cords to cut up for the complicated wiring project. He plans to drive 120V lights with the system so he’s also using the extension cords to connect a bunch of outlet boxes to the main controller. Inside you’ll find a set of AVR chips ready for your commands. Instead of using jumpers or DIP switches to set their addresses he set them in the firmware and burned a different version to each chip. The key here is writing the address right on the chips to prevent any confusion.

This will be used of Halloween and Christmas displays. We love Halloween hacks just about as much as we love Christmas hacks, so hit the basement and don’t forget to share the result of your labors with us.