Home Brew Coffee Machine

There are already a lot of different ways to brew up a decent coffee at home, from the humble saucepan to the elegant vacuum flask. In an office environment the choice of coffee-making technique can have a major impact on workplace harmony—how can people be expected to work happily when the kitchen is filthy with grounds and the coffee is always stale? “Someone have mercy,” [Christian Finger] lamented, “and boil a pot of fresh.”

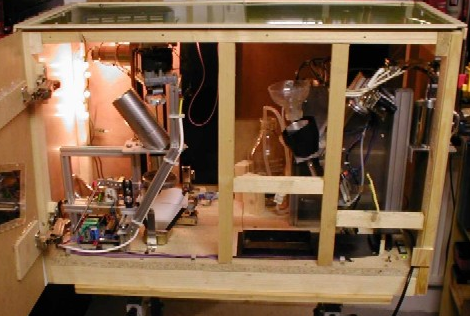
In the end he took extreme measures, building a machine that grinds whole beans, measures out a dose, brews a cup and self-cleans. He used all sorts of odds and ends to put the thing together, detailed in his long and hilarious build log (english translation—and check out the dude’s sweet ride). Refer to his shockwave animation for a summary of the intended operation.

The end result is an extremely impressive Goldbergian contraption—download the video from the build log. It is pretty noisy and probably energy- and water-hungry, but that wouldn’t stop us from using it every day, if given the chance. Hell, this here could form a major part of your next breakfast machine.

We’re sure that there is further potential in this, because to get the really freshest possible cup of coffee you’d want to roast the coffee beans just before grinding them. Then you’d be well on your way towards something else entirely: a delicious breakfast machine.

Cassette Case Cameraphone Tripod

We see a lot of comments on shaky video asking why that person didn’t use a tripod. [Aatif Sumar] wants to use one when taking pictures and video with his phone but the threaded mounting hole you’d find in most cameras doesn’t come as a feature on smart phones. That didn’t deter him, he used an old cassette case for this phone tripod. The build started with a cheap flexible camera tripod. [Aatif] used a soldering iron to melt a hole in a plastic cassette case. We’re apprehensive about relying on the plastic’s ability to hold threads so we’re recommend epoxy to reinforce the joint. A bit more melting with the iron and he had a cradle on legs with a hole for the camera lens. It’s nothing fancy, but it also cost him next-to-nothing.

Copper-clad Enclosures

Building a great looking box for your projects can be a challenge. [Ken] boils down his process of building enclosures out of copper clad (PDF) circuit board material into an illustrated guide in case you want to try this for yourself. Why would you want to use PC board? The fiberglass substrate makes for a strong and lightweight material. Also, [Ken] is a ham radio operator and the copper coating acts as an electrical shield for delicate components inside.

As you can see above he uses solder to tack the pieces together. There’s some important considerations that go along with this method. First, he cuts the pieces just a bit oversized and then sands them flat and square before assembly. Next, he uses some 20 gauge wire as a shim between a ninety-degree joint and a right angle jig. This shim compensates for the shrinking that occurs as the solder cools, making sure the joint gets pulled to a right angle. He even solders nuts in place so that screws can be used to attach the case cover to the chassis.

Yesterday we saw toner transfer used to make labels on an ABS case. If you make your enclosure out of copper clad, using toner transfer for panel labels will be a snap!

The Twelve Days Of… Self-replicating

Okay, it’s more like the 23 days but who’s counting? [Kliment] is giving the gift of self-replication this holiday season by uploading one new printable part a day. If you follow along and print each one you’ll have a Prusa Mendel by Christmas (this started on 12/2 so you’ll need to catch up). The Prusa is a variation on the Mendel that uses bushings wherever possible, reducing the need for bearings down to just two.

So yeah, you need to have access to a 3D printer in order to make the parts for this 3D printer, but that’s how it always works. [Kliment] has gone the distance to make this little exercise enjoyable. The parts that take longer to print are reserved for the weekends, some have been altered to include a holiday theme, and all of them have been optimized to fit on a Makerbot build platform.

[Thanks Christopher]

Vintage Car Audio Gets MP3 Input

[Nali] is fixing up a 1966 Rambler Ambassador and decided to give the audio a bit of an upgrade. Instead of replacing the head unit he added a connector for audio input. The method he used is simple, inexpensive, and allows the original unit to continue functioning as a radio. He cut the feed wires going to the volume knob and patched in a headphone jack. The jack he used has an internal switch that is meant to switch off a pair of speakers when headphones are plugged in. The jack will allow the original signal from the radio tuner to pass through whenever there isn’t a connector plugged in. It seems like this is easier on older hardware than it is on modern equipment.

This isn’t where his entertainment enhancements stop. [Nali’s] working on a 7″ in-dash Linux machine so keep your eye on his thread to see what he comes up with.

[Thanks Joel383]

Christmas Tree Low-water Monitor

The end of the year is rapidly approaching and there’s a good chance you have a slowly dying tree in your living room. Help it hold on a little longer by using [Eric Ayars’] Christmas Tree water monitor. He’s built a sensor out of a piece of strip board. Three bus strips on the board allow for a variety of alerts. When all three are submerged everything is ok. When the two longer traces are still under water but the third is not an LED will blink to let you know it’s time. If you don’t pay attention and there’s no water left, a piezo buzzer makes noise until you add water (or the coin cell runs out of juice).

This project centers around an ATtiny85 that [Eric] programmed using an Arduino, one of the methods we covered in our AVR Programming Tutorial. But if this simple circuit isn’t high-tech enough for you, we saw a similar method last year that will send an alert to your iPhone.