Build A 3D Printer Workhorse, Not An Amazing Disappointment Machine

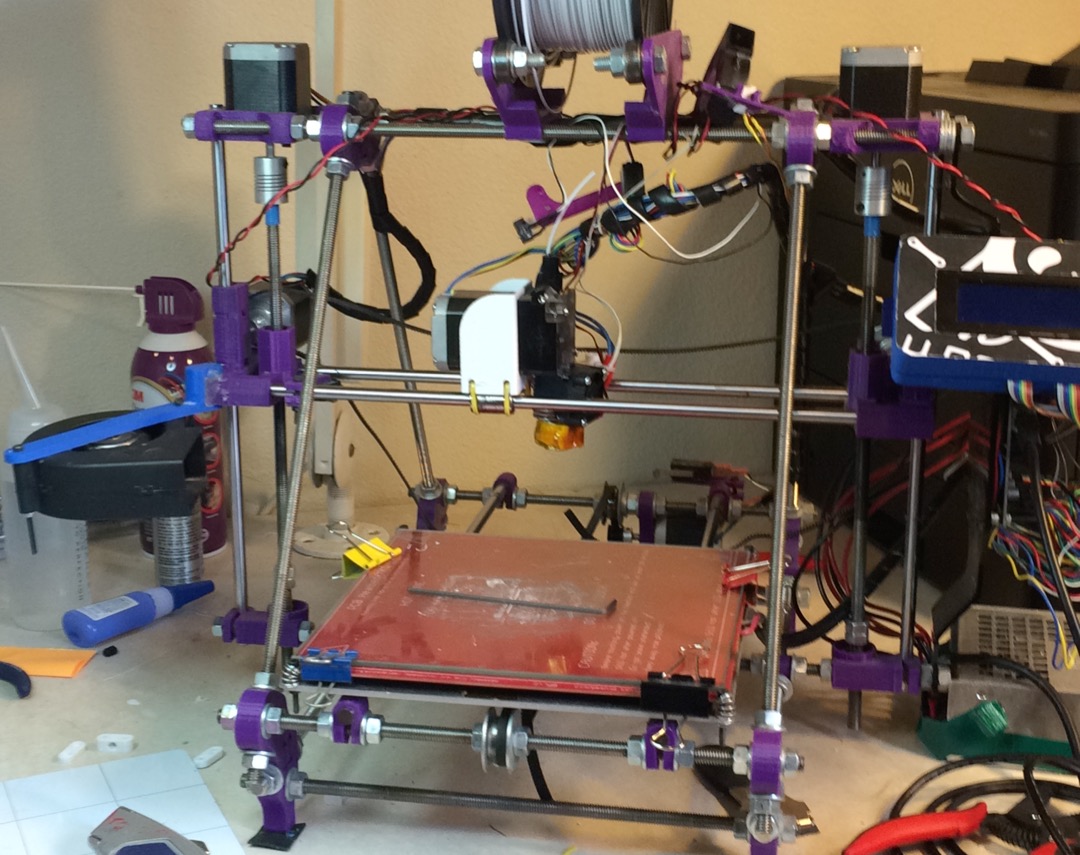
3D printers have become incredibly cheap, you can get a fully workable unit for $200 – even without throwing your money down a crowdfunded abyss. Looking at the folks who still buy kits or even build their own 3D printer from scratch, investing far more than those $200 and so many hours of work into a machine you can buy for cheap, the question “Why the heck would you do that?” may justifiably arise.

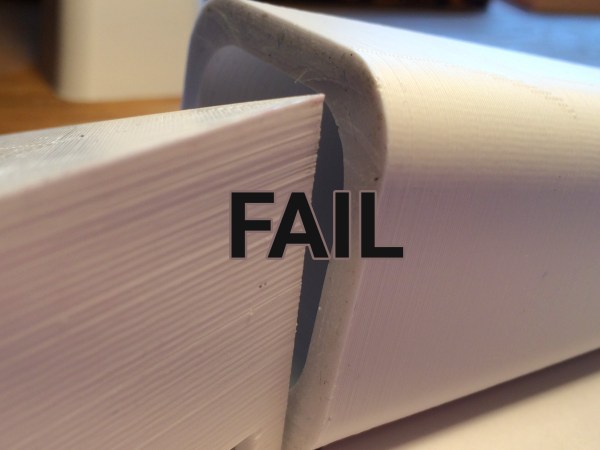
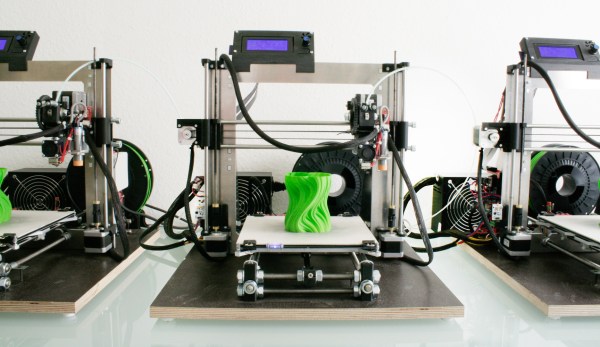
The answer is simple: DIY 3D printers done right are rugged workhorses. They work every single time, they never break, and even if: they are an inexhaustible source of spare parts for themselves. They have exactly the quality and functionality you build them to have. No clutter and nothing’s missing. However, the term DIY 3D printer, in its current commonly accepted use, actually means: the first and the last 3D printer someone ever built, which often ends in the amazing disappointment machine.

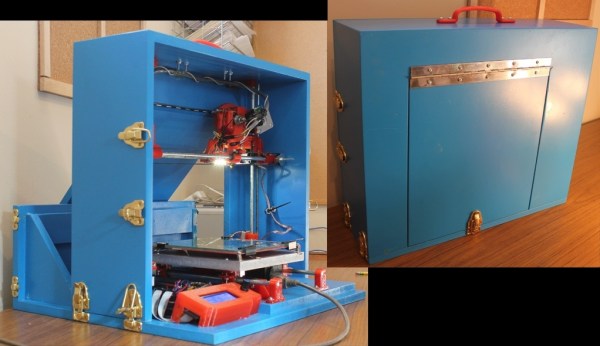
This post is dedicated to unlocking the full potential in all of these builds, and to turning almost any combination of threaded rods and plywood into a workshop-grade piece of equipment.

Continue reading “Build A 3D Printer Workhorse, Not An Amazing Disappointment Machine”

My precision mechanism adjuster. NSFW. As in if you use one of these to adjust a precision mechanism at work you'll get fired. Home use is fine tho;)

Fail Of The Week: My 3D Printer Upgrade

After years of cutting my hands on the exposed threads of my Prusa Mendel i2, it was time for a long overdue upgrade. I didn’t want to just buy a new printer because it’s no fun. So, I decided to buy a new frame for my printer. I settled on the P3Steel, a laser cut steel version of the Prusa i3. It doesn’t suffer from the potential squaring problems of the vanilla i3 and the steel makes it less wobbly than the acrylic or wood framed printers of similar designs.

My trusty i2. Very sharp. It... uh.. grew organically.
My trusty i2. Very sharp. It… uh.. grew organically.

I expected a huge increase in reliability and print quality from my new frame. I wanted less time fiddling with it and more time printing. My biggest hope was that switching to the M5 threaded screw instead of the M8 the i2 used would boost my z-layer accuracy. I got my old printer working just long enough to print out the parts for my new one, and gleefully assembled my new printer.

I didn’t wait until all the electronics were nicely mounted. No. It was time. I fired it up. I was expecting the squarest, quietest, and most accurate print with breathtakingly aligned z-layers. I did not get any of that. There was a definite and visible ripple all along my print. My first inclination was that I was over-extruding. Certainly my shiny new mechanics could not be at fault. Plus, I built this printer, and I am a good printer builder who knows what he’s doing. Over-extruding looks very much like a problem with the Z-axis. So, I tuned my extrusion until it was perfect.

Continue reading “Fail Of The Week: My 3D Printer Upgrade”

CaseRap - Folding RepRap

New RepRap With Integrated Case, Oddly Called Case-Rap

The great thing about RepRaps are that there are so many to choose from! No matter what features or design intent you could want, there is probably a RepRap for that. Even so, there has been a recent addition to the RepRap family. Creator [jlguil] calls it the Case-Rap, and for good reason, the frame of the printer folds up into a suitcase.

The Case-Rap is inspired by the Mendel90 which tries to improve on the original Mendel by replacing the threaded rods for a more rigid sheet material frame with bracing to keep the X, Y and Z axes perpendicular to each other. The Case-Rap goes a little further with the design to have the frame also perform double duty as a travel case.

Check out the video after the break, the printer is actually built in 2 complete separate assemblies. The X and Z axes are mounted in a 4-sided wooded frame. The Y axis and the electronics are mounted on a 2-sided wooden frame. When the frame pieces are latched together in one orientation, they conceal the printer inside a suitcase-sized box. The latch positions were thoughtfully placed so the frame pieces could also be latched together in ‘printer mode’. Setting up and breaking down the printer takes all of 30 seconds.

You may think a super portable printer has to be small… but you’d be wrong. The Case-Rap has a commendable 8x8x8 inch print area. According to [jlguil], the total DIY cost comes in around 350$ CAD, which is not too bad for a 3D printer, and pretty good for one that is unique, portable and capable.

Continue reading “New RepRap With Integrated Case, Oddly Called Case-Rap”

Hackaday Links: September 1, 2013

hackaday-links-chain

[Anton] has been doing some Commodore 64 Datasette experiments. He managed to connect the C64 audio traces to his smartphone and use it for tape playback.

Not wanting to actually disassemble his Mendel 3D printer, [SteveDC] figured out how to make extenders that increase his build height by about 40%.

We have fond memories of owning an 8088 PC. We did a lot of experimental programming on it but never anything as impressive as getting the TCP/IP stack to run on it. Then again, we’re not sure there was such a thing back when we owned the 10 MHz hardware. That’s right, the microcontrollers we mess around with now days are much faster than that old beast was.

When he goes running at night [Tall-drinks] straps a pico projector to his chest. We guess you’d call the readout a heads-up display… but it’s really more heads-down since it’s projecting on the pavement.

See how things heat up as a Raspberry Pi boots. This video was made using a thermal imaging camera to help diagnose a misbehaving board.

We don’t have very many trinkets on our desk (that would steal space normally reserved for clutter). But be would happily make room for this motorcycle model made from VCR parts (translated).

RepRap Voyeurism

Hey everybody, [Nbitwonder] is building his own RepRap 3D printer. What’s special about that? Well, not much and and lot all at the same time. The art of building a self-replicating 3d printer still has a lot to do with luck and forum-crawling to make all of the decisions that go into this complicated project.

Back in March [Nbitwonder] did a collaborative project over at Thingiverse and scored himself a set of printed parts from a guy who already has one of these printers. He then order a set of the non-printable hardware and has since been assembling it. If you’re interested but haven’t already taken the plunge, there’s enough pictures and information in this set of posts to satisfy your craving… for now.

We say this build is an art because it goes beyond just plunking the pieces together. Take the print head, for instance. Instead of going with the extruder that is considered the default for a Mendel build, [Nbitwonder] is working on a variation called Greg’s Hinged Accessible Extruder. We can’t wait until the hardware assembly is done, because it’s the calibration that really interests us.

The Twelve Days Of… Self-replicating

Okay, it’s more like the 23 days but who’s counting? [Kliment] is giving the gift of self-replication this holiday season by uploading one new printable part a day. If you follow along and print each one you’ll have a Prusa Mendel by Christmas (this started on 12/2 so you’ll need to catch up). The Prusa is a variation on the Mendel that uses bushings wherever possible, reducing the need for bearings down to just two.

So yeah, you need to have access to a 3D printer in order to make the parts for this 3D printer, but that’s how it always works. [Kliment] has gone the distance to make this little exercise enjoyable. The parts that take longer to print are reserved for the weekends, some have been altered to include a holiday theme, and all of them have been optimized to fit on a Makerbot build platform.

[Thanks Christopher]

From RepStrap To RepRap; A 3D Printer Is Born

[Gavilan Steinman] just printed and assembled his own RepRap machine and filmed the process. This isn’t news but we found it very interesting to watch. He started with a RepStrap, a rapid-prototyping 3D printer that as built by hand instead of printed by a similar machine. This is the seminal step in the self-replicating process.

From there he prints an extruder head which improves the quality of the parts the RepStrap can produce. We then see time-lapse footage of the printing process for a Mendel unit, the second generation of RepRap machines. We’ve embedded the video after the break. It’s a great way to spend ten minutes on a Sunday afternoon.

Continue reading “From RepStrap To RepRap; A 3D Printer Is Born”