Full Color PCB Business Card

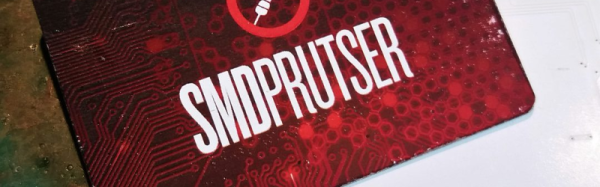
[Sjaak], in electronic hobbyist tradition, started to design a PCB business card. However, he quickly became disillusioned with the coloring options made available by the standard PCB manufacturing process. While most learn to work with a limited color palette, [Sjaak] had another idea. PCB decals for full-color control.

As [Sjaak] realized early in his PCB journey, the downside of all PCB business cards (and PCBs in general) is the limited number of colors you can use which are dictated by the layers you have to work with: FR4, soldermask, silkscreen and bare copper. Some people get crafty, creating new color combinations by stacking layers for hues, but even that technique doesn’t come close to a full palette.

The commercial off-the-shelf out of the box solution [Sjaak] found was decal slide paper. For those of you not prone to candle making or car decorating, decals are printable plastic film that can be used to decorate ceramics, glass or other smooth surfaces. Both clear and white versions can be found in most hobby stores. Once obtained, an inkjet or laser printer can print directly onto the photo paper-like material, lending the decals an infinite range of colors.

[Sjaak] bought clear film and designed his PCB with black soldermask and white silkscreen. Once the PCBs had come in, [Sjaak] got to work applying the decals with a transfer method by placing one into water, waiting a bit until the decal lets loose and then are carefully applied to a PCB. [Sjaak] reports that the process is a bit trickery because the film is very thin and is easily crinkled. But, difficulties overcome, the PCB then needs to dry for twenty-four hours. From there, it’s into the oven for 10 minutes at 248 degrees Fahrenheit (120 degrees Celsius) followed by an optional clear coating. Although the process is a bit involved, judging from his pictures we think the results are worth it, producing something that would stand out; which, in the end, is the goal of a PCB business card.

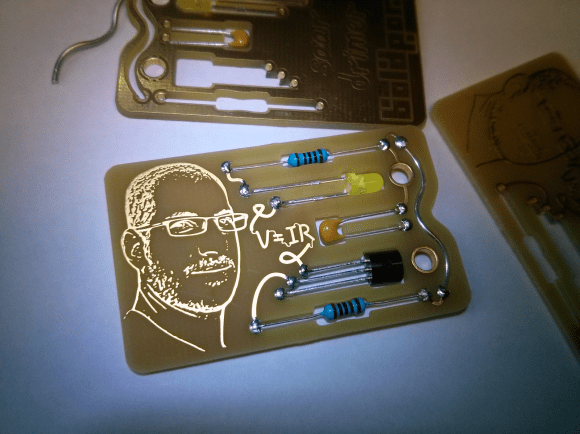
With all this in mind, we think that the logical progression is to incorporate digital logic or go full DIY and CNC or laser engrave your own business card.

This PCB Business Card Is Logically Different

Having seen a number of PCB business cards [Will] decided to go against the more popular choice of a micro-controller based design and show some character with a logic based finite state machine. [Will] uses a single 7-segment display to scroll through the letters of his name with a state machine that outputs the desired combination of 1’s and 0’s to the LED display each time the tactile button is pushed.

[Will] uses a 4-bit counter made up of D Flip-Flops for the clock signal as a conditional input to 6 of the 4-input AND gates. He doesn’t go into the painful details of displaying each character through the process (thankfully) but he does mention that he uses the Quine-McCluskey technique for reduction instead of Boolean algebra. Since his name is 11 characters long and the 4-bit binary counter goes from 0000 to 1111 leaving 5 more pushes of the button before rolling the count back to 0000, during which time the display is left blank. [Will] kindly includes the eagle and Gerber files for your downloading pleasure over at his blog if you’re interested in getting a little deeper into the design.

Continue reading “This PCB Business Card Is Logically Different”

CNC’ed Business Card

Hobby CNC mills have made rapid prototyping easier and faster for hackers. One really useful application is quickly fabricating your own milled PCB’s. [proto logical] built a Reference PCB Business Card using his CNC mill after repeatedly coming across other hackers who were not too convinced about the capabilities of CNC mills in routing PCB’s (also referred to as isolation milling). He thought of making a business card sized reference PCB to show around when he bumps into such folks.

To keep it useful, he included inch and centimetre scales, 0.1″ grid of holes, reference track widths from 16 mil to 66 mil, a few common drill holes and vias and some SMD foot prints. The single sided board is 50 mil thick, so it doesn’t bulk up his wallet. He’s posted the Eagle board file (direct download) and G-code (text file) for those interested in milling their own reference boards. The idea isn’t new – it’s been tried several times in different form factors in the past, generally using more traditional techniques. [proto logical] got inspiration from [Rohit Gupta’s] TinkerRule – The Maker’s Swiss Army Knife. Then there’s the very popular uRuler made by [Dave Jones] of EEVBlog fame. If you have any suggestions on improving the design, chime in with comments here.

Thanks to [ACG] for sending in this tip that he dug up while looking for CNC routed PCB’s.

An Engineer’s Emergency Business Card

breakout_3

We’ve seen lots of circuit board business cards before, but none quite like this. [Saar] calls it the Engineer’s Emergency Business Card.

Since he actually makes a living from making circuit boards, it made sense for him to make a truly functional card. But unlike some of the fancier cards we’ve seen, you can’t plug it into your computer, or even open a beer with it! In fact, all it does is light up when a voltage is applied across the main pins.

But wait — why are all the components in through holes? Well, according to [Saar], that’s because it’s designed to be the electrical engineers emergency kit!

When all hope is lost, the MacGuyver engineer could snap out one of the components and save the day. Recall the countless times you desperately needed a 1 KOhm resistor to fix an amplifier at a party, only to see the girl you were trying to impress slip away with an OCaml programmer? Never again with this little kit. You even have 2 cm of solder in there to make sure the connection’s electrically solid!

We love it. Whether or not anyone will ever successfully use it in an emergency situation such as [Saar’s] hypothetical one is another question altogether. But we do have to give him creativity points for it, the artistic traces look awesome!