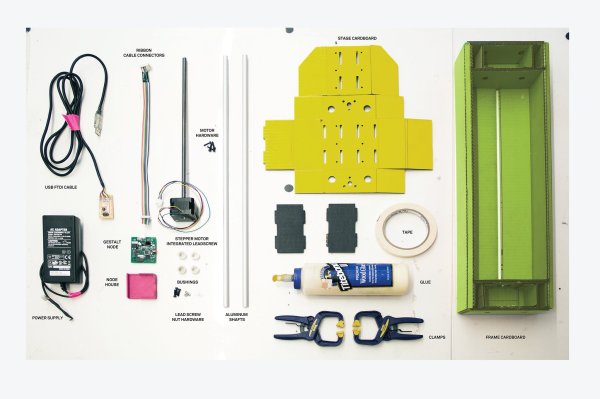
Take A Spin On This Voice-Controlled 3D Scanning Rig

[Aldric Negrier] wanted to make 3D-scanning a person streamlined and simple. To that end, he created this voice-controlled 3D-scanning rig.

[Aldric] used a variety of hacking skills to make this project, and his thorough Instructable illustrates this nicely. Everything from CNC milling to Arduino programming to 3D-printing was incorporated into the making of this rig. Plywood was used to construct the base and the large toothed gear. A 12″ Lazy Susan bearing was attached to this gear to allow smooth rotation. In order to automate the rig, a 12V DC geared motor was attached to a smaller 3D-printed gear and positioned on the base. When the motor is on, the smaller gear’s teeth take the larger gear for a spin. He used a custom dual H-bridge motor driver made by a friend, which is connected to an Arduino Nano. The Nano is also connected to a Bluetooth module and an ultrasonic range finder. When an object within 1-35cm is detected on the rig for 3 seconds, the motor starts to spin, stopping when the object is no longer detected. A typical scan takes about 60 seconds.

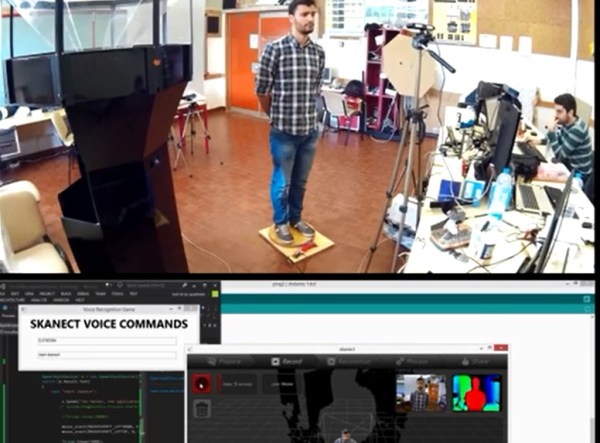
This alone would have been a great project, but [Aldric] did not stop there. He wanted to be able to step on the rig and issue commands while being scanned. It makes sense if you want to scan yourself – get on the rig, assume the desired position, and then initiate the scan. He used the Windows speech recognition SDK to develop an application that issues commands via Bluetooth to Skanect, a 3D-scanning software. The commands are as simple as saying “Start Skanect.” You can also tell the motor to switch on or off and change its speed or direction without breaking form. [Aldric] used an Asus Xtion for a 3D-scanner, but a Kinect will also work. Afterwards, he smoothed his scans using MeshMixer, a program featured in previous hacks.

Check out the videos of the rig after the break. Voice commands are difficult to hear due to the background music in one of the videos, but if you listen carefully, you can hear them. You can also see more of [Aldric’s] projects here or on this YouTube channel.

Continue reading “Take A Spin On This Voice-Controlled 3D Scanning Rig”

X-Carve, The Logical Upgrade To A Shapeoko

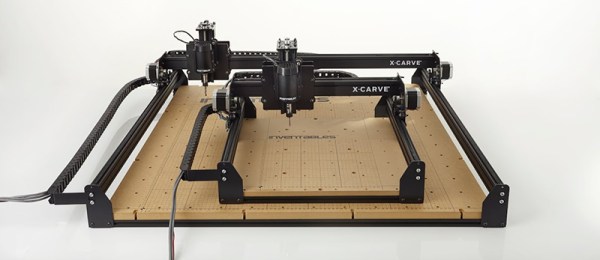
When it comes to small CNC carving machines for hackerspaces and extremely well-equipped garages, the Shapeoko, or something like it, has been the default machine. It’s dead simple – a Dremel attached to linear rails – and is useful for everything from milling PCBs to routing complex woodworking project to plotting designs with a pen. Now, [Bart Dring], the guy behind the Buildlog.net lasers and Inventables have teamed up to create the next generation of carving machines. It’s called the X-Carve, and while it’s fully compatible with the Shapeoko 2, it adds a few improvements that make for a much better machine.

The X-Carve does away with the Dremel-based spindle and replaces it with something that can produce torque. There’s a 24VDC spindle in the stock arrangement that will give you speed control through Gcode. There is, of course, adapters to fit the Dewalt and Bosch routers most commonly used in these types of machines.

As far as the gantry goes, the X and Y axes are makerslide; no change there. The Z axis leadscrew has an optional upgrade to Acme threaded rod, an improvement over the M8 threaded rod found in just about every other DIY machine kit. The entire machine is basically all the upgrades a Shapeoko should have, with stronger corners, NEMA 23 motors, and increased rigidity.

There are a few versions of the X-Carve, ranging from an upgrade kit to the Shapeoko 2 to a fully loaded kit with a square meter of machine space. The big, high-end kit ships for around $1250, but a smaller kit with 500mm rails, NEMA 17s, and threaded rod lead screw is available for around $800.

[Bart] and [Zach], the founder of Inventables sat down and shot a video going over all the features of the X-Carve. You can check that out below.

Continue reading “X-Carve, The Logical Upgrade To A Shapeoko”

Cardboard CNC Machine Boxes Up Both A Tool And A Framework

Want to build up a desktop CNC machine without breaking your pocketbook? [James Coleman], [Nadya Peek], and [Ilan Moyer] of MIT Media Labs have cooked up a modular cardboard CNC that gives you the backbone from which you can design your own machine.

The CNC build comprises of design instructions for a single axis linear stage and single axis rotary stage with several ideas on how to combine multiple of these axes together to construct a particular machine. Whether your milling wood, laser-engraving your desk, or pipetting your bacteria samples, the designs [Dropbox] and physical components can be adopted for your end-application.

Perhaps the most interesting aspect of this project is that, at the high level, it is not just a cnc, but a framework known as Gestalt. This architecture enables users to develop their own machine configuration consisting of multiple software nodes linked together with high-level Python Code. Most of the high level computation is organized by a Python library that calls compiled C-code. This high-level framework processes instructions through the desired machine’s kinematics to output commands to the motor controllers. Finally, the top-level interface does away with the archaic GCode with two alternatives: a Python interface consisting of function calls to procedures and a remote interface to make procedure calls through http requests. While the downside of a motion control language is that commands have no standardization; they are, however, far more human-readable, a benefit that plays into the Gestalt Framework’s aim “to be accessible to individuals for personal use.”

gestaltFramework

In the paper [PDF], [Ilan] expresses the notion of a tool as an impedance-matching device, an instrument that extends the reach of our creativity to bend and morph a broader range of shapes into forms from our imagination. Where our hands fail in their imprecision and weakness, tools bridge this gap. Gestalt and the Cardboard CNC are first steps to creating a framework so that anyone can design and realize their own impedance-matching device, whether they’re weaving steel cables or carving wood.

The folks at MIT Media Labs a familiar heavy-hitters in this field of low-cost machinery, especially the kind that fit in a suitcase. We’re thrilled to see a build that reaches out directly to the community.

via [CreativeApplications.net]

Hacklet 31 – Software Tools

For every computer error, there are two human errors, and one of them is blaming the computer. Whenever a human blames a computer for something, there are two tools, and one of them is the computer.

Not all of your nifty tools need to be fancy robots, CNC machines, or nifty Robertson screwdrivers; a computer is equally capable of being a fantastic tool, provided it has the right software. For this week’s Hacklet, we’re going through some of the best software tools on hackaday.io.

6653681421957570397[Alan] was inspired to build a software tool for making sewing patterns. Sewing patterns are usually designed for the ‘average’ person, but if you’re making custom wearables, you should end up with a piece of clothing that fits perfectly.

The first project [Alan] is using this tool for is a fleece cap that fits the contour of his head. He captured a 3D mesh of his head, imported the mesh into Blender, and unwrapped the resulting mesh. The two halves of the hat were then plotted with a Silhouette Cameo, cut out of fleece, and sewn together. The result is a beanie that fits perfectly around [Alan]’s head. It’s an extremely cool and novel application of 3D modeling, and if you ever need to wrap a 3D object with a 2D material, this is the project you want to check out.

5869061407871295021 And you thought the autorouter in Eagle was bad.

[Anderson] built a tool called Pyrite that will take a schematic and build a layout in three-dimensional space. He calls them Volumetric Circuits, and it’s basically the point-to-point wiring found in old radios and amplifiers taken to the next level. We featured this project before, and there haven’t been many updates since then. Maybe giving [Anderson]’s project a few skulls will help motivate him to get back to the project.
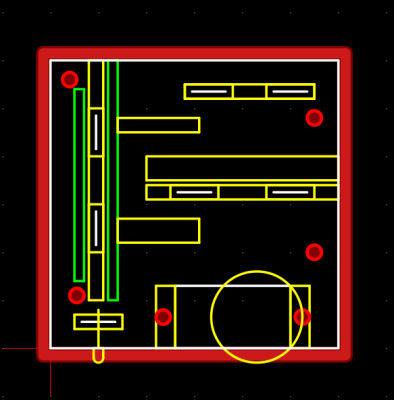
133031421839442989 Not satisfied with the existing free and open source CAM programs, [Snegovick] started work on his own.

[Snegovick] calls his project BCAM, and it’s exactly what you need to mill holes in PCBs, cut gears with a CNC router, engrave plastic, and anything else a 2.5 axis CNC machine can do. The project is written in Python, and yes, the source is available. Supported operations include drilling, path following, offset path following, and pocketing.

Write enough microcontroller projects, and you’ll eventually come up with your own library of common code that does one thing and one thing well. If you’re smart, you’ll reuse that code in future projects. [ericwazhung] is cutting through the hard part of developing all this code and released some things that are useful in a whole lot of projects.

Included in the commonCode library are the usual ‘heartbeat LED’, non-blocking input, a standard interface for AVR timers, bitmaps of text characters, DC motor control, and a whole bunch more. Extremely useful in any event.

That’s it for this round of the Hacklet, bringing you the best hackaday.io has to offer.