XYZ Printing has been selling 3D printers for years now with one very special feature not found in more mainstream printers. They’re using a chipped filament cartridge with a small chip inside each of their proprietary filament cartridges, meaning you can only use their filament. It’s the Gillette and ink jet model – sell the printer cheap, and make their money back on filament cartridges.
Last week at CES, XYZ Printing introduced their cheapest printer yet. It’s called the da Vinci Mini, a printer with a 15x15x15 cm build volume that costs only $269. Needless to say, a lot of these will be sold. A lot of people will also be disappointed with chipped filament cartridges in the coming months, so here’s how you defeat the latest version of chipped filament.
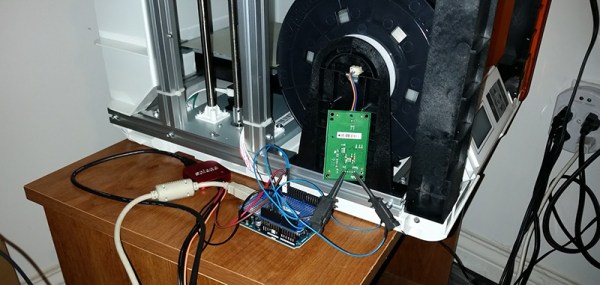
A little bit of research showed [WB6CQA] the latest versions of XYZ Printing’s filament uses an NFC chip. Just like the earlier EEPROM version, the latest spools of filament just store a value in memory without any encryption. [WB6CQA] pulled a board from the printer, connected it up to a logic analyzer, and checked out the data sheet for the NFC chip, giving him access to the data on the filament chip.
After running a few prints and comparing the data before and after, [WB6CQA] found a few values that changed. These values could be written back to their previous values, effectively resetting the chip in the filament and allowing third party filament to be used in this printer. It’s a kludge, but it works. More effort will be needed to remove the need to capture data with logic analyzers, but we’re well on our way to chipless filament on da Vinci printers.