Sharpie Mount Brings Some Color To Your 3D Prints

The average cost of a desktop 3D printer has dropped like a stone over the last few years. They went from a piece of equipment you had to wait your turn to use at the hackerspace to something you can pick up on Prime Day, which has definitely been a good thing for our community. But to get the price down, these printers are almost exclusively running single extruder setups with no provision for multi-material printing other than swapping the filament manually.

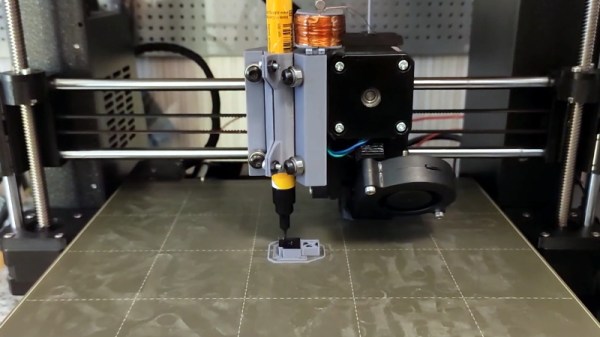
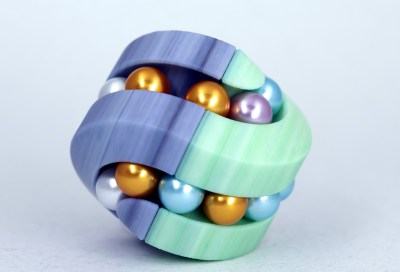
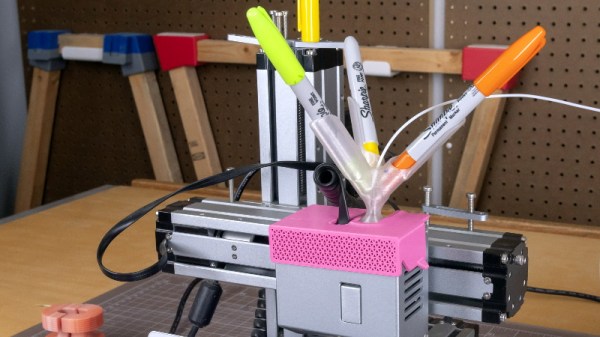
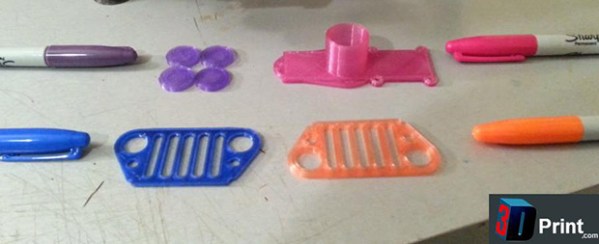
From a practical standpoint, that’s not much of a problem. But wanting to add a little visual flair to his prints, [Devin Montes] came up with a simple 3D printed mount that holds the tip of up to three Sharpie permanent markers against the filament as it enters the top of the extruder. When used with white or translucent filaments, these markers can give the final print an interesting splash of color. Obviously it’s not true multi-color 3D printing, but it can certainly make for some attractive decorative objects.
The mount is designed for the Snapmaker 3-in-1 3D printer, which is relatively well suited to such a contraption as it has a direct drive extruder and there’s plenty of clearance for the markers to stick up. The concept could certainly be adapted to other printers, but it might be a little trickier in the case of a Bowden extruder or an i3 clone that has frame components running over the top. It sounds like [Devin] is working on a generic version of the marker holder that can work on other printers, so it should be interesting to see how he addresses these issues.

Technically this isn’t a new concept, as makers were pulling off similar tricks back in the earliest days of desktop 3D printing. But this is an especially well-implemented version of the idea, and if [Devin] can really come up with a mount that will work on a wider array of hardware, we could certainly see it becoming a popular way to make printed projects a bit more exciting.

Improving 3D Printed Supports With A Marker

Anyone who’s spent some quality time with a desktop 3D printer is familiar with the concept of supports. If you’re working with a complex model that has overhanging features, printing a “scaffolding” of support material around it is often required. Unfortunately, supports can be a pain to remove and often leave marks on the finished print that need to be addressed.

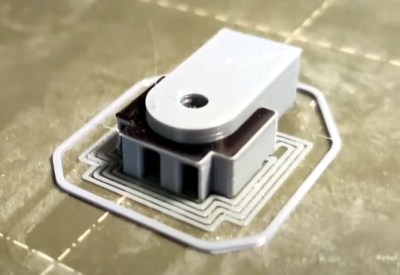
Looking to improve the situation, [Tumblebeer] has come up with a very unique modification to the traditional approach that we think is certainly worthy of closer examination. It doesn’t remove the need for support material, but it does make it much easier to remove. The method is cheap, relatively simple to implement, and doesn’t require multiple extruders or filament switching as is the case with something like water-soluble supports.

The trick is to use a permanent marker as a release agent between the top of the support and the area of the print it’s actually touching. The coating of marker prevents the two surfaces from fusing, while still providing the physical support necessary to keep the model from sagging or collapsing.

To test this concept, [Tumblebeer] has outfitted a Prusa i3 MK3S with a solenoid actuated marker holder that hangs off the side of the extruder assembly. The coil is driven from the GPIO pins of a Raspberry Pi running OctoPrint, and is engaged by a custom command in the G-code file. It keeps the marker out of the way during normal printing, and lowers it when its time to lay down the interface coating.

[Tumblebeer] says there’s still a bit of hand-coding involved in this method, and that some automated G-code scripts or a custom slicer plugin could streamline the process considerably. We’re very interested in seeing further community development of this concept, as it seems to hold considerable promise. Having a marker strapped to the side of the extruder might seem complex, but it’s nothing compared to switching out filaments on the fly.

Continue reading “Improving 3D Printed Supports With A Marker”

Measuring Sharpie Thickness… The Ink Itself, Not The Pen!

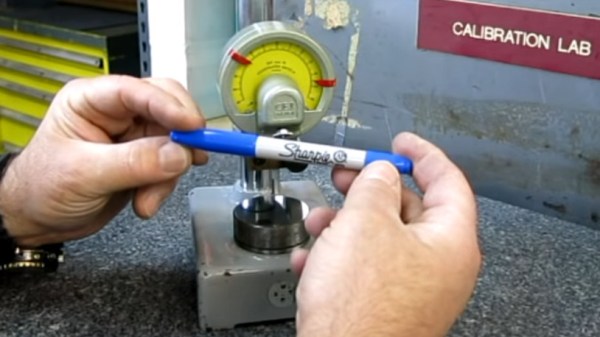
How we missed this one from a few years ago is unknown, but we’re glad to catch up with it now. Have you ever needed to measure how thick the ink in a Sharpie line is? Of course you haven’t. But if you needed to, how would you do it? Using a wicked-sensitive indicator gauge and levering an interesting test setup.

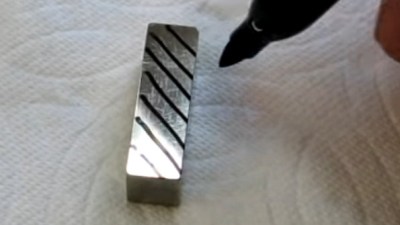
[Tom] from [oxtoolco] got his hands on a tool that measures in 1/10,000,000th (that’s one ten-millionth) increments and was wondering what kind of shenanigans you can do with this Lamborghini of dial indicators. It’s one thing to say you’re going to measure ink, but coming up with the method is the leap. In this case it’s a gauge block — a piece of precision ground metal with precise dimensions and perfectly perpendicular faces. By zeroing the indicator on the block, then adding lines from the Sharpie and measuring again, you can deduce the thickness of the ink markings.
After arraying diagonal lines on the gauge block it is placed lines-down under the dial indicator. This distributes the ink layer across a larger area, as probing the ink line directly would likely result in inaccurate readings. On that topic the gauge block is moved using pliers, as introducing heat from your fingers could result in expansion of the metal upsetting the readings.

The results? Black, blue, and red Sharpie were all tested, alongside blue and black Dykem layout fluid. Ten samples of each were run and the readings were all very close, save a couple of obvious outliers. Clocking in the thinnest is black Sharpie at about 118 millionths of an inch (~30 microns) and blue Dykem was the thickest at 314 millionths (86 microns). [Tom] quips that since we now know the thickness, you could even use ink as a shim.

If you can’t get enough Sharpie in your life, try it as an extremely satisfying add-on for your plasma cutter.

Continue reading “Measuring Sharpie Thickness… The Ink Itself, Not The Pen!”

Sharpies And Glue Sticks Fight The Gummy Metal Machining Blues

“Gummy” might not be an adjective that springs to mind when describing metals, but anyone who has had the flutes of a drill bit or end mill jammed with aluminum will tell you that certain metals do indeed behave in unhelpful ways. But a new research paper seeks to shed light on the gummy metal phenomenon, and may just have machinists stocking up on office supplies.

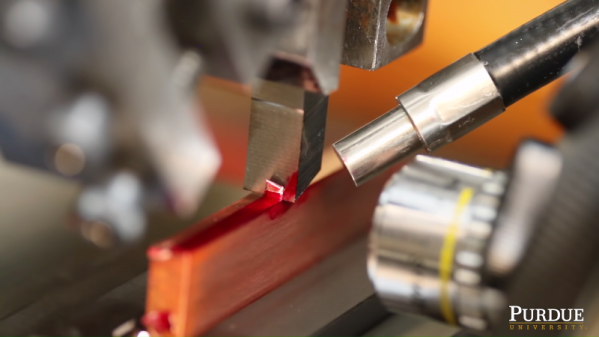
It’s a bit counterintuitive that harder metals like steel are often easier to cut than softer metals; especially aluminum but also copper, nickel alloys, and some stainless steel alloys. But it happens, and [Srinivasan Chandrasekar] and his colleagues at Purdue University wanted to find out why, and what can be done about it. So the first job was to get up close and personal with the interface between a cutting tool and metal stock, to observe the dynamics of cutting. In a fascinating bit of video, they saw that softer metals tend to fold in sinuous patterns rather than breaking on defined shear planes.

Source: American Physical Society.

Having previously noted that cutting through Dykem, a common machinist’s marking fluid, changes chip formation in soft metals, the researchers tested everything from Sharpies to adhesive tape and even correction fluid, and found that they all helped to reduce the gumming action to some degree. Under their microscope they can clearly see that chips form differently once the cutting edge hits the treated surface, tending to act more brittle and ejecting rather than folding. They also noted a marked decrease in cutting force for the treated metal, and much-improved surface finish to boot.

Will Sharpies and glue sticks enter the book of old machinist’s tricks like gauge-block wringing? Only time will tell. But for now, this is a pretty fascinating bit of research that you might be able to put to the test in your shop. Let us know what you find in the comments.

Continue reading “Sharpies And Glue Sticks Fight The Gummy Metal Machining Blues”

Cheap, Easy To Build Robot For Beginners

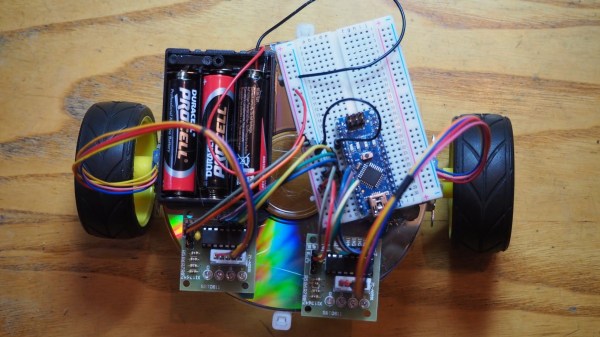
Robotics kits are a great way to get folks , young and old, interested in hacking and learning the basics. Quite often, the cost puts them off – it’s no fun if you mess things up while learning how to put an expensive kit together. Many kits are too polished and that leads to beginners feeling that they’ll never be able to build something complex like a robot. The Shonkbot is what the team at Bristol Hackspace came up with for a robot that is obvious in its working and encouragingly easy to build, even for kids (with supervision).  To that effect, they completely avoided custom PCBs and laser cut bits. The Shonkbot is built from easily available parts and some commonly available materials. They aimed to build it for £5, but managed £15. With proper planning and time, they guess it can be brought down to £10.

The Shonkbot is built using an Arduino Nano, two stepper motors with their drivers, a 3xAA battery box and some bits and bobs. Assembly takes about an hour for a 10-year-old and then they can reprogram it in another workshop or at home. The “frame” of the Shonkbot is an old CD-ROM or DVD disk. Everything is hot glued to this frame. At the centre of the disk, a Sharpie is inserted and the Arduino code then allows the robot to draw on paper. Upgrades include adding an IR LED, a photo transistor and a buzzer to allow the Shonkbot to detect objects, or communicate with other Shonkbots. Build instructions are detailed in this document, and the code is available from the Github repository. Here is a photo album from their first build workshop which was held recently.

Thanks to [Matthew Venn] from the Bristol Hackspace for sending in this tip. Check the robot in action in the video below.

Continue reading “Cheap, Easy To Build Robot For Beginners”

Coloring 3D Prints With Sharpies

Printing objects in full color easily is one of the paramount goals of the ‘squirting plastic’ 3D printer scene, and so far all experiments have relied on multiple colors of filament, and sometimes multiple extruders. This, of course, requires a stock of different colored filaments, but [Mathew Beebe] has a different idea: why not dye a natural colored filament just before it’s fed into a printer? Following his intuition, [Mathew] is doing some experiments with the common Sharpie marker, and the resulting prints look much better than you would expect.

The basic procedure or this technique is to drill a hole in the butt end of the Sharpie, pull out the felt in the tip, and feed a length of filament through the marker before it goes into the extruder. The filament is dyed with the Sharpie ink, and the resulting print retains the color of the marker.

Despite the simplicity of the technique, the results are astonishing. An off-white ‘natural’ filament is easily transformed into any one of the colors found in Sharpies.

Besides the common Sharpie, there’s a slightly more interesting application  of this technique of coloring 3D printer filament; as anyone who has ever been in a dorm room with a blacklight knows, you can use the dye inside a common highlighter to make some wicked cool UV-sensitive liquor bottles. Whether the ‘Sharpie technique’ works with highlighters or other markers is as yet unknown, but it does deserve at least a little experimentation.

Video below.

Continue reading “Coloring 3D Prints With Sharpies”

Tearing Through Floppy Drives To Build A Small-format Dot Matrix Printer

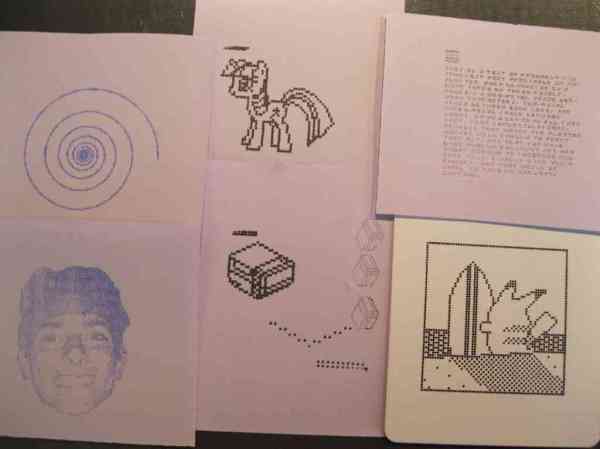
The accuracy which [Mario] achieved in his pen plotter dot matrix printer is very remarkable. He tore through a pile of floppy drives to get the parts he wanted, and chose to go with a fine-point Sharpie marker as a print head. In the video after the break he flatters us with a printout of the Hackaday logo, but you also get a look at one problem with the build. The ink doesn’t always flow from the felt tip and he has to coax it (almost like priming a pump) with a piece of scrap paper.

He was inspired by the pen printer we featured back in June. This rendition features a printing area of 1.5×1.5 inches that can accommodate 120×120 black and white pixels. He’s not a microcontroller type of guy and is driving the printer from the parallel port of his computer.

The best printing technique puts the pen down and moves it around just a bit (helps prevent the ink flow problem we mentioned earlier) and produces images like one in the lower right. We love the 8-bit nature of the result and would use this all the time to make our own greeting cards.

Continue reading “Tearing Through Floppy Drives To Build A Small-format Dot Matrix Printer”