There are a lot of neat toys and accessories that rely on 3D printing filament. The 3Doodler is a 3D printing pen, or pretty much an extruder in a battery-powered portable package. You can make your own filament with a Filastruder, and of course 3D printers themselves use up a lot of filament. [Bodet]’s project for this year’s Hackaday Prize gives those tiny scraps of leftover filament a new life by welding filament together.
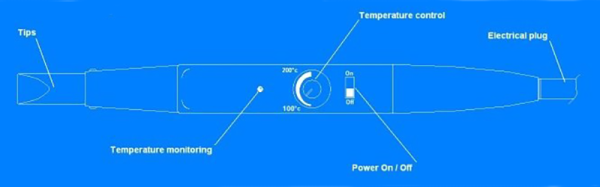
The EasyWelder [Bodet] is designing looks a little bit like a tiny hair straightener; it has a temperature control, a power switch, and two tips that grip 1.7 or 3mm diameter filament and weld them together. It works with ABS, PLA, HIPS, Nylon, NinjaFlex, and just about every other filament you can throw at a printer. By welding a few different colors of filament together, you can create objects with different colors or mechanical properties. It’s notas good as dual extrusion, but it does make good use of those tiny bits of filament left on a mostly used spool.
Since the EasyWelder can weld NinjaFlex and other flexible filaments, it’s also possible to weld NinjaFlex to itself. What does that mean? Custom sized O-rings, of course. You can see a video of that below.
This month the popular “Thomas the Tank Engine” toy celebrated its 70 anniversary. As a fun project, [tinkermax] wanted to bring this traditional toy into the age of IoT, while preserving its physical appearance and simple charm.
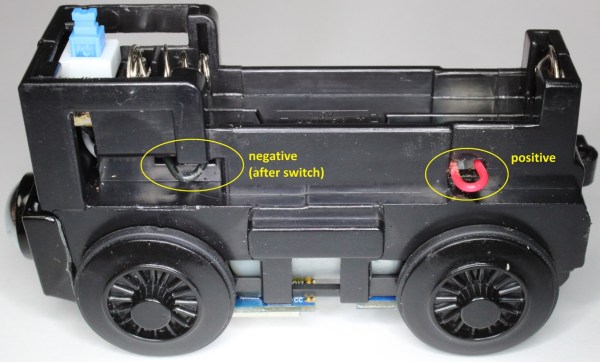
He used a model called the “Diesel” which seemed big enough to house the electronics, but proved otherwise once he inspected the innards. He needed to fit in an ESP8266 module, an accelerometer breakout, some discrete parts, a nifty analog multiplexer, and a 14500 3.7V LiPo. Once done, he was able to control its speed remotely over WiFi, with an auto “throttle-boost” that kicks in when the accelerometer senses that the train is going uphill, and has remote monitoring of battery state, engine load, inclination and track vibration – all in real-time using MQTT over WiFi. It’s quite a demonstration of the power of these super-cheap WiFi modules that are powering the current wave of IoT innovation.
The train motor works off a single 1.5V battery, so [tinkermax] tried a couple of boost converters to get the ESP-12 to work. But the modules were a tad bigger, and couldn’t provide the high peak current needed by the ESP-12. So he used a 14500 3.7V LiPo battery instead. A series diode drops the LiPo voltage to a circuit friendly 2.9V ~ 3.6V range. The ADXL345 accelerometer is used to measure “pitch” to detect going up and down a hill, “roll” to check for tilt or tip over and vibration to identify track defects. It communicates with the ESP-12 using a special Lite-SPI library that he wrote.
Two analog measurements are performed. One uses a resistor in series with the PWM driven motor to measure its current, with a low pass filter to smooth out PWM noise. The other is a resistor divider network used to monitor battery voltage. But the ESP-12 has just one ADC channel. Instead of adding another ADC module, [tinkermax] used a neat device – the FSA3157 – which allows two analog inputs to be channeled to a single output much like a SPDT switch. One PWM output is used to control motor speed and a second one to pulse a LED.
The sensor data is streamed 5 times a second over the MQTT protocol to a Raspberry Pi based MQTT broker. Finally, a JavaScript webpage receives the MQTT messages and plots the data graphically. One upgrade he would like to implement is speed measurement, to allow constant speed drive. If you have any ideas on how to extract that information from an accelerometer, chip in with your comments below. Check out his build log in the short video below. And if you’d like to see how all of this can be used in the real world, check this other video where [tinkermax]’s colleague gives a run down about a commercial enterprise IoT cloud platform hooked up to Thomas the Tank Engine.
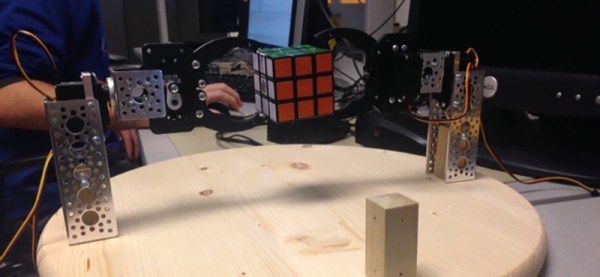
For their final project for ECE 5760 at Cornell, [Alex], [Sungjoon], and [Rameez] are solving Rubik’s Cubes. They’re doing it with an FPGA, with homebrew robot arms to twist and turn a rainbow cube into the correct position.
First, the mechanical portion of the build. The team are using a system of three robot arms positioned on the left, right, and back faces of the cube relative to a camera. When a cube is placed in the jaws of this robot, the NTSC camera data is fed into an FPGA, where a Nios II soft core handles the actual detection of the cube faces, the solver algorithm, and the controller to send servo commands to the robot arms.
The algorithm used for solving the cube is CFOP – solve the white cross, the white corners, the middle layer, the top face, and finally the entire cube. In practice, the robot ended up taking between 60-70 moves. This is not the most efficient algorithm; the Thistethwaite algorithm only requires 52 moves. There’s a reason for this apparent inefficiency – the Thistlethwaite algorithm requires large look-up tables.
Once the cube is scanned and the correct moves are computed, the soft core in sends commands out through the FPGA’s GPIO pins. Each cube can be solved in under three minutes after it has been scanned, but the team ran into problems with scanning accuracy. It’s a problem that can be fixed with the right lighting setup and better aberrant cubie detection, and a great final project using FPGAs.
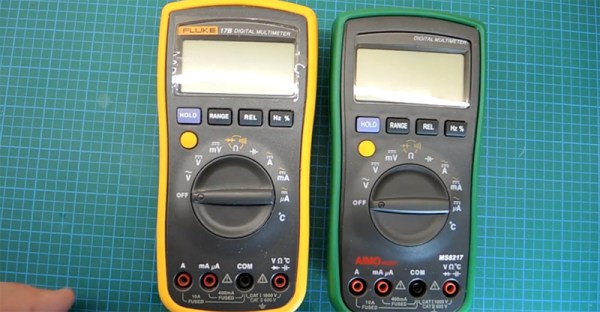
Need a good multimeter? The Fluke 17B is an excellent basic meter that will last your entire career. It’s also $100 USD. Need something cheaper? Allow me to introduce the AIMOmeter MS8217. On the outside, it’s a direct copy of the Fluke 17b, right down to the screen printing but understandably lacking the yellow enclosure. $30 USD will get you an exact copy of a Fluke 17B, it would seem. Right? Not a chance. [electronupdate] did a teardown of the AIMOmeter, and while this meter looks like a Fluke on the outside, it’s probably going to kill somebody.
The teardown begins with a look at the ratings on the back of this off-brand meter. It does have two fuses, but the engraving on the back strangely claims ‘Wrrebt insurance limit’. If anyone has any idea what a ‘wrrebt’ is, please leave a note in the comments. The only references to this word in Google are mis-OCRed blackletter type in a book from the early 1800s.
Opening up the meter reveals – surprisingly – two real fuses in the meter. There were no markings on the bigger fuse, which could be a problem for verifying if the fuse is of the proper value. That’s not really a problem, though: the fuse isn’t even between ground and the amp probe socket. Yes, this fuse is completely useless, and testing the resistance with the fuse out of the circuit confirms this.
After putting the meter back together, [electron] tests the accuracy of the meter. With a 1 mA current source, the mA setting seems to work, but when testing the larger Amp range of this meter, the results display in milliVolts. Don’t worry, there’s an easy fix for that: just press the dial down just right and the correct setting will be displayed. Wow.
You get what you pay for, and if you only ever use an AIMOmeter for measuring Arduinos and batteries, you might – might – be alright. This is not the kind of meter you want to measure line voltage, motors, or anything else with, though.
If you’re a ham, you already know that the ionosphere is a great backboard for bouncing HF signals around the globe. It’s also useful for over-the-horizon backscatter (OTH-B (PDF)) radar applications, which the United States Air Force’s Rome Laboratory experimented with during the Cold War.
During the trial program, transmit and receive sites were set up ninety miles apart inside the great state of Maine. The 1/2 mile-long transmit antenna was made up of four arrays of twelve dipole elements and operated at 1MW. An antenna back screen and ground screen further expanded the signal’s range. Transmission was most often controlled by computers within the transmit building, but it could also be manually powered and adjusted.
The receive site had 50-ft. antenna elements stretching 3900 feet, and a gigantic ground screen covering nearly eight acres. Signals transmitted from the dipole array at the transmit site bounced off of the ionosphere and down to the receive site. Because of step-scanning, the system was capable of covering a 180° arc. OTH-B radar systems across the continental United States were relegated to storage at the end of the Cold War, but could be brought back into service given enough time and money.
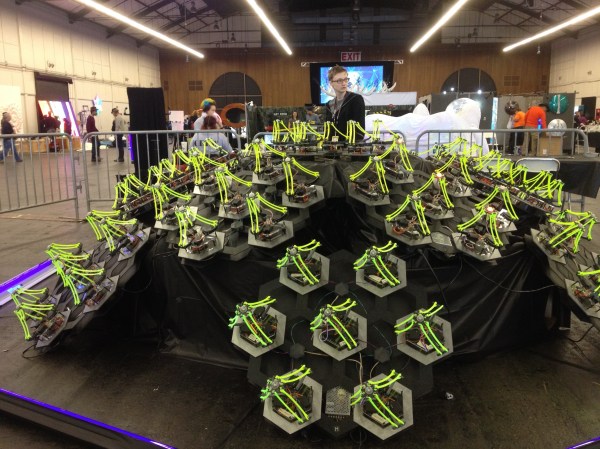
For a few years now I’ve been developing an interactive army of delta robots. This ongoing project is fueled by my desire to control many mechanical extremities like an extension of my body (I’m assuming I’m not the only one who fantasizes about robots here).
Since my army doesn’t have a practical application… other than producing pretty light patterns and making the user feel extremely cool for a minute, I guess you’d call it art. In the past I’ve held a Kickstarter to fund the production of my art which I can now happily show at cool events with interesting people; Maker Faire being one of them.
Interactivity and Sprawling Crowds
Last year, for our debut at the big Bay Area Maker Faire, my collaborator, [Mark], and I displayed a smaller sampling of 30 robots for our installation. We also decided to create an interactive aspect for others to experience. After the end of our crowdfunding period last March, we had a little over a month to do any development before the big event, so our options were slim. The easy solution was to jam our delta code into the hand tracking demo which comes with the Xbox Kinect’s Open NI within Processing. This was cool enough to exhibit, but we hadn’t really anticipated how it would go over in an environment as densely packed as the dark room at Maker Faire.
We should have known better. Both of us were aware that there would be many, many children… all with micro hands to confuse and bewilder the Kinect, but we did it anyway. Our only resolve was to implement the feature that would force the Kinect to track one hand at a time, only after being waved at in a very particular fashion. After needing to explain this stipulation to every person who stopped by our booth over the course of the weekend, we decided never to use the Kinect for crowds ever again; lesson learned.
Delta Robots and DMX
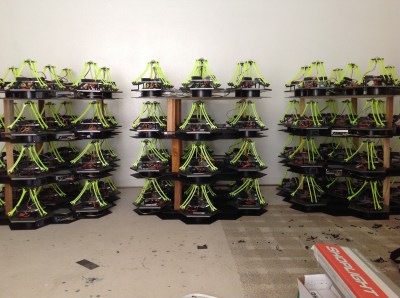
Over the past year since that experience, we’ve tripled the size of the installation and brainstormed some better demo ideas. As of now, the robots are all individually addressable over an RS485 bus, and we use the DMX protocol over a CAT5 cable to send commands. If you aren’t familiar with it, DMX is used in show production to control stage lighting… to which there is a super neat and free application called QLC+ that allows you to effectively orchestrate the motion and color of many individual light units; perfect for our cause.
Functionally, each of the 84 delta robots in the installation believes that it is a stage light (robots with identity issues). We mapped the X and Y axis of the end effector to the existing pan and tilt values, and the z axis to the beam focus value. The RGB of the LED mounted in the end effector of each delta maps directly to the RGB value of the stage light.
By using the sliders in the QLC+ GUI, I could select groups of robots and create presets for position and color. This was great, someone like me who doesn’t really write a lot of code could whip up impressive choreography with little sweat. Additionally, the program comes with a nice visualizer, where you can layout virtual nodes and view your effects as you develop them.
This is the layout of our installation mapped in QLC+. The teal and purple sliders around each light represent pan and tilt (or in our case X and Y):
Lighting control was an interesting solution. Having autonomous robots this year changed how people responded to them, as they were less like an army you’d command and more of a hypnotic field of glowing grass.
[Mark] and I are considering picking up some flex sensors and maybe playing with the Leap or an EEG headset as a means to reintroduce the interactive aspect. Bottom line, I have this cool new toy that I can’t wait to play with over the summer!
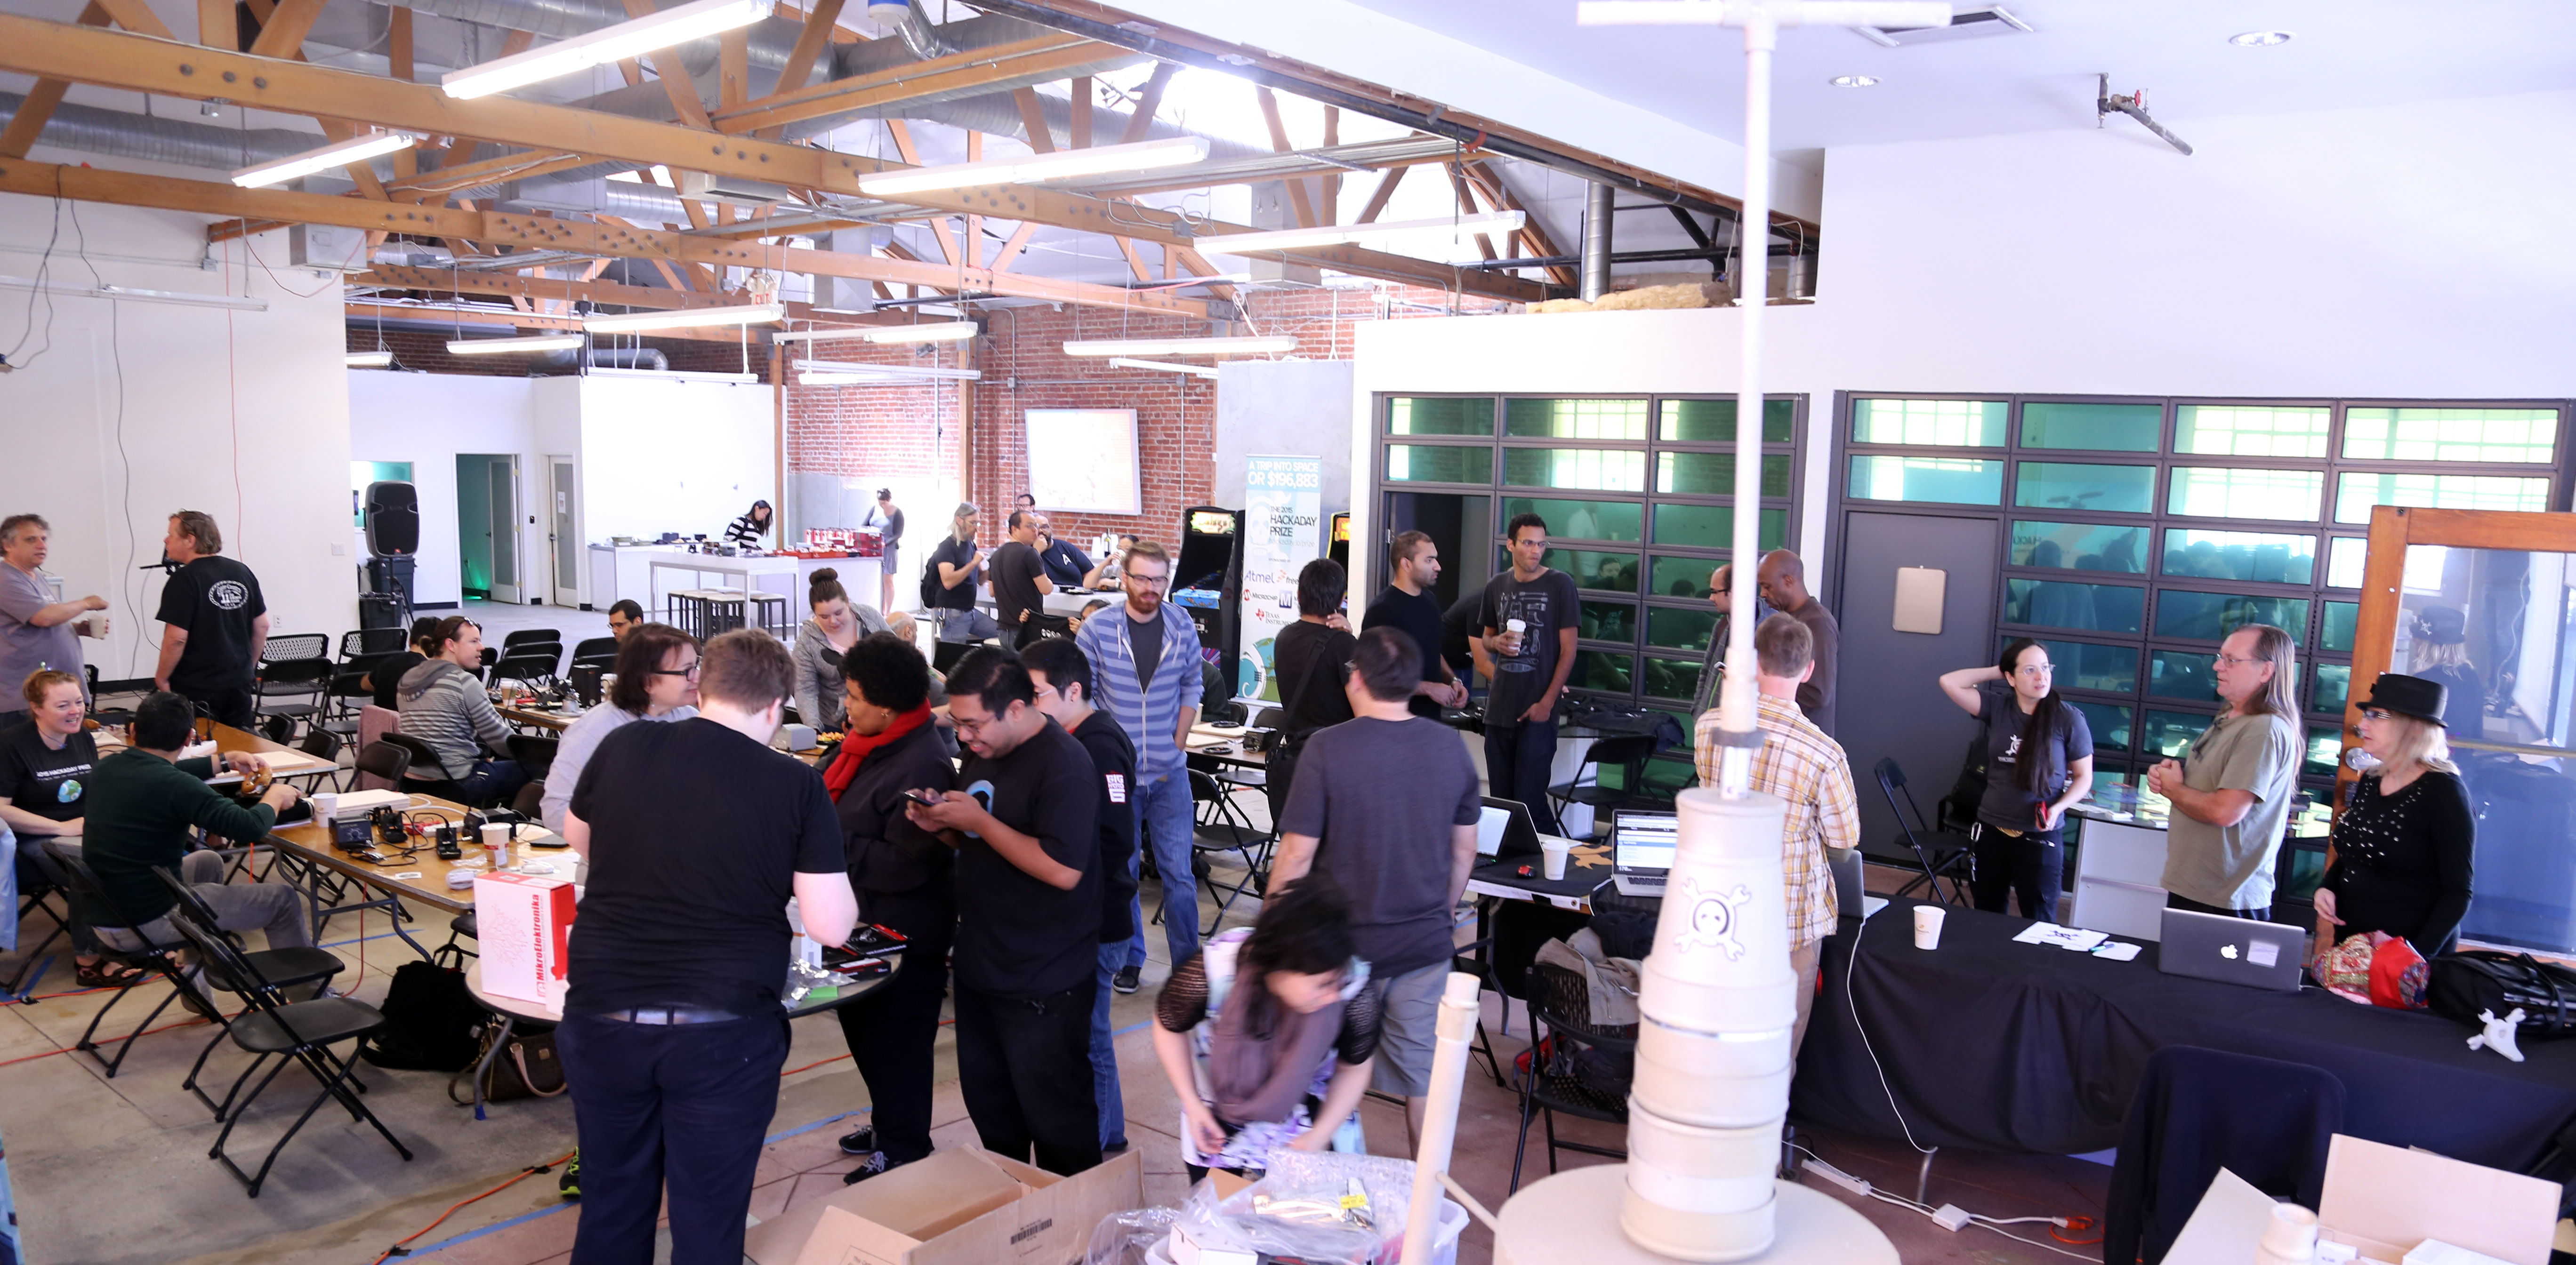
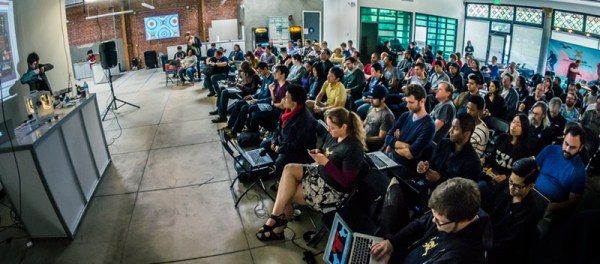
The Zero to Product workshop, held at the Hackaday Design Lab in Pasadena two weeks ago, was a packed house of talented people seeking to expand their skill set with professional PCB layout tips and tricks. [Matt Berggren] didn’t disappoint, bringing his professional experience to the table in a way that anyone with basic electronic knowledge can grasp. Learning the things that make a board reliable and manufacturable can be done with a simple design. In the case, the culmination of the workshop is development board to host the ESP8266 WiFi modules that have been so popular over the last half-year.
This isn’t the first time we’ve pulled off a massive hardware hackathon and meetup, and it certainly won’t be the last. You have another chance to participate in the workshop in San Francisco on June 13th. If you can’t catch that one, we’ll be in Shenzhen for the Shenzhen Maker Fare, a Zero to Product workshop, and a meetup.
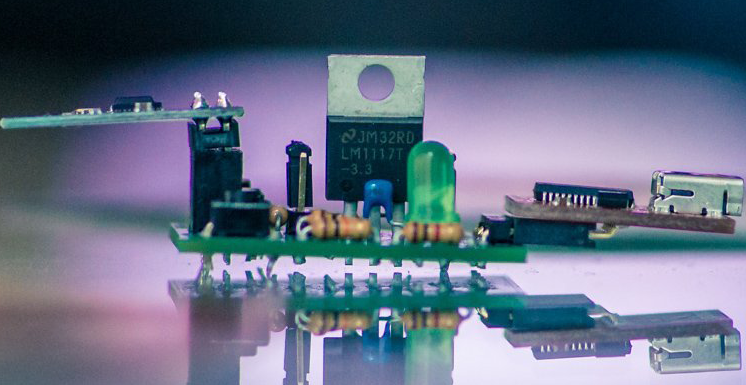
The completed ESP8266 breakout presented during the talk
Of course Hackaday events are never “all work and no play”. The day crept into night and the the chairs were cleared out for hightop tables and tasty beverages. The atmosphere was festive and everyone still made it back early the next morning for an entire day of hardware hacking, tinkering, and general futzing around with circuits and electrons. If you check out [Rich Hogben]’s photo log of the weekend, you’ll find some an impressive collection of hackers were there. I see at least one person who’s job is flying space probes, a Hackaday Prize judge, and a security researcher who can crack a Master Lock in 30 seconds.
The display for [Steve]’s LIDAR
Bar-time Show and Tell
The meetup Saturday night wasn’t technically a bring-a-hack event, but we walwasy want to see people’s latest and greatest contraptions. [Steve Collins] brought a homebrew LIDAR. This project was based on a SparkFun Time of Flight breakout board that scans the room with a cheap hobby servo, reads the data into an Arduino and displays the rangefinding data on a small TFT. The LIDAR is good enough to scan the entire Hackaday Design Lab, with more than enough resolution for any robotics project you have in mind.
Also at the Saturday night gathering was our very own mythical creature [Sophi Kravitz], [Elecia White] who is and embedded.fm podcaster, engineer, and Hackaday Prize judge two years in a row, and [Samy Kamkar] known for his privacy and security research and for building the KeySweeper. They gave a series of lightning talks about the latest things they’re working on:
We rented Galaga and Ms. Pac Man machines for the entire weekend, but that wasn’t the only electronic entertainment for the party. Two Bit Circus was there with a game that could only be described as highly disorganized electronic chess. FLED, the exceedingly large, high-resolution RGB LED display was behind the bar, and Deezmaker took over a room to 3D scan people and print out miniature clones on a pair of 3D printers.
The Hackathon
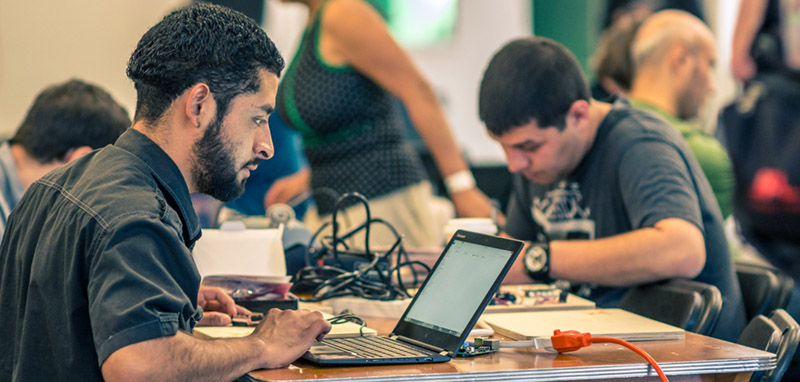
The events continued on until Sunday evening with a hardware hackathon. This isn’t your run-of-the-mill software hackathon where people sit behind their MacBooks the entire time; we had soldering irons, components, solder, solder wick (important!) and dozens of hardware hackers tinkering away at their latest electronic doodad.
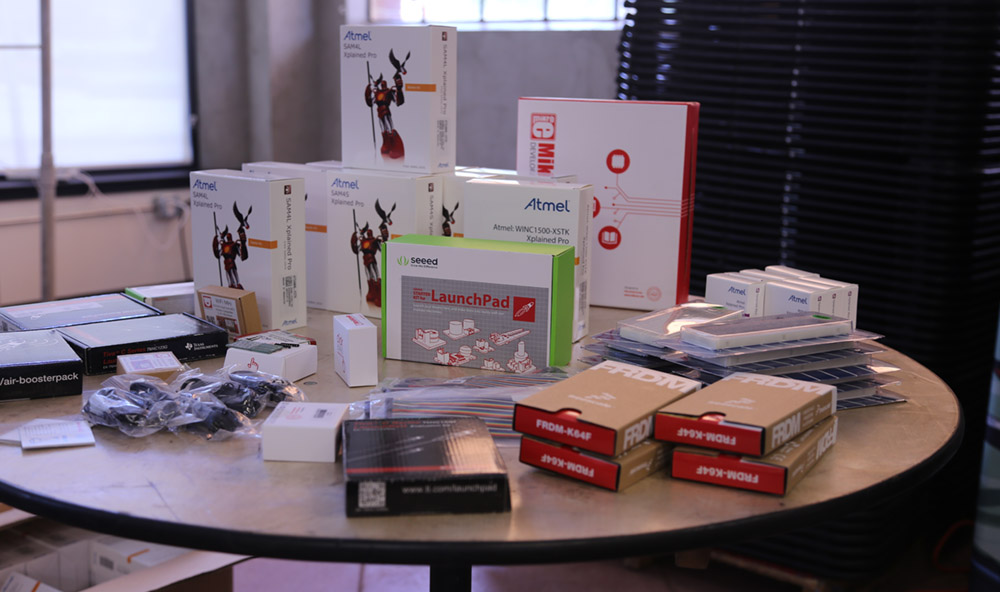
Foreground: A moisture vaporatorA vast assortment of dev boards
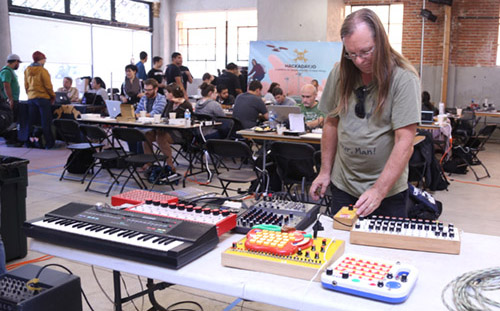
The amount of hardware on hand was spectacular. Hackaday Prize sponsors Atmel, Freescale, Microchip, and TI all provided some hardware. Everything from ATMega328 boards from Atmel, TI Launchpads bristling with goodies like the Sharp Memory Display booster packs, Seeed Studio starter packs, to insanely powerful Freescale Freedom boards were available to build on at the event. The Sunday hackathon also had several gigantic boxes from Mouser filled to the brim with components and breadboards available to everyone to clobber into submission, letting their inner electronics geek shine. When taking a break from the build there was plenty to look at. People were showing off already completed projects they brought along with them. [Jeff] from Circuitry & Poetry was there with a bunch of circuit bent synths. A number of people were also finishing up the ESP8266 breakout boards that were presented the day before; some soldering and some laying out a PCB in Eagle. It was an incredible event, with dozens of groups going off to do their own thing, but still welcoming to anyone else who wanted to tinker. This type of community isn’t found everywhere and we’re thankful for the people that make Hackaday events like this one so special.
We need to take the time to give a big shoutout to SGVHAK. We honestly couldn’t have done this event without them. I’d personally like to thank [Michael Proctor-Smith] for bringing his amazing livestreaming box. He is the reason I am not currently (still) editing down seven hours of video from the PCB design workshop and the lightning talks. Big ups to [Lan], [Scoops] and everyone else who helped out. If you came to the Hackaday event, check out their meetups. If you’re in the area, we also have regular informal meetups somewhere around the hackerspace. Come on out!

 Since my army doesn’t have a practical application… other than producing pretty light patterns and making the user feel extremely cool for a minute, I guess you’d call it art. In the past I’ve held a
 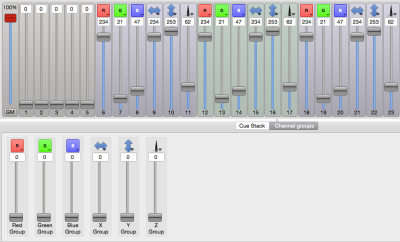 Functionally, each of the 84 delta robots in the installation believes that it is a stage light (robots with identity issues). We mapped the X and Y axis of the end effector to the existing pan and tilt values, and the z axis to the beam focus value. The RGB of the LED mounted in the end effector of each delta maps directly to the RGB value of the stage light.
![The display for [Steve]'s LIDAR](https://hackaday.com/wp-content/uploads/2015/05/lidar1.jpg)