Flashing Arduinos With A Zipit

zipit_arduino_flashing

[Giacomo] finds that every once in awhile, he needs to flash a sketch to an Arduino while on the go. While he doesn’t always carry his laptop with him, he almost certainly has his Zipit Z2 on hand. He prefers to use the Zipit because it’s tiny, it uses Debian, has built-in WiFi, and can run for about 5 hours before requiring a recharge. The only shortcoming is that the device lacks a serial port.

Following instructions we featured last year he added a serial port to his device, then built a small converter cable that allows him to connect it to virtually any Arduino. He says it only takes a moment to get avrdude up and running on the Zipit via apt-get, and once that’s done, he is in business. He wrote a short script that saves him from entering the flash command over and over, so the process couldn’t be simpler.

He does mention that since the Zipit does not have a DTR line, Arduino resetting must be done manually. For the convenience of flashing sketches from the palm of our hand, we can deal with that.

Check out the video below for a quick demonstration of his setup.

Continue reading “Flashing Arduinos With A Zipit”

Destroying An Arduino’s EEPROM

We’ve seen projects test the lifespan of an EEPROM before, but these projects have only tested discrete EEPROM chips. [John] at tronixstuff had a different idea and set out to test the internal EEPROM of an ATmega328.

[John]’s build is just an Arduino and LCD shield that writes the number 170 to memory on one pass, and the number 85 on the next pass. Because these numbers are 10101010 and 01010101 in binary, each bit is flipped flipped once each run. We think this might be better than writing 0xFF for every run – hackaday readers are welcomed to comment on this implementation. The Arduino was plugged into a wall wart and sat, “behind a couch for a couple of months.” The EEPROM saw it’s first write error after 47 days and 1,230,163 cycles. This is an order of magnitude better than the spec on the atmel datasheet, but similar to the results of similar experiments.

We covered a similar project, the Flash Destroyer, last year, but that tested an external EEPROM, and not the internal memory of a microcontroller.

Check out the hugely abridged video of the EEPROM Killer after the break.

Continue reading “Destroying An Arduino’s EEPROM”

Photographing Stuff That’s Not There By Using Stencils

This image was not made in post production, but captured during a long camera exposure. The method uses stencils to add components to a picture. [Alex] built a jig for his camera from a cardboard box. This jig positions a large frame in front of the camera lens where a printed stencil can be inserted. He printed two identical sheets of paper with black covering the area all around the 8-bit joggers. When properly aligned and inserted in the jig, the black parts of the stencil will act to mask the areas where he wants to capture the natural surroundings of the image. Once the camera shutter is triggered, he uses a flash to illuminated the stencil, then removes the the paper image from the jig and ambient light from the dark surrounding is captured during the remainder of the 20-30 second exposure time. The real trick is getting the light levels between the flash and the ambient light to balance and produce a result like the one seen above.

Is anyone else hearing the Punch Out cut-scene music in their heads right about now?

Bounce Flash In Multiple Mediums

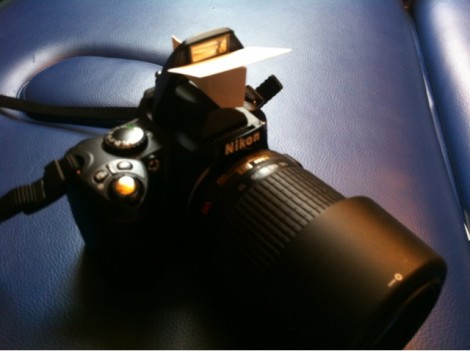
[Nigel’s] been trying out a series of designs and materials to make his own bounce flash. He set out on this mission because most of the images he used flash on ended up washed out with dark shadows. The flash add-on seen above seeks to curb the harshness of the direct light but shielding the subject.

What you see above is just a couple of pieces of paper. [Nigel] put together a template so that you can cut your own. Although the design is his favorite, he also put together a second generation that is built from hobby plastic with a piece of aluminum tape as the reflecting surface. The main link at the beginning of this feature leads to that version, but after the break we’ve included direct links to each article he published during his experimentation.

Continue reading “Bounce Flash In Multiple Mediums”

Shockingly Fun Quiz Game

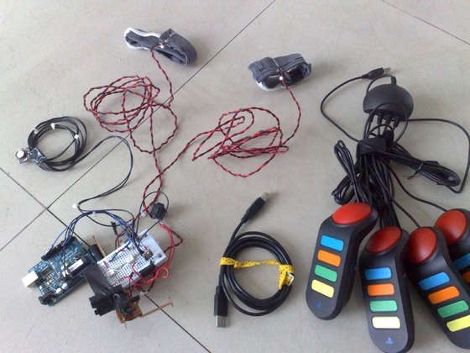
Gather your friends round the living room for a head-to-head quiz game. This one’s not quite as nice as you might think. Get an answer wrong and you’re going to get the Venkman treatment thanks to the stored electricity in a disposable camera flash circuit. [Israel] runs the game questions from a Windows machine, and uses a set of four USB joystick buzzers that let each contestant ring in. They all wear a cuff that houses electrodes for negative-reinforcement upon an incorrect answer. Since every contestant answers each question it won’t be long before you hear the uncomfortable yelp of failure from your guests. This seems a little bit more fair than shocking people for not calming their minds, but the video from that hack is still one of our all-time favorites.

Fabulous Magic 8 Ball Prank

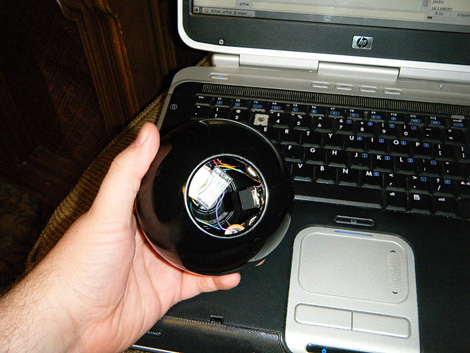
Hackaday forum user [arfink] has shown us a brilliant practical joke he built. This is a magic 8 ball that will blind you with a flash when you flip it over. Have you ever been in a room with one of these and not flipped it over? Neither have we. Using a basic flash circuit ripped from a disposable camera in conjunction with a mercury switch, this project took him about 2 hours to make. Admittedly, most of that time was just trying to split the 8 ball in half without completely destroying it.  The circuit is pretty simple. Just figure out what 2 wires need to be crossed to trigger the flash and install your tilt switch there. He added a power cut off so you could disable it as well.

UPDATE: video added after the break! Continue reading “Fabulous Magic 8 Ball Prank”

DIY Air Gap Flash Saves At Least Seven Grand

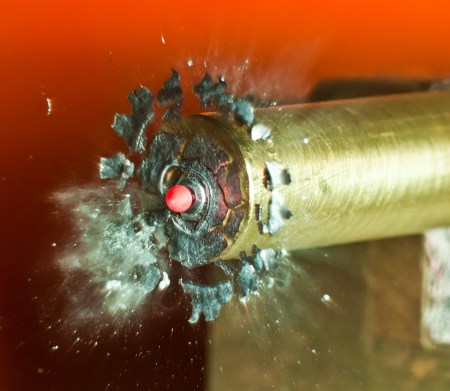
Did you know that a standard camera flash is much too slow to capture high quality images of bullets? A relatively long flash duration results in blurred images of the bullet. By building this air gap flash a bullet can be frozen in mid-air, producing some stunning results. There is an element of danger here, and not from the bullet. This flash uses a 35,000 volt capacitor to produce the mini-bolt of lightning which serves as the light source. The unit can be built for a few hundred dollars, which sounds like a heck of a deal if commercial models really do start at $8k and go up from there.

Now that the photographer has a super-fast flash, a camera axe takes care of the timing… which is everything.