Mini Arcade Cabinet Looks As Good As The Real Thing

mame_cab

[Ed] had a netbook he no longer needed and decided to make it into a mini MAME cabinet for some of his family members. MAME cabinets are pretty plentiful, but this one was so nicely done, we wanted to share it.

He removed the monitor from an EeePC 901 in order to get some precise measurements, then went about crafting a mini cabinet from MDF. The whole thing was wrapped in sticky label paper adorned with old-school Galaga graphics, then covered in plexiglass for a nice sleek look that also protects the artwork.

He used an iPac 2 controller board to wire up all of the buttons and joystick to the netbook, opting to solder the controller’s wires directly to the USB header on the eeePC’s motherboard. A power switch was added up on top for easy operation, and the cabinet was sealed shut, though the back does open easily in the event that maintenance is required. The system is managed using the Maximus Arcade front end for MAME, which [Ed] claims is incredibly easy.

If you are interested in making your own MAME cabinet, check out some of the other MAME-based projects we have featured in the past, and don’t miss the video below of [Ed’s] cabinet in action.

Continue reading “Mini Arcade Cabinet Looks As Good As The Real Thing”

DIY Scanning Electron Microscope

[Ben Krasnow]  has recently completed a home-built scanning electron microscope and has posted a video of it in action on his blog.

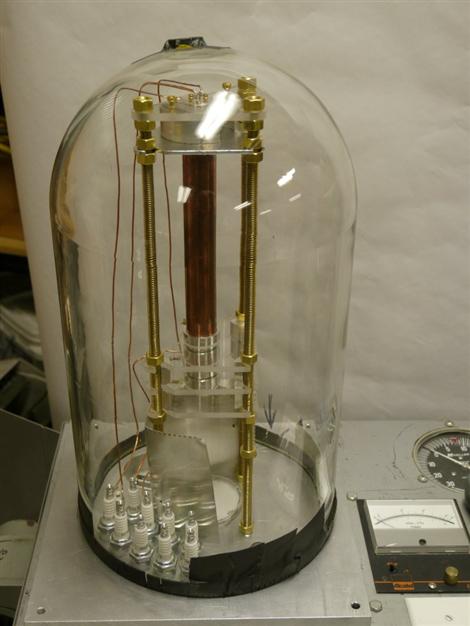
The build itself was done quite creatively using many off-the shelf components. We particularly like how long threaded brass rods were used not only for the supports, but also to maintain column alignment and fine-tune the spacing between the various beam focusing components.  A large glass “bell jar” covers the entire apparatus and is sealed to the bottom plate when the air is removed from within by a mechanical vacuum pump.

In order to produce an image, an electron gun similar to one found in a conventional CRT television tube accelerates the electrons with a 5kV potential from the top of the microscope downwards through a long copper column. Along the way the beam is focused and manipulated by electronic lenses in much the same way that light would be handled by conventional optical lenses. Near the base of the main column there are electrostatic deflection plates placed orthogonally in the X and Y directions that allow for precise scanning of the beam across the sample’s surface. When this high-energy electron beam is scanned across the sample, scattering surface electrons are then picked up by a nearby detector consisting of a phosphor screen and photomultiplier – a system that supposedly allows for higher sensitivity than trying to measure the small numbers of electrons directly.

Although the resolution of the first few scans is only around 50uM, this early success clearly shows that the device functions as intended and will provide a great starting point for future refinement with the final goal being resolutions down to the 1uM range.

Despite Ben’s reassurance that the x-rays produced at this energy level  won’t even penetrate the glass chamber, you can be sure that if we ever visit his garage we will definitely be donning some tin foil protection like these guys.

[Thanks kyle]

Continue reading “DIY Scanning Electron Microscope”

Geiger Counter A/D Conversion For Radiation Level Crowdsourcing

arduino_geiger_counter

[Akiba] and the crew at Tokyo Hakerspace are still hard at work trying to help out their fellow countrymen after the recent earthquake, tsunami, and ongoing nuclear crisis in Japan. You may remember the group as they are behind the Kimono Lantern project we featured last week. This time around, their efforts are focused on getting usable information out to those who need it.

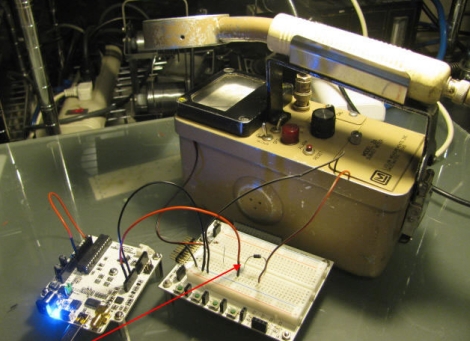
With all of the talk about nuclear fallout, they wanted to see what sort of measurements they could get in Tokyo, however they could not locate a Geiger counter anywhere nearby. Luckily, they were eventually able to source two old counters from the Reuseum in Idaho. One is being lent out to individuals in order to check if their home’s radiation levels are safe, but it was decided that the other would reside outdoors in order to collect radiation readings from the air.

[Akiba] wanted to put the results from the external Geiger counter up on Pachube, however these old units are all analog. He figured that a quick and dirty way to do analog to digital conversion would be to monitor the chirps coming off the counter’s speaker. This was done by wiring up an Arduino to the speaker leads, and keeping track of each time the speaker was activated. This resulted in an accurate digital radiation reading, matching that of the counter’s analog display. The Arduinio wirelessly sends the information to another Arduino stationed inside his apartment, which then uploads the data to Pachube.

A walkthrough of his conversion as well as the source code for both the Arduino counter and the Pachube uploader are available on his site, in case anyone else in the Tokyo area has a Geiger counter handy and wishes to do the same.

Fusion Reactor Wins Science Fairs

[Will Jack] built a heavy water fusion reactor and then won district and regional science fair projects with it. Someone give this man a job!

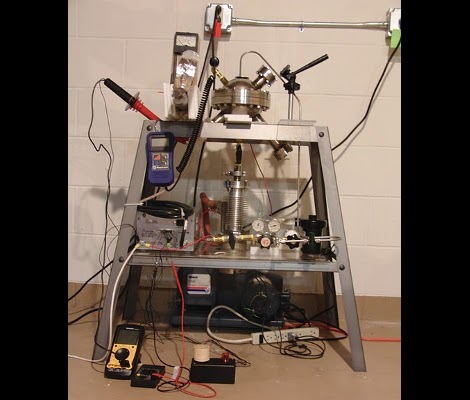
We looked in on his fusion reactor about a year ago. At the time he had managed to build a magnetic containment field but didn’t have the voltages or the deuterium necessary to achieve fusion. We’ll that’s all changed. Using a boron-10 lined sensor tube he’s managed to detect the rise in neutron counts that would indicate fusion. Remarkable. He’s now working on a refined gas system that will allow him to increase the deuterium purity by cutting down on the leak rate. He mentions a few other hardware improvements such as a new containment unit and an ion source upgrade. Both of these concepts go beyond our knowledge so do make sure to put on your Nuclear Engineering hat while reading through his project update.

DIY Low-power PSU For Home Server Use

diy_pc_psu

[Viktor] decided to replace his old power hungry home server with a model that is much easier on the old electric bill. The new motherboard uses an Intel Atom chip and consumes far less power than its predecessor. He figured there was no reason to use a bulky ATX power supply when all he needed was 12V for the mainboard and a pair of 5V rails for his hard drives, so he decided to build a PSU himself.

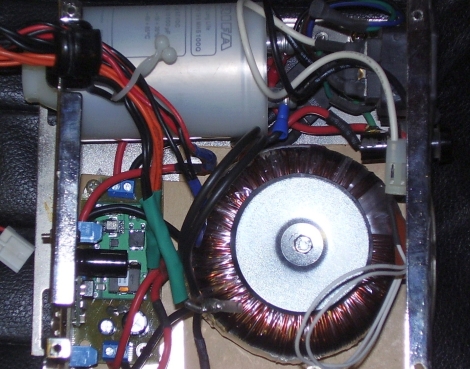
He sourced a 100VA toroid transformer as the basis of the power supply due to its popularity with audio amp builders, adding a standard bridge rectifier and smoothing capacitor before regulating the DC output. A pair of switching regulators were added, one for the 6A, 12V, and a second for the 1.5A, 5V supply. The motherboard only requires about 18W at full tilt, so the PSU should be more than sufficient for his needs.

Schematics and board layouts are available for free on his site, if you are in the market for your own DIY low-power PSU.

Looking for more build to suit electronics?  Check out this DIY amp we featured just the other day.

[Thanks, Chris]

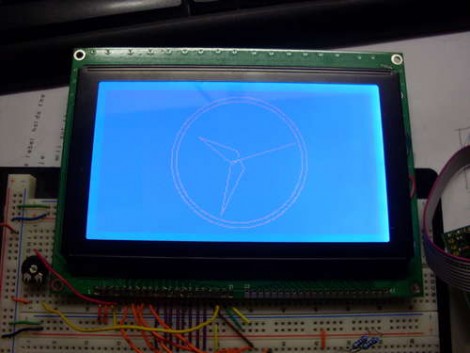
Learn The Geometry To Draw An Analog Clock On A Graphic LCD Screen

Does the image of the clock above make you shutter with fear because of the math you’d need to use to recreate your own version of the project? We certainly understand that High School geometry is becoming a very distant memory, but it’s really not as hard as you think. [Janw] built this analog clock using a graphic LCD and he’s done a great job of explaining the concepts behind it.

The hardware he’s using is pretty standard for an electronic hobby clock; an ATmega16, graphic LCD, DS1307 real-time clock, and supporting hardware like a potentiometer, resistors, and buttons. The code is written in Bascom, but like we said, [Janw] explains the concepts behind drawing the hands on the clock so you can recreate this with any microcontroller or software language you prefer. We  recommend grabbing a calculator and some blank paper. It took us a few tries to brush the cobwebs out and really grasp what he’s doing with each equation.