A Double-Hybrid Mini-Lathe, From Scratch

It’s a treadle lathe! No, it’s a power lathe! It’s a wood lathe! No, it’s a metal lathe! Actually, [Uri Tuchman]’s homebrew lathe is all of the above, and it looks pretty snazzy too.

To say that [Uri]’s creations are quirky is a bit of an understatement – birds, crustaceans, hands, and feet all appear repeatedly as motifs in his work – but there’s no overstating his commitment to craftsmanship. [Uri] turns wood and metal into wonderful tools, nonsense machines, and finely detailed instruments, like this exquisitely engraved astrolabe we featured a while back.

[Uri] mostly works with hand tools, supplemented by an old Singer treadle-powered sewing machine that he turned into a scroll saw. The video below shows how he added a small scratch-built lathe to the treadle base. His first pass at a headstock, using pillow blocks for bearings, didn’t work as well as he wanted, so he built a new headstock around off-the-shelf lathe parts. The aluminum extrusion bed holds the headstock, tailstock, and a custom-built tool rest of heavy brass, all of which look great alongside the rich wood accent pieces and base. And for those times when his feet are tired, he added a surplus electric motor to turn the spindle. We especially like the two settings on the motor speed control: “0” and “>0”. Classic [Uri].

If you haven’t heard of [Uri] before, do yourself a favor and go check out his YouTube channel right now. Or start with our other coverage of his unique projects, from building an intricately detailed hammer to his lobster claw ink-dipping machine and even this unusual take on preserved lemons.


Continue reading “A Double-Hybrid Mini-Lathe, From Scratch”

Already Impressive CNC Router Gets An Extra Axis

The type of CNC machine within the financial reach of most DIYers is generally a three-axis affair, with a modest work envelope and a spindle that never quite seems powerful enough. That’s not to say that we don’t covet such a machine for our own shop of course, but comparing small machines with the “big boy” five-axis tools might leave the home-gamer feeling a tad inadequate.

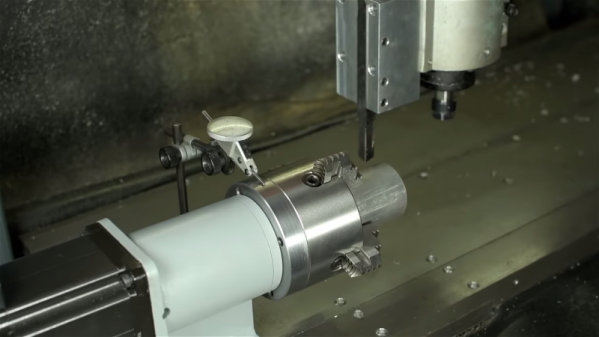
Luckily, there’s a fix that won’t necessarily break the bank: adding a fourth axis to your CNC router. [This Old Tony] tore into his CNC router – a build we’ve featured before and greatly admire – to add a machine spindle that lets him work with the machine much as if it was a CNC lathe. The first video below covers the mechanical part of the build, which involves welding and machining a sturdy assembly to hold a spindle connecting a four-jaw chuck to a Lexium MDrive, a stepper motor with integrated driver and feedback that makes it act more like a servo. [Old Tony] covered integrating the drive into Mach4 in a previous video.

The assembled machine spindle is a beefy looking affair that can smoothly ramp up to 3000 rpm and has decent enough holding torque to allow it to act as an indexing head in addition to a lathe. The second video below shows some tests turning aluminum and steel; we were surprised by how aggressive the cuts can be before stalling the spindle.

No, it’s not a Tormach or Haas or even a Pocket NC, but it’s a great addition to an already capable machine, and we’re looking forward to what [Old Tony] cranks out with it.

Continue reading “Already Impressive CNC Router Gets An Extra Axis”

Indexing Chuck Not Required

Becoming accomplished with a lathe is a powerful skillset, but it’s only half of the journey. Being clever comes later, and it’s the second part of the course. Patience is in there somewhere too, but let’s focus on being clever. [TimNummy] wants a knobbed bolt with critical parameters, so he makes his own. After the break, there is a sixty-second summary of the linked video.

Making stock hardware is a beginner’s tasks, so custom hardware requires ingenuity or expensive machinery. Adding finger notches to a bolthead is arbitrary with an indexing chuck, but one isn’t available. Instead, hex stock becomes a jig, and the flat sides are utilized to hold the workpiece at six intermittent angles. We can’t argue with the results which look like a part that would cost a pretty penny.

Using material found in the workshop is what being clever is all about. Hex brass stock comes with tight tolerances on the sides and angles so why not take advantage of that?

[TimNummy] can be seen on HaD for his Jeep dome light hack and an over-engineered mailbox flag. Did you miss [Quinn Dunki]’s piece on bootstrapping precision machine tools? Go check that out!

Continue reading “Indexing Chuck Not Required”

Safely Remove Drill Chuck; Receive Motor, Gearbox, And Clutch

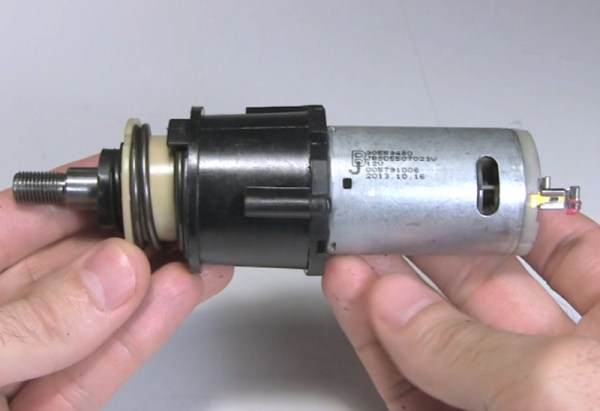
There’s a treasure trove of usefulness inside of an electric drill. [Steven Dufresne], Hackaday writer and the mad scientist behind Rimstar.org, kindly documented how to safely and reliably remove the chuck from a drill motor. You may think this is easy, but once in a while you’ll come across a drill determined to hold onto all its bits. We certainly were entertained by the lengths [Steven] went to in the video below to get a Black and Decker to give up its chuck.

An understanding of how the chuck and gearbox are connected, combined with the right tools and a bit of force, gets you a motor, gears and gearbox, and a clutch. There’s not much left in the drill after that, and you can put some or all of those components to new use — like using them for the drive system of a BB-8 Droid.

Many projects (like this walking scooter) make use of cordless drills as motor sources. Being able to skip the chuck in order to interface directly to the shaft is useful for those projects where the drill is at least a semi-permanent part of the build. Ask your friends, neighbors, and at work. Cheap cordless drills and screw guns have been around for a long time. It’s usually the batteries that go and many people have the drills lying around and will be happy to part with them knowing you’re going to do something awesome with them.

Continue reading “Safely Remove Drill Chuck; Receive Motor, Gearbox, And Clutch”

Mapping WiFi Signals In 3 Dimensions

[Charles] is on a quest to complete ever more jaw-dropping hacks with the popular low-cost ESP8266 WiFi modules. This week’s project is plotting WiFi received signal strength in 3D space. While the ESP8266 is capable of providing a Received Signal Strength Indication (RSSI), [Charles] didn’t directly use it. He wrote a simple C program on his laptop to ping the ESP8266 at around 500Hz. The laptop would then translate the RSSI from the ping replies to a color value, which it would then send to the ESP8266. Since the ESP8266 was running [Charles’] custom firmware (as seen in his WiFi cup project), it could directly display the color on a WS2812 RGB LED.

The colors seemed random at first, but [Charles] noticed that there was a pattern. He just needed a way to visualize the LED over time. A single frame long exposure would work, but so would video. [Charles] went the video route, creating SuperLongExposure, an FFMPEG-based tool which extracts every video frame and composites them into a single frame. What he saw was pretty cool – there were definite stripes of good and bad signal.

wifiPOVThumbArmed with this information, [Charles] went for broke and mounted his ESP8266 on a large gantry style mill. He took several long exposure videos of a 360x360x180mm area. The videos were extracted into layers. The whole data set could then be visualized with Voxeltastic, [Charles’] own HTML5/WEBGL based render engine. The results were nothing short of amazing. The signal strength increases and decreases in nodes and anti-nodes which correspond to the 12.4 cm wavelength of a WiFi signal. The final render looks incredibly organic, which isn’t completely surprising. We’ve seen the same kind of image from commercial antenna simulation characterization systems.

Once again [Charles] has blown us away, we can’t wait to see what he does next!

Continue reading “Mapping WiFi Signals In 3 Dimensions”

Mug Music Is Good To The Last Drop

[Bonnie] is majoring in CS at Princeton and minoring in Awesome. She is taking an electronic music class and had to produce a digital instrument for her midterm project. She and her friend [Harvest] came up with Mug Music, which turns a ceramic mug of water into an instrument.

The circuit is very easy to replicate with an Arduino, a coil, and a few resistors and capacitors. [Bonnie] wanted to experiment with Disney Research Lab’s Touché method of touch detection, and Mug Music is based on this Touché for Arduino Instructable. The inputs are turned into MIDI notes with ChucK, a real-time sound synthesis language developed at Princeton.

As you may have guessed and will see in the demonstration video after the jump, you aren’t limited to touching the water. The entire mug will produce sounds as well. [Bonnie] says you can trigger a thunderclap if you touch the water and a grounded surface simultaneously.

This would be a great project to explore with kids, especially as a music therapy vehicle for kids on the autism spectrum. It isn’t as physical as these portable musical stairs, but it may draw less attention from lawyers.

Continue reading “Mug Music Is Good To The Last Drop”