New Dynamic Duo, Arduino And Eclipse

There are a lot of solutions to programing an Arduino: the default avr-g++, Studio, etc. But [Sandeep] let us know about using one of the more powerful IDEs out there, Eclipse, to do the same. We’ve already outlined why Eclipse is a great IDE but now the fact that you can use it in your MCU based projects adds to its usefulness and already large feature list. However, don’t be turned off by [Sandeep’s] tutorial. While it is aimed at people who are completely new to setting up an IDE and working with an AVR, the tips certainly can benefit even the most experienced hacker.

XT IDE Controller

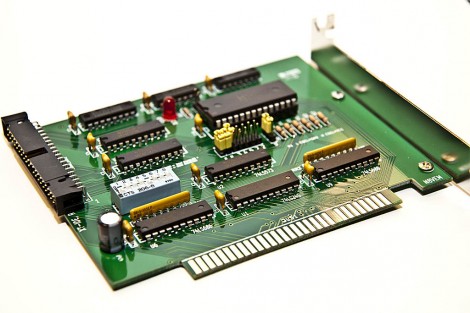
[Geordy] wanted to use some IDE devices but he didn’t have an interface card for his XT system, which can’t handle 16-bit  IDE. He looked around for 8-bit ISA controllers but they were hard to find and quite expensive. Lucky for him there’s an open source project that makes a solution to this problem. The XTIDE project brought together a group of vintage computing enthusiasts to design this ISA card. [Geordy] was even able to order a professional PCB from one of the forum members. He ordered the parts an soldered it together, costing about $30 total. He had a friend help him burn the code to the EEPROM but that’s easy enough to do with an Arduino, Bus Pirate, or one of several other methods. Now his grand plans at installing DOS 6.22 have been realized.

Adding Compact Flash To An Old Sequencer

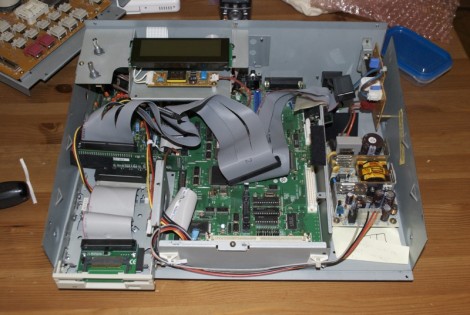
[Shoji] has a beloved sequencer that went out of production ten years ago. Unfortunately the storage options are also 10 year out-of-date as SCSI is the stock option for storing his loops. Using a series of adapters he added Compact Flash storage to his Akai MPC-2000 Classic. The board has a connector for 25-pin SCSI which he wired to a 25-pin to 50-pin SCSI adapter. From there he connects a SCSI to IDE board, and then an IDE to CF. Subsequent versions of the Akai Classic have floppy drives in the front left corner so he used this method to mount he CF slot. Now he’s got plenty of storage with very little change to the appearance of the looper.

ATmega Controller Wiring Upgrade

avrcontroller

[jelengar] liked the ease of use of the Arduino, but wanted a much higher pin count. He set about converting the ATmega Controller for use with Wiring, the code that the Arduino IDE is based on. The ATmega128 in the controller features 53 pins as opposed to the 11 on the Arduino’s ATmega168. You also get 128kb of memory. The process is fairly simple; you just need to add the appropriate crystal. You can also add a switch to trigger the bootloader and a status LED.