Extending Battery Life While Taking Time Lapse Photos

msp430_camera_control

[Peter] loved using his GoPro HD camera, but he found the time lapse functionality a bit lacking. It wasn’t that there were not enough settings to satiate his needs, but that the camera would run through its batteries in just a few short hours.

He found that the camera did not turn off or enter any sort of sleep mode between shots, wasting precious battery life. He could have simply added a bigger external battery pack to the camera, but for the sake of portability, he had a far better idea in mind.

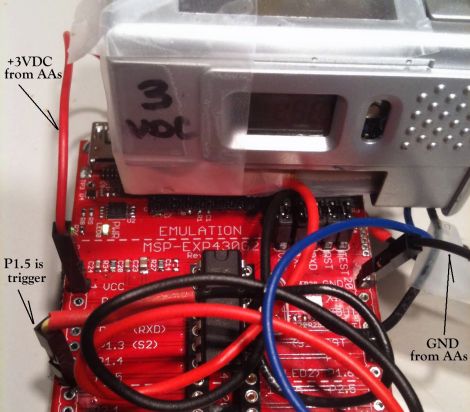
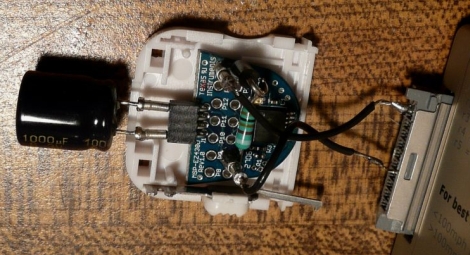
The GoPro has a pretty well documented interface called the “Hero Bus”, so all it took was a little bit of online research before [Peter] had all the information he needed. The camera has a neat feature that immediately snaps a picture when it is powered on, so he decided that he would use a microcontroller to turn the camera on and off at specific intervals, rather than using its built-in time lapse function. He chose a Texas Instruments MSP430 for the job, since it is very well known for being a power miser.

Once he had his code up and running, he connected it to his camera and found that it worked perfectly right off the bat. Now, he can take anywhere between 1,500 and 2,000 shots before the batteries run out, instead of the measly 200 he was getting without the modifications – quite an improvement!

[Bunnie] Mods Chumby To Capture Epic Time-lapse Video

When [Bunny] moved into his apartment in Singapore he was surprised to find that a huge building project was just getting started on the other side of the block. Being the curious sort, he was always interested in what was going on, but just looking in on the project occasionally wasn’t enough. Instead, he set up a camera and made a time-lapse video.

This isn’t hard, you can find a slew of intervalometer projects which we’ve covered over the years. But being that [Bunnie] is one of the designers of the Chumby One, and frequently performs hacks on the hardware, it’s no surprise that he chose to use that hardware for the project.

Luckily, he’s sharing the steps he used to get Chumby capturing images. He mentions the hardest part is finding a compatible USB camera. If you have one that works with a 2008 Linux kernel you should be fine. The rest is done with shell scripts. Mplayer captures the images when the script is called from a cron job. Once all the frames are captured, he used mencoder to stitch the JPEGs into a movie. See the result after the break.

Continue reading “[Bunnie] Mods Chumby To Capture Epic Time-lapse Video”

Using An MSP430 For Time Lapse Photography

vistaquest_keychain_timelapse_msp430

Hackaday reader [onefivefour] had an old VistaQuest VQ1005 keychain camera kicking around, and wanted to do something useful with it. A while back he hooked up a 555 timer and did a bit of time lapse photography, but he wanted more control over the process. Specifically, he desired the ability to tweak the delay between shots in a more granular fashion, as well as way to prevent the VistaQuest from going to sleep after sitting idle for 60 seconds.

His weapon of choice to get this task done was an MSP430, since the microcontroller can be found quite cheaply, and because it is relatively easy to use. He added a few header pins to the LaunchPad board wiring them up to the camera’s trigger as well as the on/off switch. When the wire connected to the trigger is pulled low, the camera snaps a picture. The wire connected to the on/off switch is always held low, ensuring that the camera is on and ready to go whenever it’s time to take a shot.

It’s a relatively simple project, but definitely useful. While there are many ways to build an intervalometer, the MSP430 is a great platform to use, especially for beginners.

Stick around to see a quick video [onefivefour] put together, showing off his time lapse rig’s capabilities.

Continue reading “Using An MSP430 For Time Lapse Photography”

Megavallometer Camera Trigger

megavallometer_camera_trigger

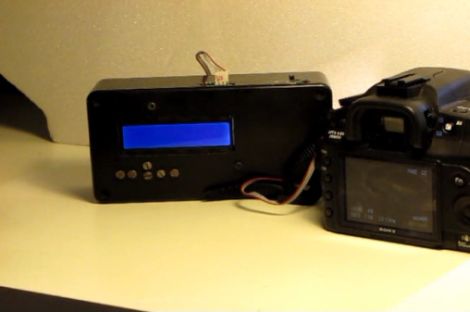
[Tobe] has an intervalometer for his camera, but he wanted a device that could trigger the shutter using several different methods, not just time. He calls his creation the Megavallometer, which can utilize any one of three distinct criteria.

He recently purchased an Arduino and a couple of shields, so he figured this would be a perfect project in which to use them. He hooked up a microphone and a photodiode to the Arduino, allowing him to use both sound and light to trigger his camera, depending on which mode he selects. Of course, the Megavallometer still incorporates the functionality of a standard intervalometer as well.

Once connected to his camera he selects one of the three trigger programs, and the Arduino handles the rest. If either the light or sound triggers are selected, the respective sensors measure the ambient levels upon selection, allowing for accurate results in any setting.

While the Megavallometer is a bit larger than other intervalometers we have seen, it looks incredibly useful and can likely be strapped to a tripod or similar if need be.

If you have a minute, be sure to check out the video on his site for a sneak peak if his Megavallometer in action.

Tiny Hardware-based DSLR Intervalometer

diy_dslr_intervalometer

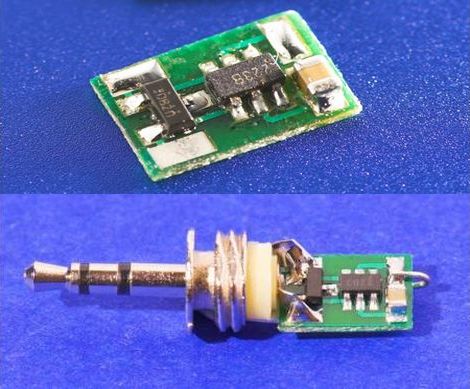
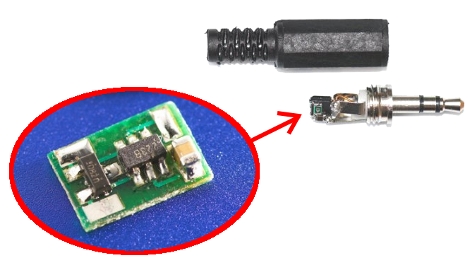
Most DSLR cameras have the ability to take pictures at set intervals, but sometimes the menu system can be clunky, and the options are often less than ideal. [Achim] is a big fan of time lapse photography and has been hard at work creating a hardware-based intervalometer to suit his needs. He has just finished the second revision of the controller which is just about small enough to fit inside the housing of a 2.5mm stereo plug. The timer is not 100% universal, but so far he has confirmed it works on Nikon, Canon, and Pentax cameras.

Based on a PIC10F222, the circuit’s operation is quite simple. Once the dongle is connected to your camera, you simply need to take two pictures anywhere from 0.4 seconds to 18 minutes apart. The intervalometer “watches” to see how long you waited between pictures, and proceeds to take shots at that interval until the battery dies or your memory card fills up.

As you can see in the video on his site, the timer works a treat. If you want to make one of your own, swing by his site to grab schematics and code – it’s all available for free.

*Whoops, it looks like we’ve actually covered this before. Our apologies.

Triggering A DSLR Shutter With An Audio Clip

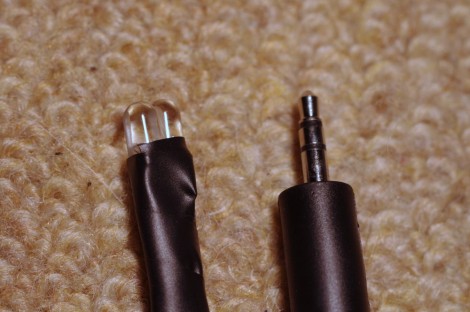
Apparently Pentax DSLR cameras have a remote shutter option that used infrared signals. [Pies for you] gathered up several different hacks and built a method of triggering the camera using custom audio. He put together the dongle above, just a headphone extension cord and two IR LEDs, which plugs into the headphone jack of any audio device like an iPod or an Android phone. When you play back a file the audio signals drive the IR LEDs. This is completely worthless unless you craft your own audio file using the correct frequency, duty cycle, and bit encoding. [Pies for you] did just that and got things up and running. Looks like the system doesn’t do so well with MP3 compression, but take a look at the waveform analysis that he posted and then make sure you’re using a lossless format.

Miniscule Intervalometer

Calling this intervalomemter small would be a glaring understatement. It’s tiny enough to fit inside the plastic cover for a 2.5mm jack for use with a Canon DSLR camera. We should point out that the image we put together is a bit misleading. The picture of the jack is version 1 of this circuit and uses an 8-pin SOIC chip. The board in the oval is version 2, with a PIC 10f222 SOT23-6 package making it even smaller than the original version.

This is used for time-lapse photography. When plugged in the chip draws power from the camera. Get this: it learns the timing interval by listening for the first two images. Once you’ve snapped the first two pictures the PIC will continue to take images based on that initial delay. Amazing.

[Thanks AW via DIY Photography]