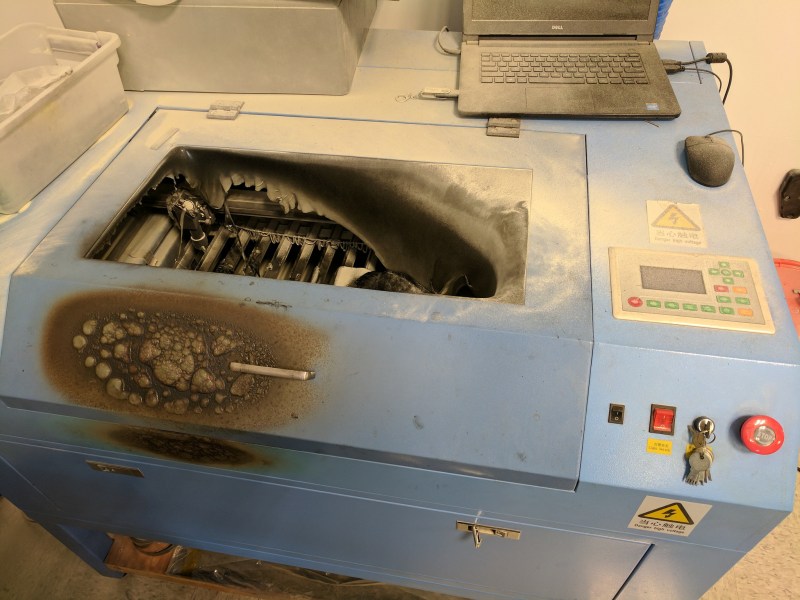
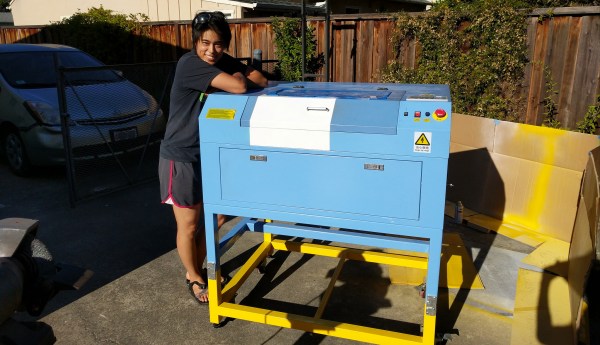
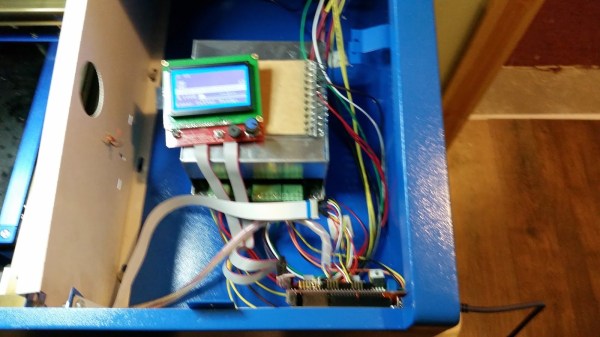
Trash is relative. When my coworker accidentally lit an ABS-barbecue inside the company laser cutter, he made trash. The wreckage was headed for the dump, but I managed to save it and pass it on to my friend [Amy]. Four months later, she phoenixed it back to life from the trash-it-was to a glorious new system more powerful than the original. This is her story, carefully told in detail in a three-part series (part one, part two, part three) that takes us on a journey from trash to triumph. She even recorded video of the entire process (also embedded below)
Get your notes out because while [Amy] spares every expense to keep this project cheap, she spares no expense at laying out the details for anyone’s path to success when working with these beasts.

As far as origin stories go, our story starts at my last employer’s office. I was in the machine shop asking one of our MechEs a question when the intern points a finger towards the corner of the room and asks: “hey is that supposed to be on fire?” I turn around to see billowing flames coming from our budget Chinese laser cutter. “Nope!” I say. “We need a fire extinguisher!” But our MechE was already on it. In half a moment he returned with an extinguisher. With one squirt the fire was out, but the machine was caked with a nasty powdery debris. It turns out another coworker had committed the almighty sin of laser cutting: he turned it on and walked away. Better yet, it was cutting ABS with a disconnected air nozzle.
This cutter was headed to the dump, but a few shenanigans later, I managed to divert this heap to [Amy]. The paint job was an absolute disaster on the outside, and the gooey ABS-and-powder mixture had caked over the inside. [Amy] dug in, stripping off the paint flakes and re-coating it. Apart from the belts, she salvaged every other part inside the machine. Her secret: “IPA and steel wool.” From there, she built her own fume extractor and lofted the whole system onto a frame she welded herself so that she could push both extractor and cutter around her wood shop as a unit. These days, it’s seeing some mileage for cutting out jigs for her woodworking projects.
Perhaps what’s truly special about this project is that she restored it with the camera rolling. As if building projects isn’t hard enough, getting the right lighting and camera angles while you’re doing the work is even more work! There’s no drop-down lofted camera setup in her garage, so each documented step is carefully set up so it captures what’s happening onscreen. While the IPA-and-steel wool might’ve been one nifty trick, by the end of these videos you’ll find that there really aren’t any secrets: just one engineer who sees the dignity in a project done well and has the patience to carry it out.
Get to know [Amy] on her blog, and you’ll discover the true finesse of her scavenging and engineering wielded hand-in-hand. From Ukuleles borne of fallen tree branches to a garage woodshop bootstrapped from a series of Craigslist adventures, it’s no surprise that a broken laser cutter would find a new life when it landed in her hands.
Continue reading “Laser Cutter Resurrection Uncovers A Magnificent Machine Beneath The Ash”


