As difficult as it is for a human to learn ambidexterity, it’s quite easy to program into a humanoid robot. After all, a robot doesn’t need to overcome years of muscle memory. Giving a one-handed robot ambidexterity, however, takes some more creativity. [Kelvin Gonzales Amador] managed to do this with his ambidextrous robot hand, capable of signing in either left- or right-handed American Sign Language (ASL).
The essential ingredient is a separate servo motor for each joint in the hand, which allows each joint to bend equally well backward and forward. Nothing physically marks one side as the palm or the back of the hand. To change between left and right-handedness, a servo in the wrist simply turns the hand 180 degrees, the fingers flex in the other direction, and the transformation is complete. [Kelvin] demonstrates this in the video below by having the hand sign out the full ASL alphabet in both the right and left-handed configurations.
The tradeoff of a fully direct drive is that this takes 23 servo motors in the hand itself, plus a much larger servo for the wrist joint. Twenty small servo motors articulate the fingers, and three larger servos control joints within the hand. An Arduino Mega controls the hand with the aid of two PCA9685 PWM drivers. The physical hand itself is made out of 3D-printed PLA and nylon, painted gold for a more striking appearance.
This isn’t the first language-signing robot hand we’ve seen, though it does forgo the second hand. To make this perhaps one of the least efficient machine-to-machine communication protocols, you could also equip it with a sign language translation glove.
Arduino Mega 256027 Articles
2024 Home Sweet Home Automation: A DIY SCADA Smart Home
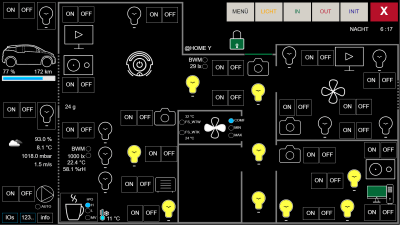
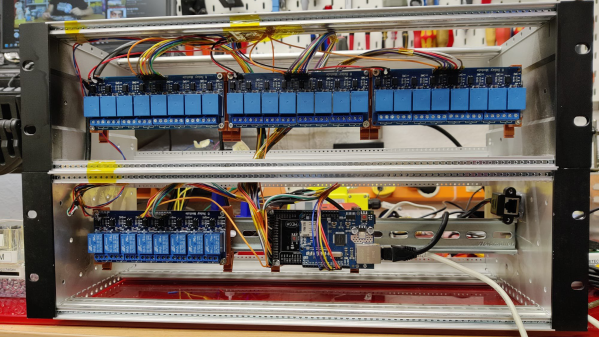
Supervisory control and data acquisition, or SCADA, systems sit in the background in industrial settings, performing all kinds of important jobs but in an ad-hoc setup, depending on the precise requirements of the installation. When we think about home automation systems, they’re pretty much the same deal: ad-hoc systems put together from off-the-shelf components and a few custom bits thrown in. [Stefan Schnitzer] clearly has significant knowledge of SCADA in an industrial setting and has carried this over into their home for their entry into the Hackaday 2024 Home Sweet Home Automation Contest. Continue reading “2024 Home Sweet Home Automation: A DIY SCADA Smart Home”
2023 Cyberdeck Contest: A Toddler’s Cyberdeck
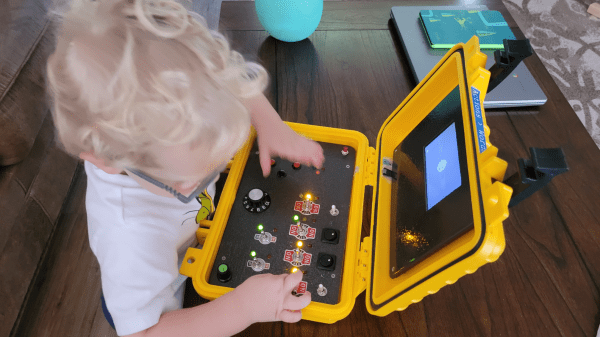
[Josh] has a child and what do children like more than stuffing random things into their mouths? Pushing buttons, twiddling knobs, and yanking things of course! So [Josh] did what any self-respecting hacker would do and built his little man a custom cyberdeck.
The build follows the usual route of some electronics wedged into a pelican-style waterproof case — which is a good choice for this particular owner — a repurposed all-in-one LCD video player in the lid and a bunch of switches in the base. The player is apparently a V100-base SBC the likes of which are used in shops for those annoying looping promotional videos, but it doesn’t really matter if all it’s doing is being a focus point.
There is no connection from the base to the ‘display’ but that doesn’t matter here. The base is the fun part, with lots of old-school toggle switches and rotary knobs to play with and a load of LEDs to flash in mysterious ways. The guts of this are controlled via an Arduino Mega 2560, with copious amounts of hot glue on display in true hacker style. On the coding side of things, [Josh] used ChatGPT to produce the code from his prompting and Wokwi to simulate it before deployment to the hardware.
Arctos Robotics: Build A Robot Arm Out Of 3D Printer Spares?
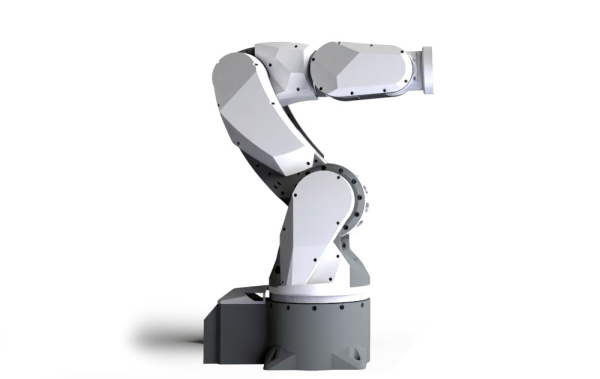
ARCTOS is a 6-DOF robot arm based upon 3D printed mechanics running a modified version of GRBL firmware. Let’s get this straight now, the firmware is open source, but the hardware plans are a paid download, but for less than forty euros, we reckon the investment would be well worth it, judging from the quality of the build instructions and the software support already in place. Continue reading “Arctos Robotics: Build A Robot Arm Out Of 3D Printer Spares?”
Kino Wheels Gives You A Hand Learning Camera Operation
Have you ever watched a movie or a video and really noticed the quality of the camera work? If you have, chances are the camera operator wasn’t very skilled, since the whole point of the job is to not be noticed. And getting to that point requires a lot of practice, especially since the handwheel controls for professional cameras can be a little tricky to master.
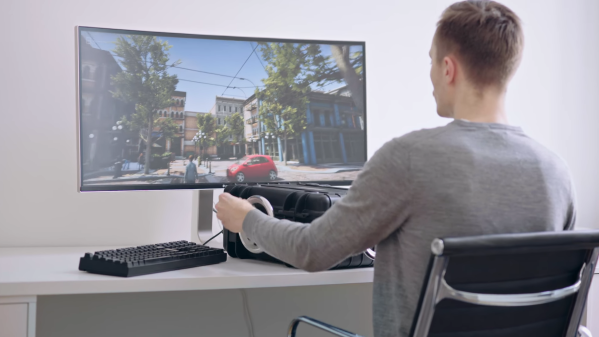
Getting the hang of camera controls is the idea behind [Cadrage]’s Kino Wheels open-source handwheels. The business end of Kino Wheels is a pair of DIN 950 140mm spoked handwheels — because of course there’s a DIN standard for handwheels. The handwheels are supported by sturdy pillow block bearings and attached to 600 pulse/rev rotary encoders, which are read by an Arduino Mega 2560. The handwheels are mounted orthogonal to each other in a suitable enclosure; the Pelican-style case shown in the build instructions seems like a perfect choice, but it really could be just about anything.
To use Kino Wheels, [Cadrage] offers a free camera simulator for Windows. Connected over USB, the wheels control the pan and tilt axes of a simulated camera in an animated scene. The operator-in-training uses the wheels to keep the scene composed properly while following the action. A little bit of the simulation is shown in the brief video below, along with some of the build details.
While getting camera practice is the point of the project, that’s not to say Kino Wheels couldn’t be retasked. With a little work, these could be used to actually control at least a couple of axes of a motion control rig, or maybe even to play Quake.
Continue reading “Kino Wheels Gives You A Hand Learning Camera Operation”
Aqua PCB Is A Big Upgrade For The Mattel Aquarius
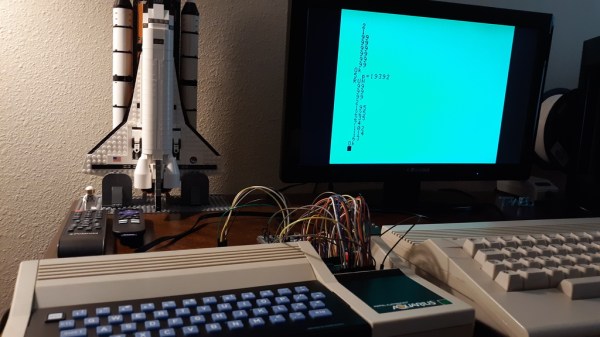
In case you weren’t around in the 80s, or you happened to blink, you may have missed the Mattel Aquarius computer. [Nick Bild] has a soft spot in his heart for the machine though and built the Aqua cartridge to make the Aquarius into a more usable machine.
Originally equipped with a mere 4 KB of RAM and a small, rubbery keyboard, it’s not too surprising that the Aquarius only lasted five months on the market. [Nick] decided on the cartridge slot to beef up the specs of this little machine given the small number of expansion ports on the device. Adding 32 KB of RAM certainly gives it a boost, and he also designed an SD card interface called Aqua Write that connects to the Aqua cartridge for easily transferring files from a more modern machine.
The Aqua Write uses an Arduino Mega 2560 to handle moving data between the SD card and the system’s memory. This is complicated somewhat because a “PLA sits between the Z80 and data bus that XORs data with a software lock code (initialized to a random value on startup).” [Nick] gets around this by running a small program to overwrite the lock code to zero after startup.
Getting data on and off retrocomputers can certainly be a challenge. If you’re trying to get files on or off another old machine, check out this Simple Universal Modem or consider Using a Raspberry Pi as a Virtual Floppy Drive.
TRS-80 Model 100 Gets Arduino Heart Transplant
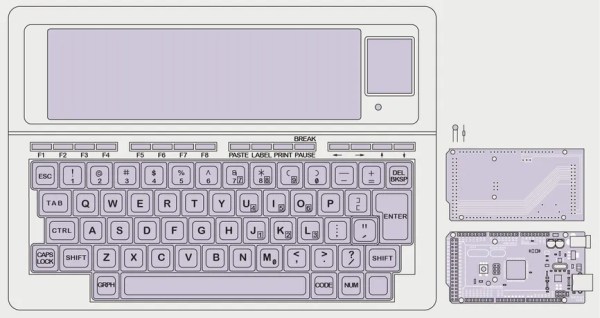
When [Stephen Cass] found himself with a broken Tandy TRS-80 Model 100 portable computer, the simplest solution was to buy another broken one and make one working computer from two non-working computers. However, this left him with a dilemma — what to do with the (now even more) broken one left over?
Naturally, he did what a lot of us would do and used modern hardware to interface with the original parts that still work. In this case it meant replacing the motherboard with an Arduino Mega 2560.
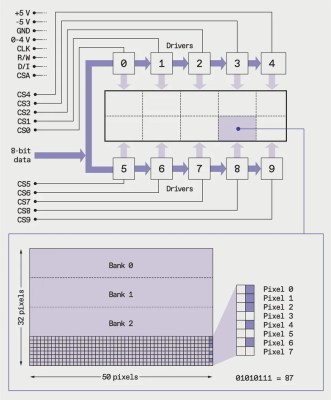
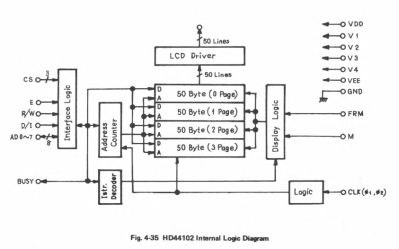
Luckily, the Model 100 has a substantial fanbase and there’s a lot of helpful information available online, including the detailed service manual, that helped [Stephen] to understand how to drive the unusual display. The LCD has a resolution of 240×64 pixels, which are broken down into eight zones of 50×32 pixels, and two zones of 40×42 pixels. Each zone is then further divided into four banks, eight pixels tall, so that each column of eight pixels corresponds to a single byte.
Every one of the ten zones is controlled by an individual HD44102 driver IC, connected to a 30-bit wide bus for selecting the correct chip, bank and column.
With the Arduino handling the data, the old LCD still needed a -5 V supply for contrast and an RC filter to smooth out the PWM signal [Stephen] is using to adjust the viewing angle.
With the new interface, [Stephen] is able to access all of the pixels on the original display, and to use modern graphics libraries such as displayio. With the display issue solved, he intends to use a separate Teensy 4.1 to connect with the keyboard matrix and provide a VT100 terminal interface.
Upcycling old, broken hardware can be a lot of fun and is always educational. Understanding why certain design decisions were made at a time when the engineering trade-offs were different can lead to insights that are directly relevant to modern designs when resources get tight. In this case, the quirky LCD drivers were a response to making the display of text as efficient as possible, so as not to overburden the processor.
The TRS-80 computers are ripe for hacking, with their “built-for-service” designs, and we’ve featured a few in the past. Some have replaced the motherboard with something newer, like [Stephen], whereas others have also replaced the display, or connected them to the cellphone network.
Have you found new ways to get old hardware working? Tell us in the comments below or send us a message on the Hackaday tips line.
Thanks to [nb0x0308] for the tip!


