Fitting 3D Prints On Eagle Boards

One of the hardest things you’ll ever do is mesh your electronic design with a mechanical design. Getting holes for switches in the right place is a pain, and if you do it enough, you’ll realize the beauty of panel mount jacks. This is especially true when using Eagle to design a PCB, but with a few tricks, it’s possible to build 3D printable pieces directly from Eagle designs.

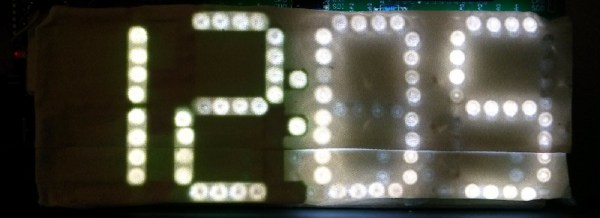
[Tyler] built a clock with a bunch of LEDs. While the clock worked great, there was a lot of light leakage around the segments of his custom seven-segment numbers. The solution is a light mask, and [Tyler] figured out how to make one in Eagle.

The first step is to draw a new layer on the Eagle board that defines the light mask. This is exported as an EPS file in the CAM processor that gives him a 2D drawing. At least it’s to scale.

The next step is to install Inkscape and install paths2openscad. This turns the two-dimensional drawing into a 2D object that can be rendered in OpenSCAD and exported as a 3D printable STL file.

Does the project work? The results are great – the entire light mask is a single-wall print, and since this light mask doesn’t need any mechanical strength, it should hold up well. The clock looks much better than before, and [Tyler] has a new technique for making 3D objects for his 2D PCBs.

Learn 40 Years Of Mech Prototyping At Lightspeed

So, what are you doing for the next five and a half hours?  If you’re as busy as we are, you might have to digest this amazing 18 part series of videos over the course of a week or so, but we can almost guarantee you’ll learn a lot. It’s a speedrun through the best collection of Mechanical Engineering knowledge we’ve every come across.

In this epic Youtube video series [Dan Gelbart] shares his knowledge of 40 years of prototyping mechanical designs in a way we’ve never seen before. Not only does he show you how to build things, but he gives away a life time of “tips and tricks” that only a veteran builder would know. There are so many little gems of wisdom in this video series, it’s hard to know where to start with our description. He covers all the usual topics: everything from materials, adhesives, coatings, and such. But the real value of this series is all the little trinkets of information he shares along the way.

Don’t be intimated by some of the tools he’s using – chances are there is a DIY version of the piece of equipment out there, and often you can find a hackerspace or enthusiast in the area who will help you out with their gear. We think this video series should be a must watch for any engineering student or hacker. We made a video playlist for you so you can start watching the videos after the break.

Continue reading “Learn 40 Years Of Mech Prototyping At Lightspeed”

Checking Populated PCB Clearance With A 3D Printer

Laying out one PCB, sending it out to a fab, stuffing it with components, and having the whole thing actually work when you’re done is a solved problem. Doing the same thing and having it plug in to another PCB… well, that’s a bit harder. Forget about building a PCB and having it fit inside an enclosure the first time.

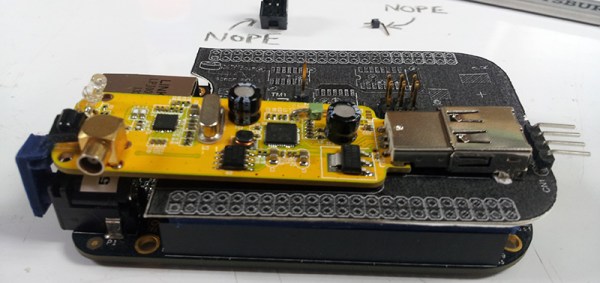
The usual solution to this problem is printing the board to be fabbed on a piece of paper, take some calipers, and measure very, very carefully. Extra points for sticking a few components you’re worried about to the paper before lining the mechanical prototype up to the existing board. [N8VI] over at the i3 Detroit hackerspace had a better idea – print the whole thing out on a 3D printer.

[N8VI] is working on a software defined radio cape for a BeagleBone. He was a bit concerned about a few caps getting in the way of a board stack. This was tested by printing out a bit of plastic in the shape of the new board, adding header spacers and parts that might be troublesome.

While the idea is great, there’s not much in the way of a software solution or a toolchain to make plastic copies of completed boards. We know rendering 3D objects from KiCAD is rather easy, but there aren’t many tools available for those of us who are still stuck with Eagle. If you know of a way to print populated boards, drop a note in the comments.

Clever Stair Climbing Robot

[youtube=http://www.youtube.com/watch?v=QReb1hLfdbE]

Stairs are one of the most commonly faced mobility challenges for a robot. This robot’s design eliminates the need for a complex drive train or computer, and instead uses a clever mechanical design to climb stairs. Version three of the robot uses five servos modified for continuous rotation, a Picaxe28, sharp IR sensors, and bump sensors.

[via BotJunkie]