NES Controller Cannibalized For MP3 Player Enclosure

We know some folks are very upset by the scrapping on vintage hardware, so let’s all observe a moment of silence for this NES controller.

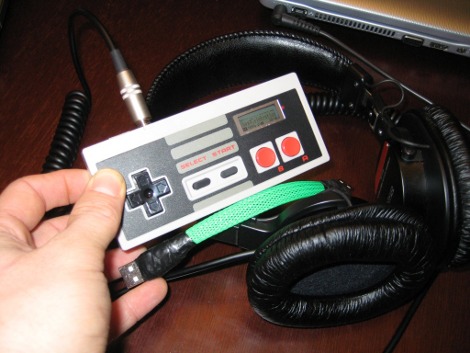
Now that that’s behind us we can live vicariously through [Burger King Diamond’s] project. He polished up the NES controller and repurposed it as an enclosure for a portable MP3 player.

His first step was to remove some of the yellowing of the plastic using Retr0brite. He admits it wasn’t bad to start with but now it’s sparkling like new. Next, he started planning how everything would fit in the case. Luckily the MP3 player operates with one AAA battery which leaves plenty of room.

Just above the A and B buttons you can make out an opening that he cut in the case for the MP3 player’s LCD screen. The bezel from the original case works well for cleaning the rough cut opening. The buttons on the controller have been patched into the controls on the MP3 board, and the opening for the controller’s cable now holds the headphone jack. There’s also a USB port mounted next to it for easy file transfers.

The one thing we would like to see is a rechargeable battery so you don’t need to open the case to top off the power. But all in all this is a fantastic build!

Adding Sound To Children’s Museum Exhibits

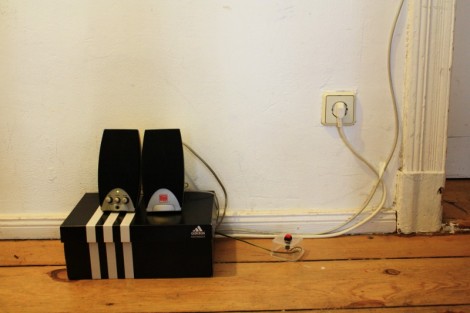
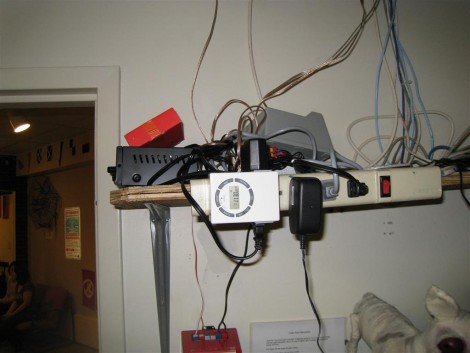
Believe it or not, the local Children’s Museum staff was happy that [Bill Porter] left this mess of wires and equipment in one of their offices. It makes up an ambient sound system for a couple of their exhibits. A movie without sound just doesn’t fully entertain, and the same can be said for these exhibits. The ambient sound that goes with a boat room, and a hospital room in the Museum really helps to snag your attention. And [Bill’s] material cost came in at just over $200 for both rooms.

He started off by purchasing a speaker, amp, and MP3 breakout board (SparkFun). The speaker mounts in one of the ceiling tiles, with the wire running to a different room where the audio equipment is housed. There were a couple of problems with this; the museum staff forgot to turn on the system, and for all of its expense this only provided one room with audio. Bill figured that since only one speaker was being used he could make an audio file with a different clip on the left and right channel, then feed them to different rooms. He also added that programmable timer so the sounds will turn themselves on and off.

This isn’t the first time we’ve seen hacks end up as museum pieces. Check out this other project that rigs up some interactive telephones.

$3 Adds Sweet Tunes To Your Project

It’s a fun time to design your own MP3 player, lovingly adding in features to a meticulously crafted user interface. But sometimes you just want a quick and cheap way to add music to a project. [Jeff Ledger] will show you how to do just that using some knock-off hardware from overseas. Instead of a proper breakout board — which can cost a bundle — he used a generic MP3 player acquired for $3 from an eBay seller.

Cracking open the case you’ll see that you actually get a lot for your triad of Washingtons. We know, it may be of questionable quality (see this feature about cheap PSU problems) but we’re not building mission critical hardware now are we? Inside is a rechargeable Lithium battery for use with another project, and a chip-on-board device with attached SD card slot, audio jack, and USB port. The battery inputs are used to solder the MP3 pcb to the power rails on your project. To control the playback, just make connections to the button pads as [Jeff] describes in his post. It sounds like this will work with any MP3 player which runs at either 3.3V or 5V.

Sound-reactive EL Wire Box Makes Gift Giving Awesome

sound-reactive-el-wire-display

[Jonathan Thomson] was ruminating on EL wire displays and decided that most he has seen are boring, static fixtures or installations that simply flash EL wire on and off at a fixed rate. He thought that EL wire has far more potential than that, and set off to build something more exciting. Using a graphic equalizer T-shirt, with which we’re sure you are familiar, he put together a slick, sound-reactive EL wire display.

He started off by removing the EL panel and inverter from the aforementioned T-shirt, separating the display into two pieces. He set aside the panel and focused on wiring up the inverter’s ribbon cable to a set of EL wire strands he picked up for the project. Once he had everything hooked up, he put a design together on a cardboard box, which he intended to use for wrapping Christmas presents. With the holiday behind him, [Jonathan] broke down his original display and constructed another to offer up some fun birthday wishes.

While the EL inverter was originally built to display sounds detected by an onboard mic, [Jonathan] added a 3.5” stereo jack to his so that he can feed audio directly into the display using an MP3 player.

Continue reading to see the EL display in action, and be sure to check out his writeup if you are looking to spice up your gift giving this year.

Continue reading “Sound-reactive EL Wire Box Makes Gift Giving Awesome”

Tiny MP3 Module Is Perfect For Your Next Project

tiny_embedded_mp3_module

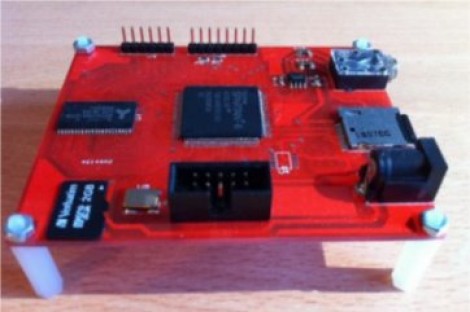
If your next project needs the ability to play MP3s but you don’t have a lot of room to spare in your enclosure, [Boris] has just the thing you need. His tiny embedded MP3 module supports playback of up to 65,536 songs or as many as you can fit on a 16GB microSD card, which isn’t bad in the least.

The module relies on a PIC24F for input and control, while a VS1011 handles all of the MP3 decoding responsibilities. He says that the module would be great for voice-enabled vending machines, telephone systems, cars, and more.

With such a wide range of possible applications, he decided that the module should be able to support several different input methods. The board can be controlled via a set of digital input buttons, which is perfect for direct human interaction, while it also supports serial control for scenarios where it is part of a larger embedded system.

Of course, we’ve seen tiny MP3 players like this before, but we like the fact that this module was designed to operate in standalone mode or as a component in a larger device. Of course all of the device’s schematics, code, and a BoM are available, allowing you to build your own if you are comfortable with SMD soldering.

Remote-controlled VMUSIC2 Audio Player

ir_controlled_vmusic2_audio_player

[Ron] was looking for a way to play his MP3s around the house without having to use his computer. He also wanted the ability to remotely control his tunes with an old camcorder remote he had sitting around – not exactly a feature you would find in an off the shelf personal audio player.

Ultimately, he decided to construct his own remote-controlled audio player using a VMUSIC2 audio module, which can decode MP3s from any standard USB drive. The VMUSIC2 is controlled by a Propeller demo board, which also handles receiving and decoding IR signals from his camcorder remote. While he was originally dumping ID3 tag data to his computer for debugging purposes, he recently added an LCD screen for displaying song information in a more useful manner.

The MP3 player seems to work pretty well if the video below is any indication, though it’s begging for a nice enclosure to tie things together. We like the project so far, so we’re sure [Ron] won’t fail to impress when it’s completely finished.

Continue reading “Remote-controlled VMUSIC2 Audio Player”

Restoring A Jukebox With An Arduino

[Jim] just finished restoring an old Seeburg USC1 jukebox for his father using an Arduino, replacing an electromechanical rats nest of wires. The stack of 45 records were replaced with an Arduino Mega 2560 with an Sparkfun MP3 player shield, and he jukebox lights are now controlled with 74595 shift registers. Because his jukebox isn’t taking in money, the dollar bill validator has been modified into a ‘skip song’ button, and when there are no songs in the jukebox queue, there are 500 additional songs on the SD card that will randomly play.

We’ve seen one of [Jim]’s builds before. Earlier this year he repaired a thirty year old Pachinko machine using the same Arduino + MP3 shield setup. It looks like [Jim] is pretty skilled at revitalizing bulky old electronics. The jukebox restoration is great and has a lot more class than the internet-connected touch screen monstrosities that we still pump money into.

Check out the video after the break for a walk through of this restoration.

Continue reading “Restoring A Jukebox With An Arduino”