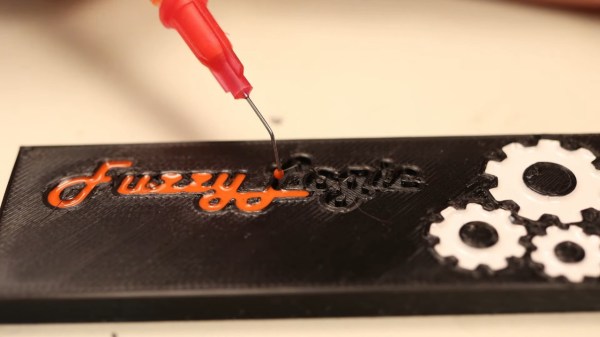
Syringe with diluted nail polish used to fill into cursive "FuzzyLogic" letters extruded into a surface of a 3D-printed block of plastic, as a demonstration.

Brighten Up Your Prints With This Nail Polish Approach

It’s not enough to 3D-print a part – there’s a myriad of things you can do from there! [FuzzyLogic] shows us his approach of adding inlay labels, icons and text to a 3D print, by extruding them into the print and filling the resulting cavity with nail polish! This makes for colorful and useful prints, as opposed to dull single-color parts we typically end up with.

The devil’s in the details, and [FuzzyLogic] has got the details down to a technique. Nail polish has to be diluted with acetone so that it flows well, and a particular combination of syringe and needle will be your friend here. Of course, don’t forget to factor surface tension in – even with well-diluted nail polish, you cannot make the grooves too thin. A bit more acetone on a q-tip helps in case of any happy little accidents, and a coat of clear acrylic spray paint seals the lettering firmly in place. The five-minute video tells you all about these things and a quite few more, like the basics of extruding text and icons in a typical CAD package, and has a bit of bonus footage to those watching until the end.

Adding markings to our prints is a lovely finishing touch! If you’re looking for more of that, here’s a custom tool-changing printer with a pen attachment making beautiful custom enclosures for the Pocket Operator.

Continue reading “Brighten Up Your Prints With This Nail Polish Approach”

Silicon Hacking


Wired recently posted an article and video detailing our friend [Chris Tarnovsky]’s process for hacking smart cards. In the video, [Chris] shows how he strips away physical components of the chips inside the smartcards using various gadgets and chemicals.

The first step is to remove the chip from its plastic frame. After soaking it in acid for about 10 minutes, the epoxy is removed and the chip is exposed. After that the outer layer is loosened by soaking the chip in two solutions of acetone, the second being the “clean” one. Then the chip is placed on a hotplate where a drop of fuming nitric acid is applied with a dropper; the chip is washed again in an ultrasonic cleaner, removing any residue left.

[Chris] then returns the chip to the card. He will apply nail polish to act as a masking material. He scratches a hole through the polish with a needle held by a micro positioner in the area of interest. The hole is treated with hydrofluoric acid and then etched in short intervals until the desired layer of silicon is exposed. At this point, the card is fully prepped.

Now by powering the chip with the needle resting on the bus, [Chris] can read the code on the chip by sending it various commands and watching how it reacts. To see more of [Chris]’s reverse engineering work, check out Flylogic Engineering’s Analytical Blog. It’s a enjoyable read even if you’re new to silicon hacking.