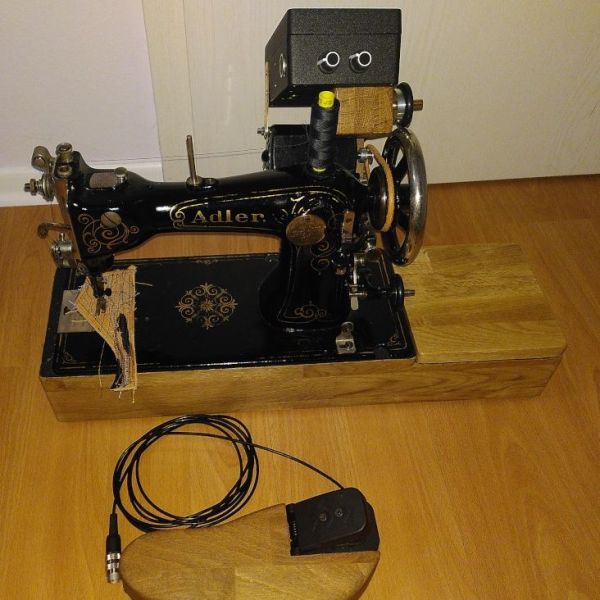
Bigfoot Turns Classic Sewing Machine Into A Leather-Eating Monster

If you try to sew leather on a standard consumer-grade machine, more often than not you’ll quickly learn its limits. Most machines are built for speed, and trying to get them to punch through heavy material at the low motor speeds often needed for leather work is a lesson in frustration.

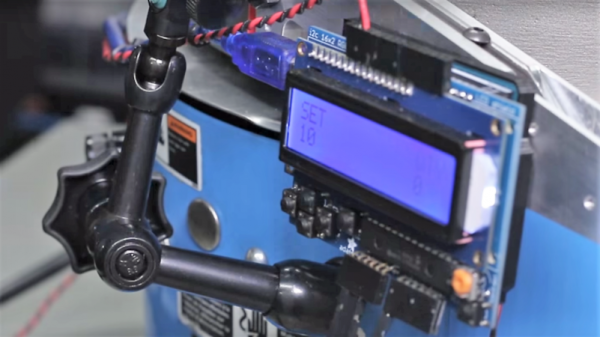
How frustrating? Enough so that [Joseph Eoff] expended considerable effort to create this sewing machine speed controller for his nearly century-old Adler sewing machine. The machine was once powered by a foot treadle, which is probably why the project is dubbed “Bigfoot,” but now uses a 230 V universal motor. Such motors don’t deliver much torque when run at low speeds with the standard foot-pedal rheostat control, so [Joseph] worked up an Arduino-based controller with a tachometer for feedback and a high-power PWM driver for the motor.

There are a ton of details in [Joseph]’s post and even more in the original blog article, which is well worth a read, but a couple really stand out. The first is with the tachometer, which uses an off-the-shelf photointerrupter and slotted disc. [Joseph] was displeased with the sensor’s asymmetrical and unreliable output, so he made some modifications to the onboard comparator to square up the signal. Also interesting is the PID loop auto-tuning function he programmed into Bigfoot; press a button and the controller automatically ramps the motor speed up and down and stores the coefficients in memory. Nice!

The short video below shows Bigfoot in action with varying thicknesses of faux leather; there are also some clips in the original article that show the machine dealing with a triple thickness of leather at slow speed and not even breaking a sweat. Hats off to [Joseph] on a solid build that keeps a classic machine in the game. And if you want to get into the textile arts but don’t know where to start, we’ve got you covered.

Continue reading “Bigfoot Turns Classic Sewing Machine Into A Leather-Eating Monster”

Automating A Bowl Feeder With Arduino

Search for “bowl feeder” on Hackaday and you’ll get nothing but automated cat and dog feeders. That’s a shame, because as cool as keeping your pets fed is, vibratory bowl feeders are cooler. If you’ve seen even a few episodes of “How It’s Made” you’re likely to have seen these amazing yet simple devices, used to feed and align small parts for automated assembly. They’re mesmerizing to watch, and if you’ve ever wondered how parts like the tiny pins on a header strip are handled, it’s likely a bowl feeder.

[John] at NYC CNC is building a bowl-feeder with Arduino control, and the video below takes us on a tour of the build. Fair warning that the video is heavy on the CNC aspects of milling the collating outfeed ramp, which is to be expected from [John]’s channel. We find CNC fascinating, but if you’re not so inclined, skip ahead to the last three minutes where [John] discusses control. His outfeed ramp has a slot for an optical sensor to count parts. For safety, the Arduino controls the high-draw bowl feeder through an external relay and stops the parts when the required number have been dispensed.

We know, watching someone use a $20,000 CNC milling station might seem overkill for something that could have been 3D printed, but [John] runs a job shop after all and usually takes on big industrial jobs. Or small ones, like these neat color-infill machine badges.

Continue reading “Automating A Bowl Feeder With Arduino”

Measuring Tiny Masses Acoustically

How do you measure the mass of something really, really tiny? Like fish-embryo tiny. There aren’t many scales with the sensitivity and the resolution to make meaningful measurements in the nanogram range, so you’ve got to turn to other methods, like measuring changes in the resonant frequency of a glass tube. And that turns out to be cheap and easy for the home gamer to reproduce.

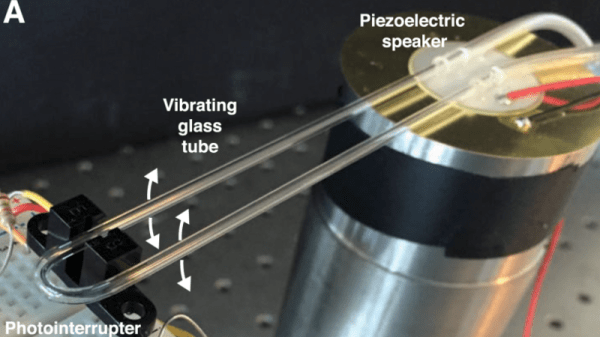
In a recent scholarly paper, [William Grover] et al from the University of California Riverside outline the surprisingly simple and clever method of weighing zebrafish embryos, an important model organism used in all sorts of developmental biology and environmental research. [Grover]’s method is a scaled-up version of a suspended microchannel resonator (SMR), a microelectromechanical device that can measure the mass of single cells or even weigh a virus particle. Rather than etch the resonator out of silicon, a U-shaped glass tube is vibrated by a piezoelectric speaker and kept at its resonant frequency by feedback from a cheap photointerrupter. When an embryo is pumped into the tube, the slight change in mass alters the resonant frequency of the system, which is easily detected by the photointerrupter. The technique can even be leveraged to measure volume and density of the embryos, and all for about $12 in parts.

In the lab, [Grover]’s team uses a data acquisition card and LabVIEW to run the resonant loop, but there’s no reason a DIY version of this couldn’t use an Arduino. In fact, tipster [Douglas Miller] expects someone out there will try this, and would appreciate hearing the details. You can ping him on his hackaday.io page.