We’ve said it before and we’ll say it again: water always finds a way in. That’s particularly problematic for things like wire splices in damp environments, something that no amount of electrical tape is going to help. Heat shrink tubing might be your friend here, but for an electrically isolated and mechanically supported repair, you may want to give over-molding with a hot glue gun a try.
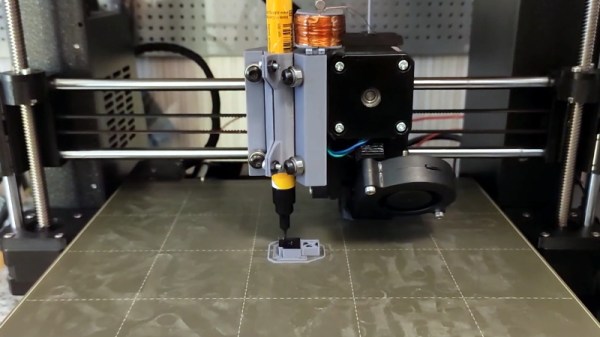
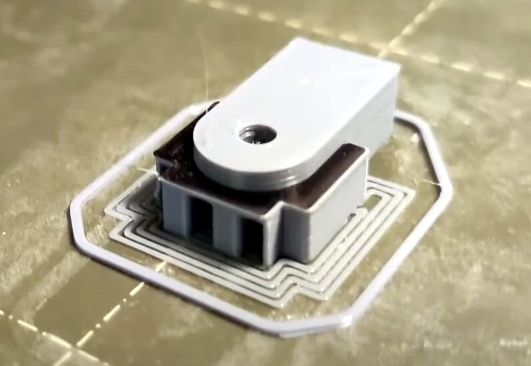
The inspiration for [Print Practical]’s foray into over-molding came from a video that’s making the rounds showing a commercially available tool for protecting spliced wires in the automotive repair trade. It consists of a machined aluminum mold that the spliced wires fit into and a more-or-less stock hot glue gun, which fills the mold with melted plastic. [Print Practical] thought it just might be possible to 3D print custom molds at home and do it himself.
His first attempt didn’t go so well. As it turns out, hot glue likes to stick to things — who knew? — including the PETG mold he designed. Trying to pry apart the mold after injection was a chore, and even once he got inside it was clear the glue much preferred to stay in the mold. Round two went much better — same wire, same mold, but now with a thin layer of vegetable oil to act as a release agent. That worked like a charm, with the over-mold standing up to a saltwater bath with no signs of leaking. [Print Practical] also repaired an iPhone cable that has seen better days, providing much-needed mechanical support for a badly frayed section.
This looks like a fantastic idea to file away for the future, and one that’s worth experimenting with. Other filament types might make a mold better able to stand up to the hot glue, and materials other than the ethylene-vinyl acetate copolymer found in most hot glue sticks might be explored. TPU over-molds, anyone? Or perhaps you can use a printer as an injector rather than the glue gun.
Continue reading “Over-molding Wires With Hot Glue And 3D Printed Molds”