Counting Down To The New Year

[Rod] is in a position to provide a community service on New Year’s Eve. He spends the evening at a relative’s house next to the beach. There are fireworks at midnight, but the crowd has no communal way to count down to the deadline. This year, he build his own count-down display so that everyone can join in during the last few seconds.

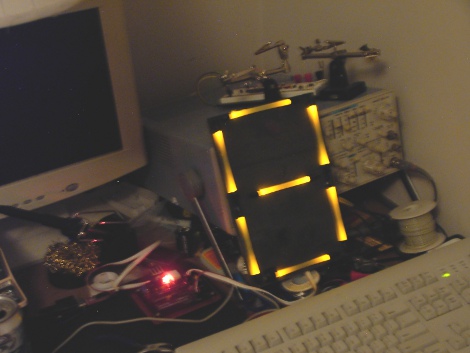
This is a temporary build so each digit is housed in a cardboard box. [Rod] first drew the outline of the seven segment digit on the front, then added holes for three LEDs in each segment. He’s feeding the segments with 12V and therefore is able to run the LEDs in series, along with a resistor, switching each segment with one transistor. He chose an Arduino to drive the display, and since he had two sitting around, used both instead of grabbing a shift register as port expander.

If you’re looking for a more permanent solution, we really like the digit displays designed for this scoreboard. But you’re going to have to etch the boards yourself if you want them done in time for the festivities.


HEX Out Reveals The Secrets Your Data Bus Holds

[Quinn Dunki] is looking to augment the tools she has available at her electronics bench and built the HEX Out as a mock-logic sniffer. The device reads 8 or 16-bit inputs, showing the current state of those connections on a 7-segment display. This requires that you’re comfortable reading Hex codes, but if you’re not it’s almost like studying flash cards; before long you’ll be able to read them without thinking about it.

She’s blogging about the design and build process in three parts. The link above is the first installment where she shares the development process for the top layer which hosts the display hardware. The other two parts should be up for your enjoyment in the next couple of weeks.

You’ll notice her design on this portion of the project still requires a lot of point-to-point soldering, even though she etched her own circuit boards. We didn’t look too closely, but it seems this would be worth going to the trouble of etching a double-sided board if you can.

UPDATE: Part Two is now available

Going RGB With 7 Segment Displays

We can order seven segment displays in red, green, yellow, or blue all day long. One thing we haven’t seen is an RGB segmented display, so [Markus]’ project is really interesting. He took a stock seven segment display and modded it into an RGB display.

After taking a Dremel to the back of the stock display, [Markus] was left with a seven segment light mask. A few SMD LEDs were purchased through the usual channels. The RGB LEDs were epoxied into place on the back of the light mask one at a time. Thankfully, the LEDs came with magnet wire already attached – helpful, since these LEDs are only 1.6mm x 1.2mm big.

With 32 pieces of magnet wire, [Markus] needed some sort of socket. A small piece of perfboard and some .100″ headers handled the job very nicely. [Markus] still has to work on some way to drive the 24 cathode lines his LED display. He’d like an I2C interface, but with something like an individual seven segment display, the footprint of the circuit should be pretty small. If you’ve got any tips, drop them in the comments section. [Markus] is sure to catch them there.

Large 7 Segment Display Made From Glue

We here at Hack A Day love LED’s, and all things LED related, but one of the biggest problems with LED’s are the small size. We want bigger and brighter, matrices the size of our TV, seven segments as big as a wall and a single white led the size of a baseball, and brighter than the sun!

I was recently commissioned to make a device which uses a pretty large number display, and I went out shopping. The seven segment we liked best was still quite pricey, and would not fit our enclosure correctly anyway. We ended up going a different route, but it really got me thinking… What if you wanted to make something with a fairly large display? And how could one go about doing it cheaply at home?

I first thought about acrylic rods, but no one near me had any of small diameter, or at a decent price. Never mind that I don’t have that many tools on hand, and I could just see me trying to drill out the end of a thin plastic rod using a electric hand drill, and my knees as a clamp. Looking around the HQ I found my stash of glue-sticks. I thought would make an interesting display and it is easy to work with.

Before I knew it I had a working (serial and expandable) 9 inch tall 6 inch wide 7 segment display. I will be the fist to admit, its not spectacular in quality, or brightness, though the display itself did only cost four dollars in material. A quick and easy project, especially if you need a quick scoreboard or large clock.

Join us after the break to see how the display and the controller circuit are made.

Continue reading “Large 7 Segment Display Made From Glue”