Oh, perfect — now our cars can BSOD. At least that’s how it looks from a forum post showing a Blue Screen of Death on a Ford Mustang Mach E, warning that an over-the-air software update failed, and now the car can’t be driven. The BSOD includes a phone number to reach Ford’s Customer Relationship Center and even presents a wall of text with specific instructions to the wrecker driver for loading the bricked vehicle onto a flatbed. Forum users questioned the photo’s veracity, but there are reports of other drivers getting bricked the same way. And we’ve got to point out that even though this specific bricking happened to an EV, it could just have easily happened to an ICE vehicle too; forum members were particularly prickly about that point. It would be nice if OTA software updates on vehicles could always roll back to the previous driveable state. Still, we suppose that’s not always possible, especially if memory gets corrupted during the update. Maybe the best defense against a bricked vehicle would be to keep a beater around that doesn’t need updates to keep running.
hex13 Articles
ColorReplica Is A Rainbow At Your Fingertips
Have you ever wanted to match paint to the color of a pillow, or make a website where the primary color matches your favorite shade of electrolytic capacitor? Then ColorReplica is the project for you.
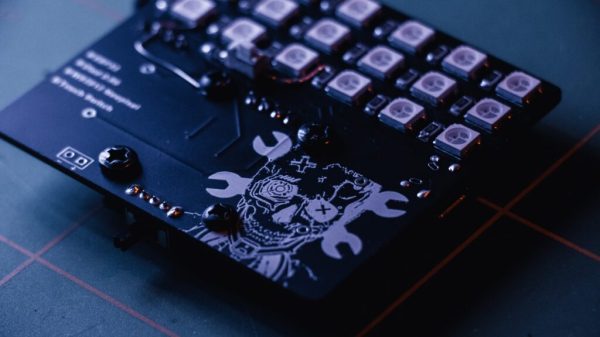
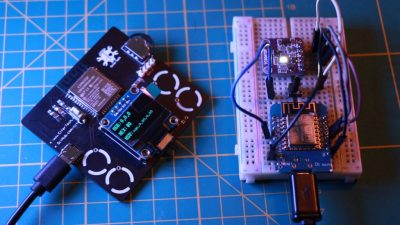 At the heart of this build are two ESP32s, one of which controls the color picker, and the other lights up the 18 WS2812 LEDs and displays information on the OLED screen.
ColorReplica has two modes, ColorPicker and ColorCube. In ColorPicker mode, you just choose what color you want, adjust the brightness level, and choose between static and dynamic modes for the LEDs. [CiferTech] used the ESP32 touch pins extended to pads on the PCB to control different menu variables, which is a nice touch.
In ColorCube mode, there’s a secondary circuit with a color sensor an another ESP32. Once detected, it transmits the color data to the main device at the push of a button. The RGB LEDs turn that color, and shows the RGB, HEX, and HSV values on the OLED screen. If you’d like to make one of these yourself, everything is available on GitHub.
Want something a big more tangible? Check out this color picker that types HEX codes for you.
Continue reading “ColorReplica Is A Rainbow At Your Fingertips”
Watch The Honeycomb Clock Gently Track Time
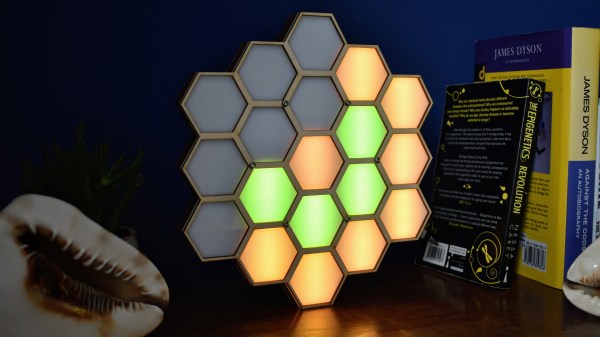
We love clocks here at Hackaday, and so does [John Whittington]. Last year he created this hexagonal honey clock (or “Honock”) by combining some RGB LEDs with a laser-cut frame to create a smooth time display that uses color and placement to display time with a simple and attractive system.
The outer ring of twelve hexagons is essentially the hour hand, similar to analog clock faces: twelve is up, three is directly to the right, six is straight down, and nine is to the left. The inner ring represents ten minutes per hex. Each time the inner ring fills, the next hex (hour) on the outer ring lights up. The whole display is flooded with a minute-long rainbow at noon and midnight. Watch it in action in the video, embedded below.
Continue reading “Watch The Honeycomb Clock Gently Track Time”
Indexing Chuck Not Required
Becoming accomplished with a lathe is a powerful skillset, but it’s only half of the journey. Being clever comes later, and it’s the second part of the course. Patience is in there somewhere too, but let’s focus on being clever. [TimNummy] wants a knobbed bolt with critical parameters, so he makes his own. After the break, there is a sixty-second summary of the linked video.
Making stock hardware is a beginner’s tasks, so custom hardware requires ingenuity or expensive machinery. Adding finger notches to a bolthead is arbitrary with an indexing chuck, but one isn’t available. Instead, hex stock becomes a jig, and the flat sides are utilized to hold the workpiece at six intermittent angles. We can’t argue with the results which look like a part that would cost a pretty penny.
Using material found in the workshop is what being clever is all about. Hex brass stock comes with tight tolerances on the sides and angles so why not take advantage of that?
[TimNummy] can be seen on HaD for his Jeep dome light hack and an over-engineered mailbox flag. Did you miss [Quinn Dunki]’s piece on bootstrapping precision machine tools? Go check that out!
Edit Hex In The Browser
If you can’t stand the thought of using an application in your browser, you might as well jump ahead to the comments and start flaming.
Still with us? Imagine this scenario. You are at the office, at a client’s site, at a school, or visiting your mom. Suddenly, for some strange reason, you need to edit a hex file. We don’t know why, but if you are reading Hackaday, it isn’t that big of a stretch to imagine it. What do you do? Download and install a hex editor? Maybe you can’t. Or, if it is mom’s computer, maybe you just don’t want to. Your next option is to navigate to HexEd.it.
The application, by [Jens Duttke], uses HTML5 and JavaScript and is actually a nicely capable editor. It shows the data in hex and ASCII as you’d expect. It also shows the current cursor location in a number of formats like 8-bit integer, 32-bit integer, date and time, and more. It even shows all the representations as big endian and little endian.
File Format Posters
It’s not uncommon for hackers to have a particular delectation for unusual interior decoration. Maybe it’s a Nixie tube clock, or a vacuum fluorescent display reading out the latest tweets from a favorite chatbot. If this sounds like your living room already, perhaps you’d like some of these file format posters to adorn your walls.
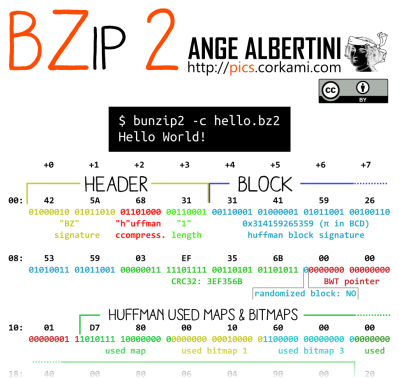 The collection of images includes all kinds of formats — GIF, ZIP and WAV are all represented, but it even gets into some real esoterica — DOLphin format executables are here if you’re a total GameCube fanatic. Each poster breaks down the format into parts, such as the header, metadata and descriptor sections, and come in a variety of formats themselves — most available in SVG, PDF and PNG.
If we’re totally honest, these aren’t all designed for hanging on your wall as-is — we’d consider putting some work into to optimize the color palettes and layouts before putting these to print. But regardless, they’re an excellent visual representation of data structures that you might find particularly useful if you need to do some reverse engineering down the track.
If you still have wall space available after seeing this, here’s the electronic reference poster that should fill it.
[Thanks to JD for the tip!]
Hackaday Prize Entry: Autorouters Are For The Weak
[Yann]’s DYPLED entry into this year’s Hackaday Prize isn’t very useful to most people. It’s a tiny module that connects to a 16-bit parallel bus, and displays a hexadecimal number on a few LEDs. It’s useful if you’re diagnosing a problem on a computer from 1982, but just barely. The real wonder here is how [Yann] is doing this cheaply and easily using some weird techniques and strange parts.
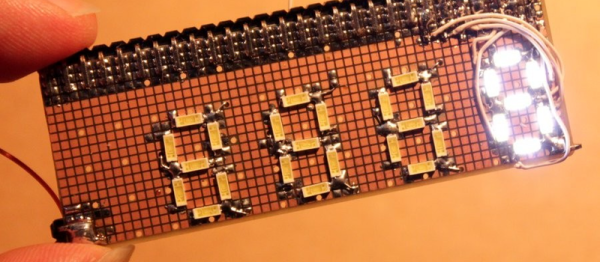
The display for this tiny device is an array of 36 LEDs, arranged into a set of five seven-segment displays. Homebrew seven-segment displays are cool, but how is he driving it? Not with a microcontroller, that’s for sure. Instead, [Yann] is using an old trick of using parallel memory to store the patterns of the seven-segment displays. This parallel memory comes in the form of a two megabit Flash chip, with the data inputs tied to the 16-bit input on the board and the data outputs connected directly to the LEDs. It’s a brute force approach, but it works.
There are a few additional features for this tiny board, including a switch to display a 16-bit bus in hexadecimal or decimal, signed or unsigned, and a pot to change how bright the LEDs are. The most amazing part is how [Yann] managed to fit all of this on a very, very small PCB. Most of that trick is due to using a thin, small TSSOP package for the Flash memory, but fitting this circuit onto a two layer board is amazing work, and a great entry for the Hackaday Prize.


