A Robot… That Can See Through Walls!

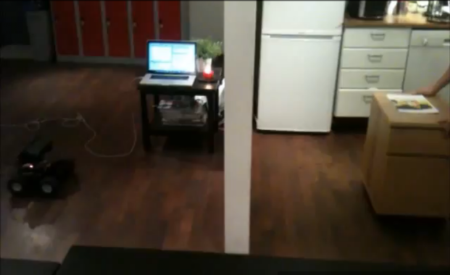
Robots on four wheels are fun on their own merits, but one thing that most lack is the ability to see through walls.  With it’s onboard radar system, this bot is equipped to see objects that a person couldn’t normally detect on the other side of the wall.

Although some of the more “nuts and bolts” details of this build are missing, the robot uses an Ultra-Wideband Radar system called the [D1] Radar System. This system can, according to their documentation, “Avoid false positives caused by vapor, dust, smoke, rain or other small particles.” Apparently this means drywall as well if programmed correctly.

In the video after the break, the robot’s sensor package is programmed to ignore anything within 1.5 meters. This allows the robot to mirror the movement of the apparent shelving unit on the other side. This sensor could certainly have some interesting robotics applications besides imitating a rolling shelf, so we’re excited to see what it will be used for!

Continue reading “A Robot… That Can See Through Walls!”

Arcade Cabinet That Doesn’t Monopolize Your Space

We’re guessing that if you ever though of buying an arcade cabinet it was only briefly, and you decided against based on the difficulties of moving and finding a place for such a large and heavy item. You could go the opposite way and build a controller for a  MAME box, but for some, there’s no replacement for the real hardware. This Christmas gift is the best of both worlds, a JAMMA box which uses traditional hardware in a more compact cabinet.

[Majtolycus’] boy friend is a sucker for a game of Battle Balls. She looked around for an original logic board and after several weeks of searching had to settle for the Japanese version of the game called Senkyu. To patch into the board she also picked up a JAMMA harness, power supply, RGB to VGA video converter, speaker, and some Happ arcade controls. The whole thing goes into a wood box which connects to a VGA monitor (or the VGA port on your HDTV).

The system is easier to store than a full-sized cabinet, and if a deal comes along, you can buy additional JAMMA logic boards to play.

[Thanks Adam]

StripInvaders Puts Colored Lights Everywhere

There’s not much to be gained by living in a discotheque but colored lights are awesome, especially when they’re as well implemented as [michu]’s StripInvaders.

The StripInvaders project takes a gigantic 5 meter LED strip with WS2801 controllers and turns it into an Ethernet-enabled 24 bit display with the new Arduino Ethernet. While the Ethernet-enabled may seem a little superflous, [michu] implements it quite nicely. The entire 5 meter LED strip can be controlled from a tablet or smartphone.

Apart from a tablet/smartphone interface with OSC, there’s also mDNS support so we’re sure the StripInvaders could make for an interesting LAN party with the appropriate scripts. While the cost of the LED strip itself is fairly high, we’re sure some Hack a Day commenter will come up with a cheaper solution.

The firmware for StripInvaders has been posted on Github, but for a real treat, check out the demo after the break.

Continue reading “StripInvaders Puts Colored Lights Everywhere”

Ammo Tin ][

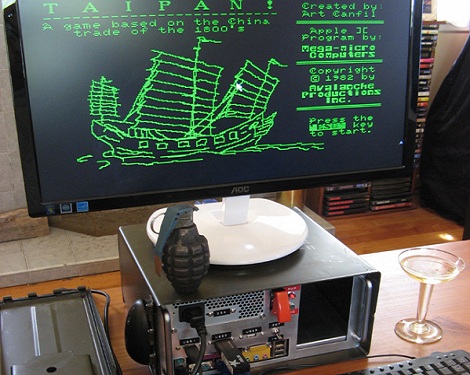
Ammo crate PCs have been around since Unreal Tournament LAN parties, but this one goes further back than that; [Simon] put an Apple II in an ammo crate. It’s a fitting anachronistic build from the same guy that built the TARDIS MAME cabinet.

Thankfully, [Simon] didn’t tear apart an Apple IIc for this build. A bare-bones Celeron motherboard was acquired for this project to run the AppleWin emulator. Instead of shoving all the parts into the box and calling it a day, [Simon] did it right and fabricated a very nice frame for the computer. With a wimpy CPU and no expansion cards, the Ammo Tin ][  can run very cool without drawing a lot of power.

We really have to hand it to [Simon] for this build. The metal work on this build looks great (it should for someone who is rebuilding an Austin 7), and we’ve got to respect the love for the Apple II. Now all that’s needed is a real Apple II keyboard on that USB port.

IP Over LEGO Train Carrier

[Maximilien] sent in a networking protocol built out of a LEGO train set. Unlike IP over Avian Carrier this system won’t be killed by plate-glass windows or birds of prey, but we’d hate to step on [Max]’s work in bare feet.

The system uses a USB flash drive to carry data around to different nodes. At each node, [Max] removed the power from the tracks and added a relay to start the train up again. A mechanical switch detects the presence of the train, and an Arduino makes the link to the Linux boxes via serial-over-USB.

The physical connection of the flash drive is with four wires and aluminum foil contacts. To send data, the system waits for the train to arrive at the ‘station’, mounts the drive, checks if there is data for it, and sends what needs to be sent. After unmounting the drive, power is applied to the local rail and the train continues on its journey.

[Max] admits that the latency on his network is terrible, but the bandwidth should be fairly good. As the old saying goes, ‘Never underestimate the bandwidth of a station wagon full of tapes.’ We’re not quite sure how that applies to LEGO trains, but there you go. Check out the gallery of [Max]’s work after the break.

Continue reading “IP Over LEGO Train Carrier”

Counting Down To The New Year

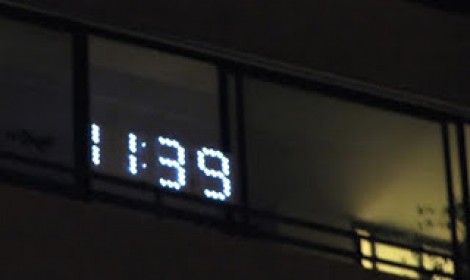
[Rod] is in a position to provide a community service on New Year’s Eve. He spends the evening at a relative’s house next to the beach. There are fireworks at midnight, but the crowd has no communal way to count down to the deadline. This year, he build his own count-down display so that everyone can join in during the last few seconds.

This is a temporary build so each digit is housed in a cardboard box. [Rod] first drew the outline of the seven segment digit on the front, then added holes for three LEDs in each segment. He’s feeding the segments with 12V and therefore is able to run the LEDs in series, along with a resistor, switching each segment with one transistor. He chose an Arduino to drive the display, and since he had two sitting around, used both instead of grabbing a shift register as port expander.

If you’re looking for a more permanent solution, we really like the digit displays designed for this scoreboard. But you’re going to have to etch the boards yourself if you want them done in time for the festivities.