Old Chart Recorder Becomes Single-Pixel Scanner

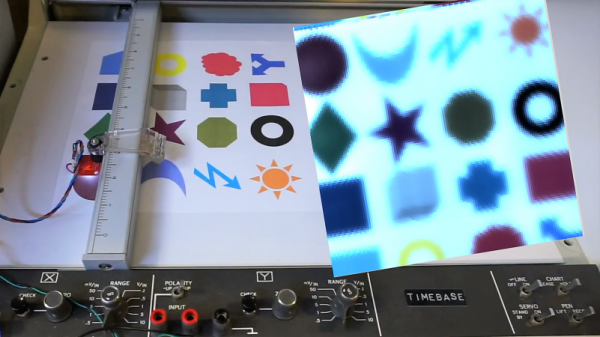
With so many ways to capture images from paper, do we really need another one? Especially one that takes 15 minutes to capture a 128×128 pixel image? Probably not, but building a single-pixel RGB scanner is pretty instructive, and good clean fun to boot.

We have to admit that when [Kerry Wong] scored an ancient Hewlett-Packard X-Y chart recorder a while back, we wondered if it would lead to anything useful. One may quibble with the claim that the Lorenz attractor plotter he built with it is useful, and this single pixel scanner is equally suspect, but we like the idea. Using an Arduino to drive the X- and X-axis of the recorder through a raster pattern over the bed and replacing the pen with an RGB sensor board, [Kerry] was able to collect the color data for each pixel and reconstruct the image. It wouldn’t be too hard to replicate this if you don’t have an analog X-Y recorder, which just goes to show that not everything needs to be steppers and digital to get something useful done. Or at least semi-useful.

As for the RGB sensor used, they’ve made appearances here many times before, mostly in M&M sorters but with the occasional synesthesia simulator.

Continue reading “Old Chart Recorder Becomes Single-Pixel Scanner”

ArduinoCamera

A Single Pixel Digital Camera With Arduino

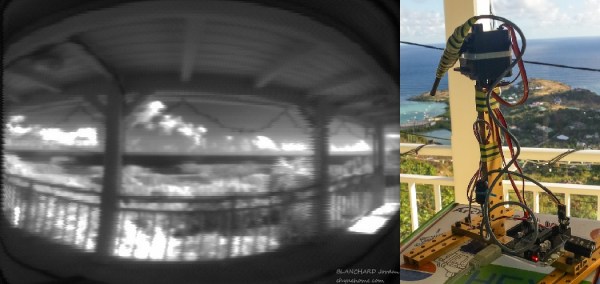
[Jordan] managed to cobble together his own version of a low resolution digital camera using just a few components. The image generated is pretty low resolution and is only in grey scale, but it’s pretty impressive what can be done with some basic hardware.

The heart of the camera is the image sensor. Most consumer digital cameras have tons of tiny receptors all jammed into the sensor. This allows for a larger resolution image, capturing more detail in a smaller space. Unfortunately this also usually means a higher price tag. [Jordan’s] sensor includes just a single pixel. The sensor is really just an infrared photodiode inside of a tube. The diode is connected to an analog input pin on an Arduino. The sensor can be pointed at an object, and the Arduino can sense the brightness of that one point.

In order to compile an actual image, [Jordan] needs to obtain readings of multiple points. Most cameras do this using the large array of pixels. Since [Jordan’s] camera only has a single pixel, he has to move it around and take each reading one at a time. To accomplish this, the Arduino is hooked up to two servo motors. This allows the sensor to be aimed horizontally and vertically. The Arduino slowly scans the sensor in a grid, taking readings along the way. A Processing application then takes each reading and compiles the final image.

Since this camera compiles an image so slowly, it sometimes has a problem with varying brightness. [Jordan] noticed this issue when clouds would pass over while he was taking an image. To fix this problem, he added an ambient light sensor. The Arduino can detect the amount of overall ambient light and then adjust each reading to compensate. He says it’s not perfect but the results are still an improvement. Maybe next time he can try it in color.

A Single Pixel, Color Digital Camera

[Ben] has written all sorts of code and algorithms to filter, sort, and convolute images, and also a few gadgets that were meant to be photographed. One project that hasn’t added a notch to his soldering iron was a camera. The easiest way to go about resolving this problem would be to find some cardboard and duct tape and built a pinhole camera. [Ben] wanted a digital camera. Not any digital camera, but a color digital camera, and didn’t want to deal with pixel arrays or lenses. Impossible, you say? Not when you have a bunch of integral transforms in your tool belt.

[Ben] is only using a single light sensor that outputs RGB values for his camera – no lenses are found anywhere. If, however, you scan a scene multiple times with this sensor, each time blocking a portion of the sensor’s field of view, you could reconstruct a rudimentary, low-resolution image from just a single light sensor. If you scan and rotate this ‘blocking arm’ across the sensor’s field of view, reconstructing the image is called a Radon transform, something [Ben] has used a few times in his studies.

camera [Ben]’s camera consists of the Adafruit RGB light sensor, an Arduino, a microSD card, a few servos, and a bunch of printed parts. The servos are used to scan and rotate the ‘blocking arm’ across the sensor for each image. The output of the sensor is saved to the SD card and moved over to the computer for post-processing.

After getting all the pixel data to his laptop, [Ben] plotted the raw data. The first few pictures were of a point source of light – a lamp in his workspace. This resulted in exactly what he expected, a wave-like line on an otherwise blank field. The resulting transformation kinda looked like the reference picture, but for better results, [Ben] turned his camera to more natural scenes. Pointing his single pixel camera out the window resulted in an image that looked like it was taken underwater, through a piece of glass smeared with Vaseline. Still, it worked remarkably well for a single pixel camera. Taking his camera to the great outdoors provided an even better reconstructed scene, due in no small part to the great landscapes [Ben] has access to.