Bust Out That Old Analog Scope For Some Velociraster Fun!

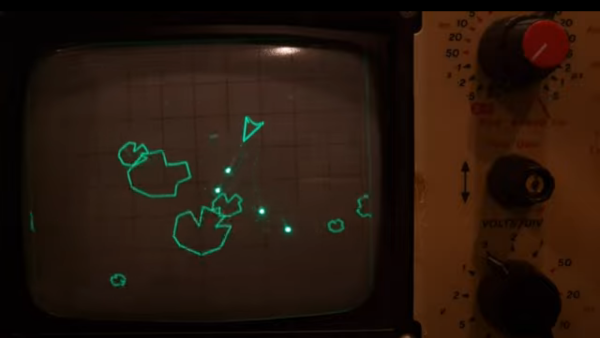
[Oli Wright] is back again with another installation of CRT shenanigans. This time, the target is the humble analog oscilloscope, specifically a Farnell DTV12-14 12 MHz dual-channel unit, which features a handy X-Y mode. The result is the Velociraster, a simple (in hardware terms) Raspberry Pi Pico based display driver.

Using a Pico to drive a pair of AD767 12-bit DACs, the outputs of which drive the two ‘scope input channels directly, this breadboard and pile-of-wires hack can produce some seriously impressive results. On the software side of things, the design is a now a familiar show, with core0 running the application’s high-level processing, and core1 acting in parallel as the rendering engine, determining static DAC codes to be pushed out to the DACs using the DMA and the PIO.

Continue reading “Bust Out That Old Analog Scope For Some Velociraster Fun!”

Interesting Optics Make This Laser Engraver Fit In A Pocket

We’re going to start this post with a stern warning: building a laser engraver that can fit in your pocket is probably not a wise idea. Without any safety interlocks and made from lightweight components as it is, this thing could easily tip over and sear a retina before you’d even have time to react. You definitely should not build this, or even be in the same room with it. Got it?

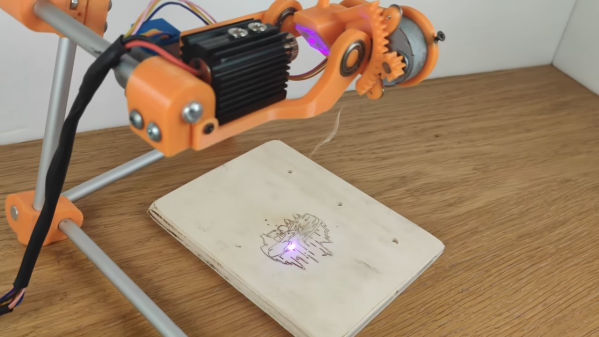
Safety concerns aside, [DAZ] has taken a pretty neat approach to making this engraver, eschewing the traditional X-Y gantry design in favor of something more like the galvanometers used for laser projectors, albeit completely homebrew and much, much slower than commercial galvos. Built mostly of 3D-printed parts, the scanning head of this engraver uses a single mirror riding on an angled block attached to gimbals with two degrees of freedom. The laser module and mirror gimbals are mounted on a stand made of light aluminum so that the whole thing is suspended directly over a workpiece; the steppers slew the mirror to raster the beam across the workpiece and burn a design.

The video below shows it at work, and again, we have to stress that this is about as close to this build as you should get. It shouldn’t be too hard to add some safety features, though — at a minimum, we’d like to see a tilt-switch that kills power if it’s knocked over, and maybe some kind of enclosure. Sure, that would probably spoil the pocketability of the engraver, but is that really a feature valuable enough to risk your eyesight for?

If there’s a laser build in your future, please read our handy guide to homebrew laser cutter safety — before you can’t.

Continue reading “Interesting Optics Make This Laser Engraver Fit In A Pocket”

Laser Galvos And An ESP32 Recreate Old-School Asteroids

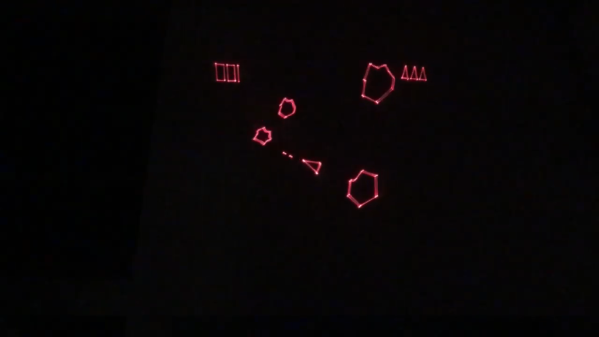
Playing Asteroids now isn’t quite what it used to be when it came out 40 years ago. At the time, the vector-scan display was part of the charm; making do with an emulator running on a traditional raster display just doesn’t quite do it for purists. But if you manage to build your own laser-projector version of the game like [Chris G] did, you’re getting close to capturing some of the original magic of the game.

There’s a lot to unpack about this project, and the video below does a good job explaining it. Where the original game used a beam of electrons flashing inside a CRT to trace out each object in the game, [Chris] substituted an off-the-shelf two-axis galvanometer from eBay and a 5-mW laser LED. This can project a gamefield on a wall up to two meters on a side, far bigger than any version of the machine ever built. The galvos are driven by op-amp drivers and an SPI DAC on a custom PCB. And in comparison to the discrete logic chips and 6502 running the original game, [Chris] opted for an ESP32.

As interesting as the hardware for this is, the real story is in the software. [Chris] does an excellent job running through his design, making the bulk of the video feel like a master class in game programming. His software is from scratch — no emulations here. As such it doesn’t perfectly reproduce the original games — no flying saucers and no spaceship explosion animations (yet) — but when coupled with the laser vector display, it certainly captures the feel of the original.

Being devoted Asteroids fans from back in the day, this one really pushes our buttons. We’ve seen laser-based recreations of the game before, but this one makes us think we can finally afford to recapture the glory of our misspent youth.

Continue reading “Laser Galvos And An ESP32 Recreate Old-School Asteroids”

Oscilloscope Learns How To Speak Japanese, And VGA

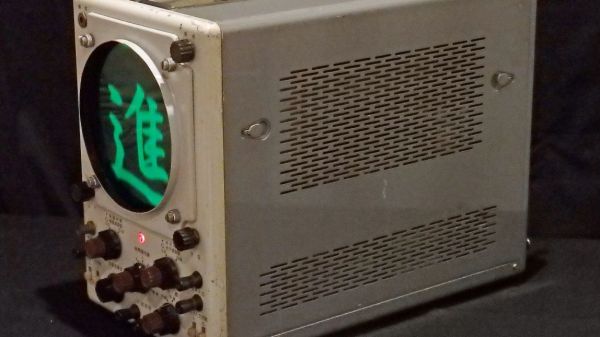
Nostalgia aside, there are a few things an analog scope can still do better than a digital, with oscilloscope art being a prime example. The blue-green glow of phosphors in a real CRT just add something special to such builds, and as a practitioner of this craft, [Aaron] decided to paint a New Year’s affirmation on his oscilloscope screen, in Japanese calligraphy of all things.

When used in X-Y mode, analog oscilloscopes lend themselves nicely to vector-based graphics, which is the approach [Aaron] has taken with previous “Oscilloclock” builds, like the Metropolis Clock. The current work, however, doesn’t use vector graphics, opting instead to turn the scope into the business end of a VGA display. He had previously developed the hardware needed to convert a VGA signal into X- and Y-axis analog outputs, so the bulk of the work was rendering the calligraphy, first in ink and then scanning and processing the results into a file. In keeping with the Japanese theme, [Aaron] chose a rare scope from Nihon Tsushinki Co., Ltd., from 1963. It’s a beautiful piece of equipment and obviously lovingly restored, and with the VGA adapter temporarily connected, the four Japanese characters scroll gracefully up the screen, delivering the uplifting message: “Steady progress, day by day.

[Aaron] sure puts a lot of work into his analog scope builds, which we’ve featured a few times. Check out the clock he made from Grandpa’s old Heathkit scope, or his Tektronic vectorscope clock. And don’t forget about other forms of oscilloscope art — they can make music too, after all.

LED Matrix And A Phototransistor Make A Reverse Camera

A digital camera has an array of sensors that captures light reflected or transmitted onto it. This build is something closer to a reverse camera – a single sensor that makes images on a matrix of LEDs. And we think it’s pretty neat.

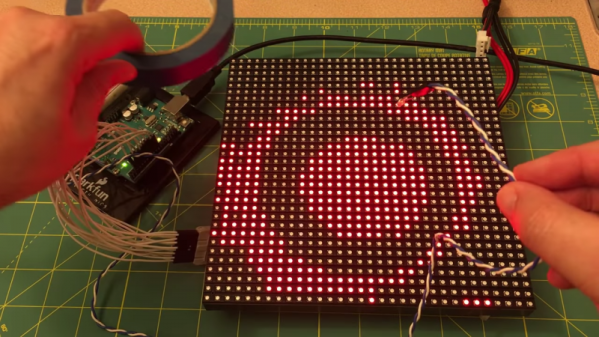
We have to admit to being a little confused by [marciot]’s LED matrix scanner when we first stumbled upon it. From the video below we thought that the LEDs in the matrix were being used both to detect incident light and as a display. We’ve seen LEDs used as photodiodes before, so such a contraption could work, but that’s not what’s going on here. A phototransistor is wired to an Arduino Uno and positioned above a 32×32 RGB LED matrix. A scanning routine rasters over the LEDs in the matrix while the sensor watches, and then the program turns on the LEDs that the sensor saw during the scan. Positioned far above the matrix, a large disc of light results, making it look like the phototransistor is beaming light down onto the matrix. The effect is reinforced by placing something between the sensor and the matrix, which casts a virtual shadow. Used close to the LEDs the sensor acts more like a light pen.

It’s a cool effect and it looks like a fun project to throw together. Refresh time could perhaps be a bit snappier, though; maybe an ESP32 could help with that.

Continue reading “LED Matrix And A Phototransistor Make A Reverse Camera”

Text Projector With — You Know — Lasers

We missed [iliasam’s] laser text projector when it first appeared, perhaps because the original article was in Russian. However, he recently reposted in English and it really caught our eye. You can see a short video of it in operation, below.

The projector uses raster scanning where the beam goes over each spot in a grid pattern. The design uses one laser from a cheap laser pointer and a salvaged mirror module from an old laser printer. The laser pointer diode turned out to be a bit weak, so a DVD laser was eventually put into service. A DVD motor also provides the vertical scan which is just a slight wobble of a mirror. A Blue Pill CPU provides all the smarts. You can find the code on GitHub.

Continue reading “Text Projector With — You Know — Lasers”

Lighting Up The Night Sky With A Flying POV Display

We’ve seen loads of persistence of vision displays before, but this sky-writing POV display seems as though it may be a first. And we have to agree with its creators that it’s pretty cool.

The idea man on this was [Ivan Miranda], who conceived of a flying POV as a twist on his robotic dot-matrix beach printer. But without any experience in RC flight, he turned to fellow YouTuber [Tom Stanton], whose recent aerial builds include this air-powered plane, for a collaboration. [Ivan]’s original concept was a long strip of Neopixels that would be attached to the underside of a wide-wingspread plane. WIthout much regard for the payload limits of most RC planes, he came up with a working display that was 3 meters long. His video below shows it in use in his shop, with some pretty impressive long exposure images.

[Tom]’s part was to make the POV display flyable. He cut the length down to 2 meters and trimmed the weight enough to mount it to a quadcopter. Ungainly as the machine was, he was able to master its control enough to start painting pictures across the twilight sky. The images at the end of his video are actually stunning – we’re especially fond of Thunderbird 2, which takes us back to our childhood.

We’re not sure what the practical uses of this are, but that’s hardly the point. It’s enough that it’s an interesting project from an unlikely duo. Continue reading “Lighting Up The Night Sky With A Flying POV Display”