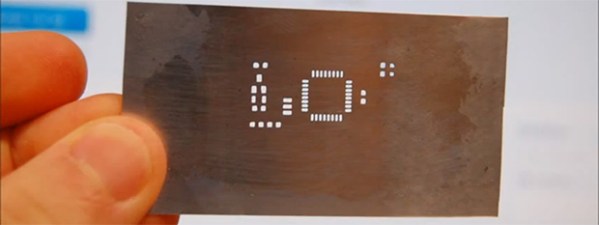
If you are soldering with paste, a stencil makes life a lot easier. Sure, you can apply paste by hand with a syringe, but a modern PCB might have hundreds or even thousands of pads. Like a lot of us, [Robert Kirberich] doesn’t like paying to have stencils made and he wondered if he could use his 3D printer to make stencils. He found the answer was yes.
solder stencil10 Articles
Hackaday Links: February 2, 2014
![]()
[Michel] was in need of a 9V battery connector, and in a brilliant bit of insight realized 9V batteries will plug directly into other 9V batteries (just… don’t do that. ever.) Taking a dead 9V, he tore it open, was disappointed by the lack of AAAA cells, and soldered some wires onto the connector.
Sometimes a project starts off as a reasonable endeavour, but quickly becomes something much more awesome. [Wallyman] started off building a hammock stand and ended up making a giant slingshot. We’re not one to argue with something that just became a million times more fun.
We’ve seen solder stencils made out of laser-cut metal, photoetched metal, plastic cut on a vinyl cutter, laser-cut plastic, and now finally one made on a 3D printer. It’s a pretty simple process – get the tCream layer into a .DXF file, then subtract it from a plastic plate in OpenSCAD.
Apple loves their proprietary screws, and when [Jim] tried to open his Macbook Air with the pentalobe screwdriver that came with an iPhone repair kit, he found it was too large. No problem, then: just grind it down. Now if only someone could tell us why a laptop uses smaller screws than a phone…
[Victor] has been playing around with an RTLSDR USB TV tuner dongle for a few months now. It’s a great tool, but the USB thumb drive form factor wasn’t sitting well with him. To fix that, he stuck everything into a classy painted Hammond 1590A enclosure. It looks much cooler, and now [Victor] can waterproof his toy and add a ferrite to clean things up.
The Definitive Guide To Solder Stencils
Yes, we’ve seen our share of tutorials for making solder paste stencils, but [Felix] hit it out of the park with this one. It’s the definitive guide to making solder stencils at home, with quality as good as you would find in any professionally made stencil.
The material for the stencils comes from the same source as so many other DIY solder stencils – aluminium cans. The interior plastic coating and the exterior paint job are both removed with heat, acetone, and patience. After laying out the cream layer of his board in a PDF file, [Felix] used a fairly interesting transfer medium to get the toner onto the aluminum; cheap vinyl shelving paper attached to a piece of paper apparently makes for an ideal surface to transfer toner.
After transfer, the board is etched with HCl and peroxide. [Felix] is getting some very good results with his method, including a few very fine pitch IC footprints. It’s just as good as a professionally made, laser cut stainless stencil, and you probably already have all the necessary ingredients lying around your house. That’s a win anytime.


