Reverse Engineering A NAND Flash Device Management Algorithm

unsoldered flash chip

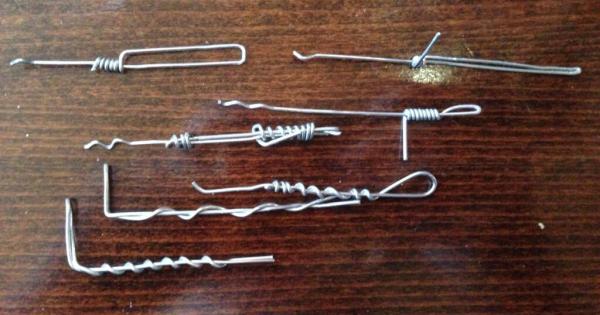
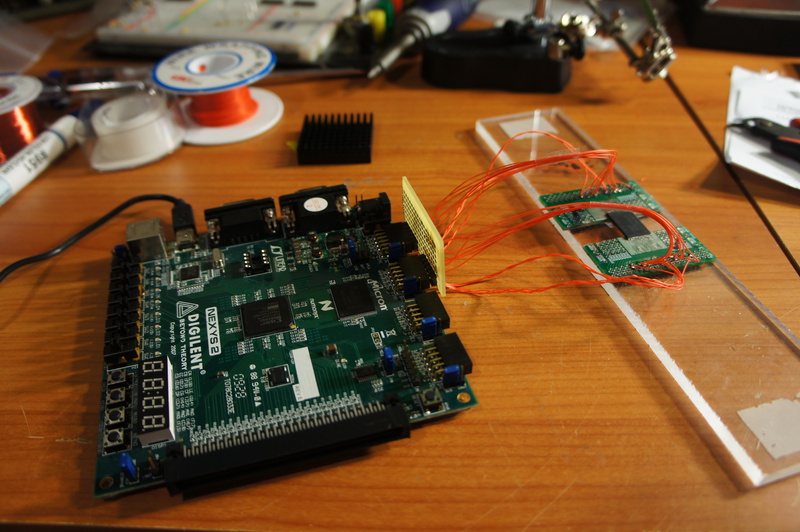
Put your hand under you chin as here comes a 6 months long jaw-dropping reverse engineering work: getting the data back from a (not so) broken SD card. As you can guess from the picture above, [Joshua]’s first step was to desolder the card’s Flash chip as the tear-down revealed that only the integrated SD-to-NAND Flash controller was damaged. The flash was then soldered on a breadboard so it could be connected to a Digilent Nexys-2 FPGA board. [Joshua] managed to find a similar Flash datasheet, checked that his wire-made bus was reliable and generated two 12GiB dump files on his computer.

In order to extract meaningful data from the dumps he first had to understand how SD-to-NAND controllers work. In his great write-up he provides us with a background of the Flash technology, so our readers can better understand the challenges we face with today’s chips. As flash memories integrate more storage space while keeping the same size, they become less reliable and have nifty problems that should be taken care of. Controllers therefore have to perform data whitening (so neighboring blocks of data don’t have similar content), spread data writes uniformly around the flash (so physical blocks have the same life expectancy) and finally support error correcting codes (so damaged bits can still be recovered). We’ll let our users imagine how complex reverse engineering the implementation of such techniques is when you don’t know anything about the controller. [Joshua] therefore had to do a lot of research, perform a lot of statistical analysis on the data he extracted and when nothing else was possible, use bruteforce…

Paperclip Lock Picking Sets

Lockpicking has become a trademark skill of hackers all across the world, and is regularly taught at hackerspaces and maker faires. But a lot of the time, the sets have already been made or bought online somewhere. However, [Sean] has demonstrated how to create a lock picking set with ordinary paperclips in the video embedded at the end of this post. Wikihow also has these awesome instructions on how to build them.

What’s great is that the material for these picks are easily found. There are other ways to fashion a set together. For example, street sweeper bristles can be used. And electrical metal tape is a good material as well, but these paperclip sets are, by far, the most accessible. Pretty much anywhere that has office stationary supplies will have mounds of these little metal clips lying around.

But how well do they work? Have you made a paperclip lock picking set before?

If so, let us know in the comments, and tell us how well they did.

Continue reading “Paperclip Lock Picking Sets”

Raspberry Pi Spies On Your Front Door

doorbell pictures

One of [Sander]’s first projects with a Raspberry Pi was to get it to send messages to his iPhone. From there he decided to take it a step further and wire the tiny computer up to his doorbell, creating a system that can send push messages to his phone whenever someone is at the front door.

[Sander]’s doorbell is wireless, and he decided to keep all of its original functionality. All it took to signal the Pi was a simple circuit tied to the doorbell’s status LED which turns off whenever the doorbell is pushed.

The Raspberry Pi runs a python program that handles the GPIO pin which is wired to the doorbell. When the doorbell is pushed, the program processes and sends the push notification while taking pictures of the visitor with an attached webcam. The pictures are included in the message so [Sander] can see who is at the front door. The code for the project is included on his project page.

This project rang a bell for us since we’ve seen projects using a Raspberry Pi and push notifications. None of them so far have included a webcam or utilized an existing wireless doorbell though, and this is a great step forward!