We often wonder how many people have 3D printers and wind up just printing trinkets off Thingiverse. To get the most out of a printer, you really need to be able to use a CAD package and make your own design. However, just like a schematic editor doesn’t make your electronic designs work, a CAD program won’t ensure you have a successful mechanical part.
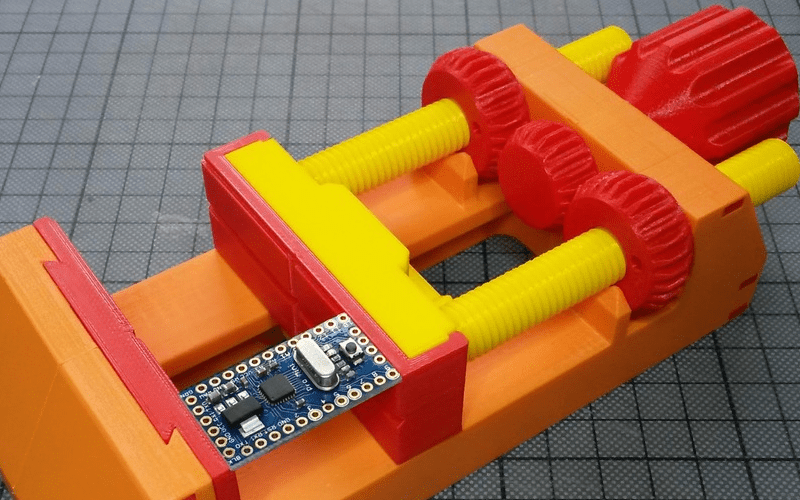
[TheGoofy] has a 100% 3D printed vise that looks like it is useful. What’s really interesting, though, is the video (see below) where he explains how printing affects material strength and other design considerations that went into the vise.
The video also shows how to assemble the parts. The 3D-printed screws and gears look great spinning on the video. The vise also looks like it would be very practical in real use.
If you don’t want to print, you can always grab a Stickvise. If you think bigger is better, head out to the lumber yard and build this, instead.


Great video, nice demonstration of the mechanical properties of 3d printed material and how to work around the weaknesses of 3d printed objects.
wow, beautifully designed FOR 3d printing. So cool how he made those snap pins to hold the two vise parts together and support the stress between layers.
Awesome.
Wow… what a nice video for such a practical clamp. Also interesting how he researched the material properties and I was slightly surprised that properly 3D printed (and used) PLA bars perform the same as wood. This guy has more interesting vids on his channel.
Very informative! I must admit I was really hoping he would measure the amount of force the vise could apply until failing tho.
Best video on 3d printing I’ve seen still don’t want one though.
Good for you, and thank you for sharing your feelings on the matter.
A thing of beauty that is!
I printed one of these, and it’s really quite helpful. The fit on the print is fantastic.
>very practical in real use
only if you are into woodworking, try soldering something with this vise, how long till you start melting it by accident? not to mention hot air
looks great tho
If you watched the vid, he says he uses it primarily for soldering.
depends on how clumsy one is…
for a lot of soldering jobs no heat should reach as far as the vice, if anything breaks then print replacement parts.
Does your soldering technique usually involve heating the vise?
Yes, vise, table, my keyboard, finger, even mouse cable at one point.
Does your car have a glass steering wheel? Because obviously that wouldn’t pose any problems if operated according to the manual.
That’s the beauty of having a 3D printer – when you do melt parts of the vice you just print a repalecement part
So somehow like a solution waiting for a problem. Because the beauty of a metal tool is that it just can not melt with the heat of a soldering iron. And if the metal is too hard for delicate work pieces I can use the soft covers made out of heat resistant rubber.
A 3D Printer is a nice tool, but it is not the right thing for every job.
Just print the dovetail-adapter and screw or glue it to a piece of metal. There you have your metal jaws :) It may be not as sturdy but some ppl tend to have a device for every job. And if its just for soldering: fine.
Maybe I’m unusual but every single thing I’ve printed on mine has been either a piece of tooling, an alignment fixture, or a test fixture. It’s paid itself off 20x already and I’ve only had it a few months. I don’t have time to print trinkets, and concluded I don’t have time to wait to mill stuff out of aluminum, so now I print it.
This vise is awesome. I think based on watching this I’ll end up printing some jaws for my milling vise for high speed stuff, so I can do toolpaths that cut into the jaws if necessary.
i have had similar experiences, granted our printer was bought for one task, it paid for itself in that project alone.
since then it has become a well used tool for a lot of different things;
we fly drones and the amount of fittings, especially customized ones, we have printed and what we have saved in time, money and resources is amazing in itself.
there is a ton of useful camera gear as well, rig parts, macro converters, hoods and snoots, just to name a few of the things i have actually printed, not just what is possible.
i think anyone with enough problems will love the way a 3d printer can solve them, sure it isn’t metal parts, but the selection of engineering grade plastics is quite high, printed nylon gears last fairly well even when compared to the brand name spare parts, then we changed the gears from simple spur gears to helical ones and we haven’t replaced them since.
in some instances i am certain even FDM printed parts can beat most other manufacturing processes due to the ways hidden geometry can be involved.
A basic, small-ish printer is around $500, like the monoprice one or whatever. More if you want bigger or higher quality prints. If it’s paid for itself 20x already in a few months, that means you’d normally buy over 10K$ in test fixtures every few months? That’s a rather unusual thing indeed!
Personally, I can’t really thing of any plastic thing over $5 I bought in the last few months. I don’t think I’d ever use it for anything besides custom enclosures, but even then the 3D printed quality isn’t always the best option.
To me, it’s on the list of neat tools I’d like to have but for which I can’t justify the expense, the space, nor invest the time, along with CNC mills, laser cutters and what not. The odd time I might need something, it’ll be easier and cheaper to get it 3D printed by a commercial place instead (that has yet to happen)
Yeah, I find printing enclosures takes way too much time and are not comparably better than commercial ones. So I only 3d print the front panels. I use aluminum tape if I need shielding, though not as good.
The cool thing about this is that I can have multiple iterations for cheap.
Very nice, but it needs a 40 kg.cm continues servo, and voice recognition for hands-free operation. :-)
There are already a few things on thingiverse for hooking it up to a motor…
http://www.thingiverse.com/thing:2126303
http://www.thingiverse.com/thing:2123525
Voice recognition shouldn’t be to hard either… a standard pi with an internet connection can do that…
It looks like there’s been a modification released since the video came out.
Printing the screws vertically is fine for the horizontal pushing force. It doesn’t take into account the twisting force if you’re trying to get a tight grip or there’s a lot of friction with the nut however, which would cause it to sheer at a weak vertical layer.
I’d be interested in seeing if there’s some hybrid method for printing them. Vertical printed sharp points over a horizontally printed core.
As an aside, I’ve read annealing PLA parts in an oven can get pretty good strength increases, although with some shrinking in the parts. Designing parts that would run together after shrinking through annealing could make a pretty strong tool when combined with the design principals in the video.
You can buy a 100mm machine vice on eBay for $30 including postage. I just do not understand the logic in printing this.
cmon, get with the program. Printing colorful whistles was worth $403 million to Stratasys, just think how much more profitable printing children toy vice can get!11!7
I added two 8-32 X 4″ button head screws through the center hole in the screws for strength in case i drop something heavy on the vise screws.