Beginner Concepts: Electronics Basics From The Giz

Gizmodo University is open for business. This free educational series aims to educate about the basics of electronic theory. No prerequisite knowledge needed and they’re starting from the ground level. First lesson? Resistors! From there they’ve posted about voltage dividers, series/parallel circuits, Ohm’s law, and how to calculate a resistor value for an LED.

This is a great way to get the base knowledge that you need to start hacking like an EE. These are concepts that we assume you have already mastered if you’re following along with our AVR Programming series. We’re hard at work on part three but that’s still a little ways off. You’ve got time to do a review a GizU and reread our favorite book on electronic theory.

Beginner Concepts: All About AVR Interrupts

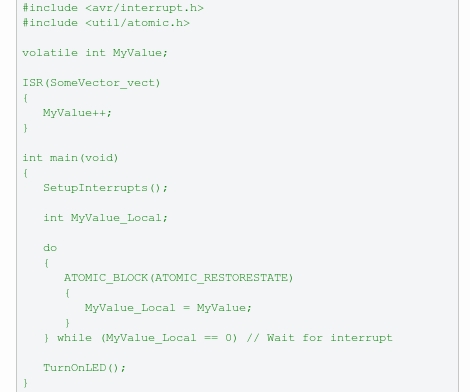
Microcontroller interrupts are one of the big tools in our embedded programming arsenal. They make the chip listen for particular events, and once detected they stop what they’re doing and run a separate set of code called and Interrupt Service Routine. We’ve come across two fairly new tutorials on the subject that you should check out if you’re not yet a master on the topic. One is a ProtoShack tutorial on ATmega168 external interrupts, and the other is a Newbie’s Guide to AVR Interrupts by [Dean Camera] (we’ve been a fan of his tutorials for some time). Both cover a range of topics from what interrupts are, to avoiding the common problems of volatile data types and the compiler optimization caveats.

What can you do with interrupts? External interrupts can be used to wake up a project like this LED menorah from sleep mode. Interrupts can be used to monitor a timer for a certain value or an overflow for use in generating a pulse-width modulation signal. The TI Launchpad uses an interval timer interrupt for button debouncing in projects like this code which was ported from an AVR chip. The source for both is available if you wanted to compare how the two differ.

Interrupts are powerful. Learn them, love them, use them.

Beginner Concepts: Analog Circuits

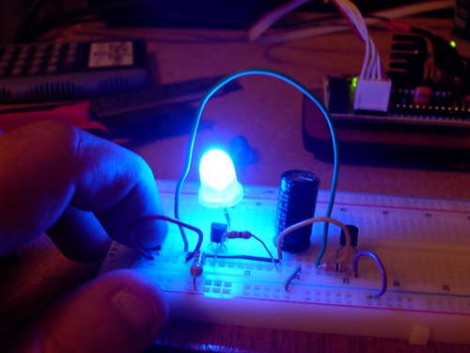
We look at a lot of projects that have microcontrollers in them. That’s because microcontrollers do cool stuff, but there are still plenty of tricks you can pull off with analog circuits. [Osgeld’s] latest project explores this realm, controlling the discharge of capacitors through an LED. His setup uses just nine components and, if you’ve been collecting broken electronics from your friends and neighbors like a good hacker, you can scavenge all of these parts. Try it, you’ll like it!

Beginner Concepts: Cascading Shift Registers

There’s a million tutorials out there describing how to use shift registers. If you’re just getting into embedded systems you should know how to use them as they allow you to take three microcontroller pins and expand them virtually without limits. This is due to the serial-in parallel-out nature of these integrated circuits. A key feature of these chips is the ability to overflow, or cascade to the next chip which is what provides the expansibility.

Protostack just published a tutorial that uses this hardware to interface sixteen LEDs using two shift registers. The explanation is short and to-the-point with easy to understand code examples. There’s also something to be said for their crisp and clean breadboarding work.

Take a look at how they do it and then use the concept to make a fancy clock or reduce the pins needed to drive a display.

Beginner Concepts: Using An Accelerometer

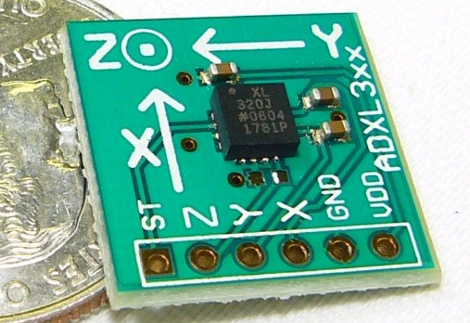
Accelerometers make for nice user interaction, that’s why every Apple product seems to have one included and the Nintendo Wii is still alive despite its underpowered graphics capabilities. Adding one to your project is pretty simple, just a matter of reading in analog data and interpreting it according to the datasheet. If you’re just starting out, here’s a tutorial on how to interface an accelerometer with a PIC microcontroller. They’re using an ADXL320 which can be acquired on a breakout board for about $30. The schematic and code are simple so even if you don’t intend to build the circuit (or want to use a different uC), this is easy to understand as an academic exercise.

[Thanks Skitchin]

[Photo credit: SparkFun]

Beginner Concepts: Electronic Jack-in-the-box

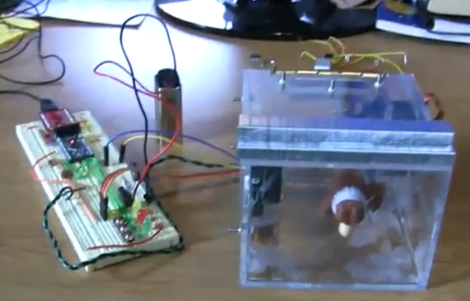
Behold the electronic Jack-in-the-box. Open the lid or enter the wrong combination and you’ll set off an alarm.  But if you get the right 6 combination code entered using the three buttons you’ll be rewarded with a little ditty and the appearance of the Jack (who lives in the box). [Jeremy Blum] designed this as part of his introduction to rapid prototyping class at Cornell University. See his description of the project after the break.

When he shared the link with us he mentioned that this might be a fun project for beginners and we couldn’t agree more. The design is easy to wrap your mind around using the provided schematic. The source code package includes PDF files that contain well commented code segments along with their descriptions. You can use this to get comfortable with driving a speaker and servo motor using an Arduino, as well as to read from two different types of inputs. We are especially interested in the hardware debounce implemented for the switch that detects if the lid is closed. Software debouncing is pretty much the standard these days but because an external interrupt is used to read the switch that method won’t work here.

If you’ve got an Arduino and few of these components why not give this a try?

Continue reading “Beginner Concepts: Electronic Jack-in-the-box”

Beginner Concepts: LPT Instead Of UC

We see it all the time, a post based on an Arduino board with multiple comments calling it overkill. How exactly should you control your homemade peripherals if you’re not using a microcontroller (uC)? [JKAbrams] and [Tim Gremalm] answered that question with this printer port (LPT) adapter. They wanted an indicator light when someone in an IRC room was talking to them. By connecting a blue rotating light through a relay to the output of this fob they’ve done just that, but there’s room for much more.

The adapter uses a Darlington transistor array IC to protect the computer. A resistor between the LPT and the base pin on the chip ensures that current flow will be well within the safe levels for the computer. The Darlington transistor amplifies the output using an external power supply in order to drive heavier loads.

If you want a deeper understanding of the printer port check out this tutorial. LPT ports are becoming less common and that’s why so many projects are migrating over to USB (plus there’s no need for external power with most USB connected projects) but if you’ve got one, it’s probably not being used for anything else.