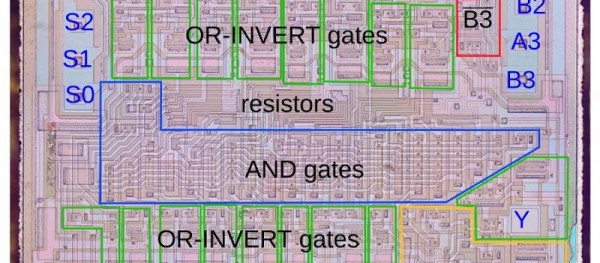
[Ken Shirriff] is the gift that keeps on giving this new year. His latest is a reverse engineering of the 74181 Arithmetic Logic Unit (ALU). The great news is that the die image and complexity are both optimized for you to succeed at doing your own reverse engineering.
 We have most recently seen [Ken] at work explaining his decapping and reverse engineering process at the Hackaday SuperCon followed soon after by his work on the 8008. That chip is crazy with complexity and a die-ogling noob (like several of us on the Hackaday crew) stands no chance of doing more than simply following along with what he explains. This time around, the 74181 is just right for the curious but not obsessed. Don’t believe me? The 8008 had around 3,500 transistors while the friendly 74181 hosts just 170. We like those odds!
A quick crash course in visually recognizing transistors will have you off to the races. [Ken] also provides reference for more complex devices. But where he really saves the day is in his schematic analysis. See, the traditional ‘textbook’ logic designs have been made faster in this chip and going through his explanation will get you back on track to follow the method behind the die’s madness.
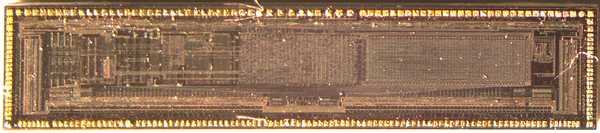
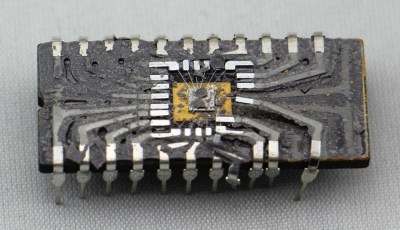
[Ken] took his own photograph of the die. You can see the donor chip above which had its ceramic enclosure shattered with a brisk tap from a sharp chisel.