Variable Capacitance/reistance Switch Box Has You Covered

variable_cap_resistor_box

While working on electronics projects, it’s often necessary to test out different capacitance or resistance values as things are moving along. Depending on what you are testing, this can be a tedious process even when using a breadboard. Instructables user [mattthegamer463] recently built a very useful device that would help out in these situations, and would likely be a welcome addition to any Hackaday reader’s workbench.

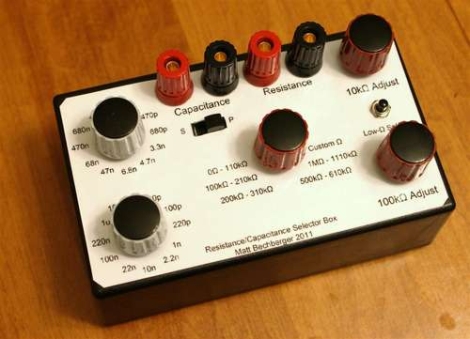
His variable resistor/capacitor box makes it easy to test out any number of different resistance or capacitance values with a simple turn of a knob. He wired up a pair of pots to provide a wide range of resistance values, being sure to add a low-resistance safety as well as safety override switch for those of you who like to have things blow up in your face live dangerously. A set of 22 capacitors were wired up on a piece of perfboard, each of which can be selected using a pair of knobs. He added a simple switch to allow the capacitors to be toggled between parallel and series orientations as well.

[Matt] did a wonderful job here – this is a great project that can be customized in a multitude of ways to fit almost anyone’s specific needs.

Super Refined Kinect Physics Demo

kinect_demo

Since the Kinect has become so popular among hackers, [Brad Simpson] over at IDEO Labs finally purchased one for their office and immediately got to tinkering. In about 2-3 hours time, he put together a pretty cool physics demo showing off some of the Kinect’s abilities.

Rather than using rough skeleton measurements like most hacks we have seen, he paid careful attention to the software side of things. Starting off using the Kinect’s full resolution (something not everybody does) [Brad] took the data and manipulated it quite a bit before creating the video embedded below. Skeleton data was collected and run through several iterations of a smoothing algorithm to substantially reduce the noise surrounding the resulting outline.

The final product is quite a bit different than the Kinect videos we are used to seeing, and it drastically improves how the user is able to interact with virtual objects added to the environment. As you may have noticed, the blocks that were added to the video never rarely penetrate the outline of the individual in the movie. This isn’t due to some sort of digital trickery – [Brad] was able to prevent the intersection of different objects via his tweaking of the Kinect data feed.

We’re not sure how much computing power this whole setup requires, but the code is available from their Google Code repository, so we hope to see other projects refined by utilizing the techniques shown off here.

[via KinectHacks]

Continue reading “Super Refined Kinect Physics Demo”

New, Inexpensive DSO Now Shipping

Seeed Studio’s line of hacker-friendly tools has expanded by one, they’ve announced that beta units of their DSO Quad oscilloscope are now available for shipping. The DSO Quad is about the size of a thick iPod yet packs impressive features such as two 72MSPS analog channels and a signal generator. By far the coolest ‘feature’ of the DSO Quad is that it’s completely open source.

DSO Quad is a pocket size four-channel digital oscilloscope designed “for common electronic engineering tasks.” It’s based on an ARM Cortex M3 that provides 72MSPS analog bandwidth on two channels with an integrated FPGA and a high speed ADC. In addition to the four data acquisition channels (two analog, two digital), the DSO Quad has a signal generator.  This lets you put out square, triangle, saw, and sine waves from 10Hz to 1MHz. An internal 2MB USB stick can be used to store sampled data, upgrade the firmware, or run custom programs. Since the device is still in beta, some of the software specifications aren’t firm, but if you’re looking for a relatively inexpensive ‘scope, this could be the one for you. Just bear in mind that for this pre-production run you’re not getting any documentation, so be prepared to be off the reservation and on your own.

build_status_board

LED Build Monitor Helps Keep An Eye On Your Servers

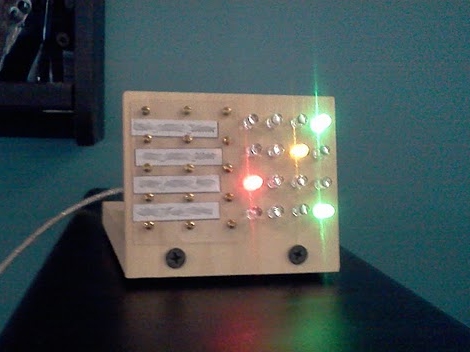
In his line of work, Hackaday reader [Pedantite] often has to monitor the build status of several continuous integration servers throughout the day. One afternoon, he got the idea to install a set of stop lights in the office in order to monitor the status of the servers, but filed it away as a “wouldn’t it be cool if…” project.

After some time had passed, he was bitten by the idea bug again and decided he would build a physical device to display the status of his build processes. This time around, he brainstormed on a smaller scale and the result is the “Indictron” you see above.

He built a simple LED board made up of four rows of four LEDs to display the build processes. Different LEDs are lit depending on the project’s current build status as well as the results of the previous build. The board uses an ATmega88, and interfaces with a compiler watchdog application using a virtual USB package made specifically for AVR micro controllers.

The end result is a simple, yet useful status board that “just works”. He does not seem to have code or schematics posted on his site at the moment, but we’re pretty sure he would share them upon request.

If you’re interested in a bit more of [Pedantite’s] work, check out his “Good Times” parental timer we featured last week.

Homebrew Z80 Computer Inspires Awe

How this one missed us, we’ll never know.

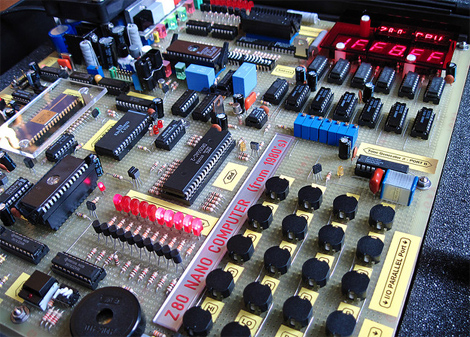
[GG] built himself a retro-styled Z80 nanocomputer over two years using all 1980’s tech. Laid out on one of the largest pieces of perfboard we’ve ever seen on a project, the computer uses a vintage Z80 CPU running at 2.5MHz, 8K ROM, 16K RAM, RS-232 and Parallel ports, an EPROM burner, and an AM95 math coprocessor for 32-bit floating point arithmetic.

We’ve seen a few homebrew computers before, including a Z80 laptop, but this blows them away. For his computer, [GG] created 8BASIC, A Basic interpreter that makes best use of the six 7-segment displays and eight 16-segment displays. The display isn’t really a limitation because [GG] also put together something in Visual Basic so his PC can communicate with his nanocomputer.

[GG] even went so far as to include error detection on the ROM and RAM, as well as an on-board power supply. If you can’t admire the dedication that went into this, at least admire the great wire porn. We’re just sad [GG] never did a proper write-up of his project. He could certainly teach us all something.

Video of [GG]’s work after the jump.

Continue reading “Homebrew Z80 Computer Inspires Awe”

Dishwasher Notifier For The Absent-minded

dish_o_tron_6000

[Quinn] over at BlondiHacks is admittedly pretty absent-minded when it comes to household chores such as emptying the dishwasher. She often can’t remember if the dishes are dirty or ready to be put away, so she decided it was time to devise a mechanism that would help keep her on task. She originally considered a double-sided sign that said “Clean” on one side, “Dirty” on the other, but she chose the fun option and decided to over-engineer the problem instead.

She ultimately focused on two conditions that she needed to monitor: when the dishwasher had been run, and when the dishes have been emptied. To tackle the first condition, she used a thermistor to detect when the door of the dishwasher got hot from the wash cycle. The second wasn’t quite as easy, since she often peeks into the dishwasher to grab a clean dish when needed, unloading the rest later. She eventually settled on using a tilt switch to monitor the angle of the door, assuming that the dishes have been removed if the door was open for over a minute.

[Quinn] reports that her Dish-o-Tron 6000 works well, and she had a good time building it. Sure the whole thing is kind of overkill, but where’s the fun in moderation?

Prototyping With A GPS Module

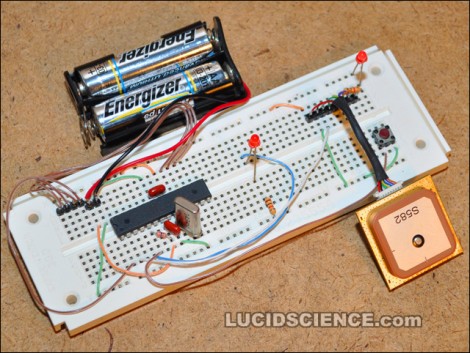
[Oneironaut] is trying out a new GPS module with the prototype seen above. It’s a San Jose Navigation device identified as FV-M8 and sold by Sparkfun for just under a hundred bucks. That’s it hanging off the bottom-right of the breadboard seen above. They’ve packed a lot of power into the small footprint, and made it very easy to control at the same time. Although the device is fully configurable, you can start grabbing serial data from it just by connecting a single data line, 3.3V, and ground.

[Oneironaut] tests it out by streaming the serial data to a character LCD screen, then comparing the output to his handheld Garmin GPS device. You can see him describe his ATmega32-based test platform in the video after the break. We’re used to seeing spy-tech for most of his projects and this will eventually join those ranks. He’s thinking of putting together a magnetic tracking module that plays nicely with Google Earth.

Continue reading “Prototyping With A GPS Module”