Templateize Your Timetable With EPaper Templates

To date, e-paper technology has been great for two things, displaying static black and white text and luring hackers with the promise of a display that is easy on the eyes and runs forever. But poor availability of bare panels has made the second (we would say more important) goal slow to materialize. One of the first projects that comes to mind is using such a display to show ambient information like a daily summary weather, train schedules, and calendar appointments. Usually this means rolling your own software stack, but [Christopher Mullins] has put together a shockingly complete toolset for designing and updating such parameterized displays called epaper_templates.

To get it out of the way first, there is no hardware component to epaper_templates. It presupposes you have an ESP32 and a display chosen from a certain list of supported models. A quick search on our favorite import site turned up a wide variety of options for bare panels and prebuilt devices (ESP32 and display, plus other goodies) starting at around $40 USD, so this should be a low threshold to cross.

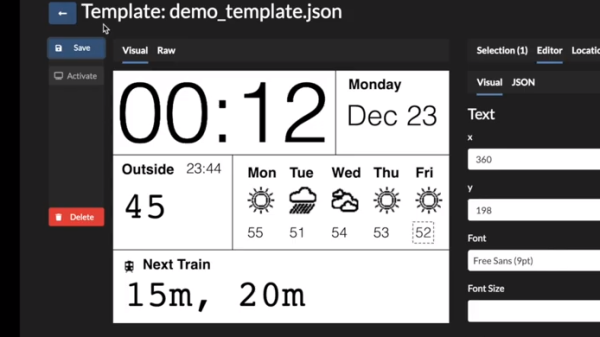
Once you have the device, epaper_templates provides the magic. [Christopher]’s key insight is that an ambient display is typically composed of groups of semi-static data displayed in a layout that never changes. The only variation is updates to the data which is fully parameterized: temperature is always integer Fahrenheit, train schedules are lists of minutes and hours, etc. Layouts like this aren’t difficult to make, but require the developer to reimplement lots of boilerplate. To make them easy to generate, epaper_templates provides a fully featured web UI to let the user freely customize a layout, then exports it as JSON which the device consumes.

The sample layout configured in the video below

The web UI is shockingly capable, especially for by the standards of the embedded web. (Remember it’s hosted on the ESP32 itself!) The user can place text and configure fonts and styles. Once placed, the text can be set to static strings or tied to variables, and if the string is a timestamp it can be formatted with a standard strftime format string.

To round out the feature set, the user can place images and lines to divide the display. Once the display is described, everything becomes simple to programmatically update. The ESP can be configured to subscribe to certain MQTT topics from which it will receive updates, or if that is too much infrastructure there is a handy REST API which accepts JSON objects containing variables or bitmaps to update on device.

We’re totally blown away by the level of functionality in epaper_templates! Check out the repo for more detail about its capabilities. For a full demo which walks through configuration of a UI with train arrival times, weather, both instant temperature and forecast with icons, and date/time check out the video after the break. Source for the example is here, but be sure to check out examples/ in the repo for more examples.

Continue reading “Templateize Your Timetable With EPaper Templates”

Colorful Display Keeps Track Of Your Network

So you’ve built out your complete home automation setup, with little network-connected “things” scattered all around your home. You’ve got net-connected TVs, weather stations, security cameras, and whatever else. More devices means more chances for failure. How do you know that they’re all online and doing what they should?

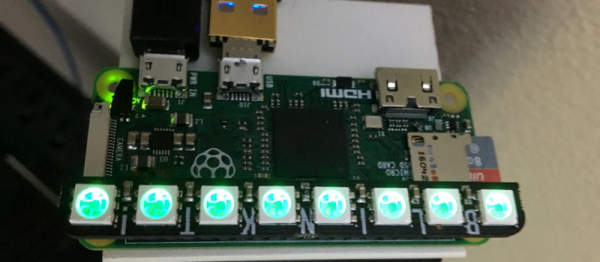
[WTH]’s solution is pretty simple: take a Raspberry Pi Zero, ping all the things, log, and display the status on an RGB LED strip. (And if that one-sentence summary was too many words for you, there’s a video embedded below the break.)

Continue reading “Colorful Display Keeps Track Of Your Network”

Bathroom Status Reporting Hack Eliminates Lines, Frustration

In a lot of ways, portable toilets are superior to standard indoor-plumbing-style toilets. This is mostly due to the fact that they have a status indicator on the door. It’s a shame that no indoor bathrooms have figured this out yet, especially in office buildings where your awkward coworkers bang on every door rather than just check for feet in the huge gap that for some reason exists between the floor and the stall door. Anyway, [Chris] and [Daniel] came up with a solution for this issue, which also eliminates wait time for bathrooms in their office.

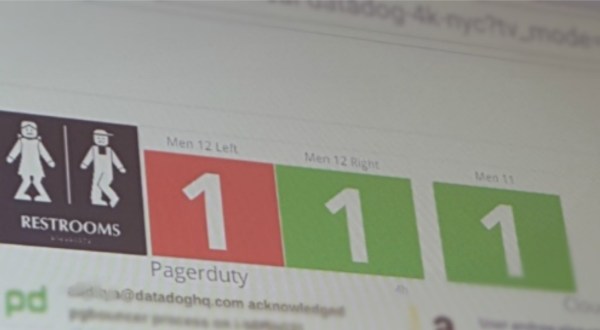
Their system is an automated bathroom status indicator that reports information about the bathroom’s use over WiFi. Since the bathrooms at their facility are spread out, it was helpful to be able to look up which bathroom would be free at any given moment. Several Raspberry Pis form the nerves of the project. Custom sensors were attached to a variety of different door locks to detect status. Each Pi reports back over WiFi. This accomplishes their goal of being subtle and simple. They also point out that they had to write very little code for this project since there are so many Unix and embedded hardware tools available to them. Checking the status of the bathroom can be as simple as running netcat.

If you’re looking to roll out your own bathroom status monitor solution, [Chris] and [Daniel] have made their code available on GitHub. There are a number of other ways to automate your bathroom, too, like switching the exhaust fan on when it gets too smelly or humid, or even creating a device that dispenses your toilet paper for you.


Animated Progress Bar Shows LCD New Tricks

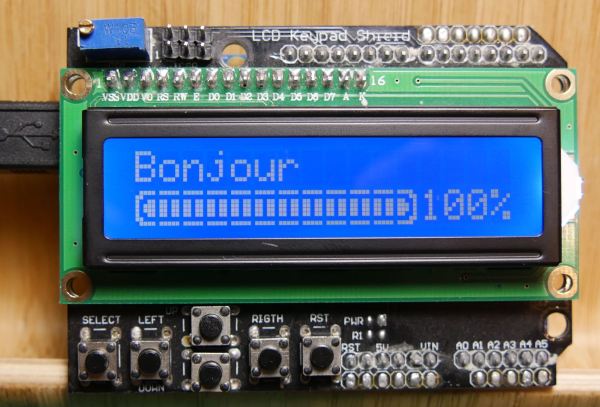
A small LCD screen can be extremely helpful with small microcontroller projects. Not everything needs to communicate to a fancy server using an ESP8266. However, if the simplicity of the character displays irks you, it’s possible to spice them up a little bit with custom characters and create animations, like [Fabien] did with his animated Arduino progress bar. (Google Translate from French)
The project started out simply enough: all [Fabien] needed was a progress bar. It’s easy enough to fill in the “characters” on the 2×16 character LCD screen one-by-one to indicate progress, and the first version of this did exactly that. The second version got a little bit fancier by adding a border around the progress bar and doubling its resolution, but the third version is where knowing the inner machinations of the microcontroller really paid off. Using a custom charset reuse optimization, [Fabien] was able to use 19 custom characters at a time when the display will normally only allow for eight. This was accomplished by placing the custom characters in memory in the correct order, to essentially trick the microcontroller into displaying them.
These types of microcontroller hacks get deep into the inner workings of the microcontroller and help expose some tricks that we can all use to understand their operation on a deeper level. Whether you’re using PWM to get a microcontroller to operate a TV, or creating the ATtiny-est MIDI synth, these tricks are crucial to getting exactly what you want out of a small, inexpensive microcontroller.

Shark With Frickin’ LED Tells People Not To Bother You

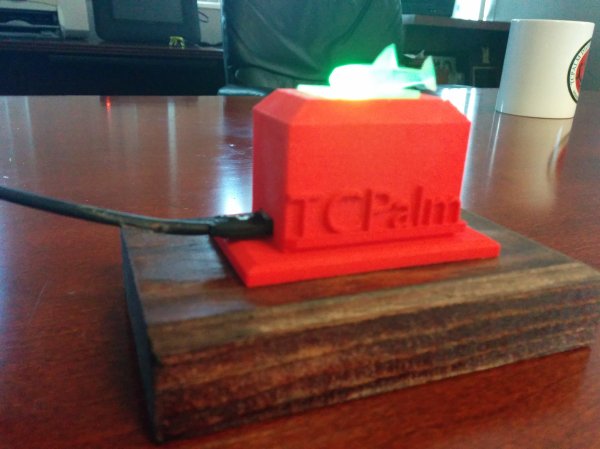
Everybody is busy these days, but sometimes it’s hard to tell. What with teleconferences being conducted over tiny Bluetooth headphones and Skype meetings where we seem to be dozing in front of the monitor, we’ve lost some of the visual cues that used to advertise our availability. So why not help your colleagues to know when to give you space with this shark themed WiFi-enabled meeting light?

Why a shark and not a mutated intemperate sea bass? Only [falldeaf] can answer that. But the particulars of the build are well-documented and pretty straightforward. A Photon runs the show, looking for an Outlook VFB file to parse. An RGB LED is used to change the color of the translucent 3D printed shark based on whether you’re in a meeting, about to step into one, or free. The case is 3D printed as well, although [falldeaf] farmed the prints out to a commercial printing outfit because of the size and intricacy of the parts. He did fabricate a nice looking wood base for the light, though.

There are plenty of ways to tell people to buzz off, but this is a pretty slick solution. For those in open floor plan workspaces, something like this IoT traffic light for you and your cube-mates might be in order.

BlinkM Smart Garage Door Opener

garage_indicator

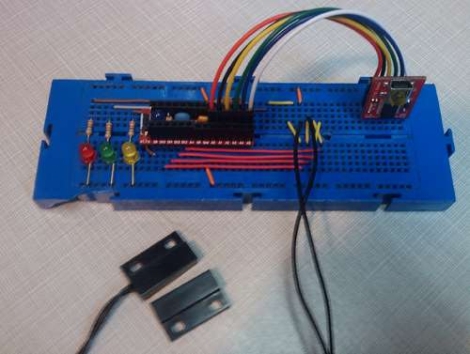
Calling Canada home, Hackaday reader [TheRafMan] has seen his share of bitterly cold winters. He also knows all too well how hard it is to get his cars started in the morning if somebody happens to leave the garage open. After the door was left open overnight for the second time this last winter, he decided that it was time to add an indicator inside the house that would alert him when the garage had not been closed .

Inspired by our BlinkM Arduino coverage a short while back, his circuit incorporates a BlinkM as well as several other components he already had on hand. He disassembled the garage door switch situated in the house and fit the BlinkM into the switch box once he had finished programming it. A set of wires was run to the BlinkM, connecting it to both a power supply located in the garage as well as the magnetic switch he mounted on the door.

The end result is a simple and elegant indicator that leaves plenty of room for expansion. In the near future, he plans on adding an additional indicator strobe to let him know when the mail has arrived, not unlike this system we covered a few months ago.

Stick around to see a quick video demonstration of his garage door indicator in action.

Continue reading “BlinkM Smart Garage Door Opener”

build_status_board

LED Build Monitor Helps Keep An Eye On Your Servers

In his line of work, Hackaday reader [Pedantite] often has to monitor the build status of several continuous integration servers throughout the day. One afternoon, he got the idea to install a set of stop lights in the office in order to monitor the status of the servers, but filed it away as a “wouldn’t it be cool if…” project.

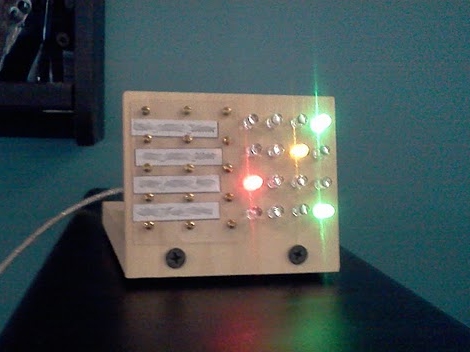
After some time had passed, he was bitten by the idea bug again and decided he would build a physical device to display the status of his build processes. This time around, he brainstormed on a smaller scale and the result is the “Indictron” you see above.

He built a simple LED board made up of four rows of four LEDs to display the build processes. Different LEDs are lit depending on the project’s current build status as well as the results of the previous build. The board uses an ATmega88, and interfaces with a compiler watchdog application using a virtual USB package made specifically for AVR micro controllers.

The end result is a simple, yet useful status board that “just works”. He does not seem to have code or schematics posted on his site at the moment, but we’re pretty sure he would share them upon request.

If you’re interested in a bit more of [Pedantite’s] work, check out his “Good Times” parental timer we featured last week.