Earning A Merit Badge With A Pinewood Derby Photo Finish

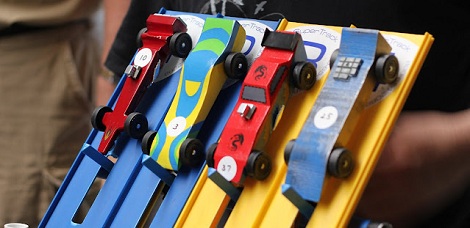
2/4 store-bought bodies

As a boy scout properly acculturated into the DIY philosophy, [Adam] really wanted to get his hands on the new Inventing merit badge. The merit badge required solving a problem, so of course a pinewood derby instant replay system was the obvious solution.

After thinking through a few solution paths like a radio-controlled camera that follows the cars, [Adam] settled on a system that would replay the pinewood derby cars crossing the finish line.  [Adam]’s father found a cheap and readily available Playstation Eye camera that can record 60fps video for this task. [Adam]  used a laser/photodiode/Arduino setup to detect when a car was crossing the finish line. A bit of Processing code supplied by his father records the relevant 60 frames of video and plays them at 5fps on a projector for the enthralled spectators.

We suspect that a similar setup could be used if [Adam]’s den wanted to try the rain gutter regatta or oft-forgotten space derby next year. Check out [Adam]’s instant replay system after the break, or join us in the comments for the inevitable argument over who had the best pinewood derby car.

Continue reading “Earning A Merit Badge With A Pinewood Derby Photo Finish”

Last Century’s Guided Missile Steps Aside For This Guided Bullet

Here’s an image of a bullet’s path to the target. There’s a couple of things to note. First of all, this is not a tracer round, the projectile actually has an LED incorporated which was picked up as a trail in the long (relative to bullet speed) exposure. The second – and most obvious – thing to consider is the non-liner path it took to its objective. That’s because this is a laser guided bullet.

The smart bullet is a about four inches long and carries with it a light sensor, 8-bit processor, and some electromagnetic actuators. The tip is searching for a laser-painted target, with an algorithm calculating course corrections along the way and using the actuators to move fins which alter its path. For us the most interesting part is that this ammo requires a non-rifled barrel. The rifling spins the bullet as it leaves the firearm, which usually results in a straighter and more dependable path. But the microcontroller wouldn’t be able reliably steer if it were spinning.

We’d bet this ends up as a special sniper tool in video games before we hear about it on the battlefield. Check out a clip of the dart-like bullet leaving the muzzle in the clip after the break.

Continue reading “Last Century’s Guided Missile Steps Aside For This Guided Bullet”

Flexible Web Interface Makes The Universal Remote Nearly Perfect

[Fall Deaf] built an Arduino based universal remote control system. It uses a shield which has both an IR receiver and transmitter. This gives it the tools to learn codes from your existing remotes and play them back in order to control the devices. This functionality is really nothing new, but we think the user interface he developed for the system is absolutely fantastic!

Software is web-based. You can simply point a remote at the Arduino and push a button. The receiver will store the code which can later be assigned to a virtual button. The image above shows the channel-up option being created; it will be added to the list once confirmed. From there any web enabled device – smart phone, tablet, netbook, etc – can be used as the remote for the system. The only feature we think is missing is the ability to alter the layout of the buttons, with larger areas for the most frequently used commands.

After the break you can see a demonstration of this system, as well as the one extra feature we haven’t touched on yet. [Fall Deaf] included a Piezo element in the hardware design which lets him knock on his coffee table to use the remote if a smart-device isn’t close at hand.

Continue reading “Flexible Web Interface Makes The Universal Remote Nearly Perfect”

Lens Adapter From A Plastic Soda Bottle

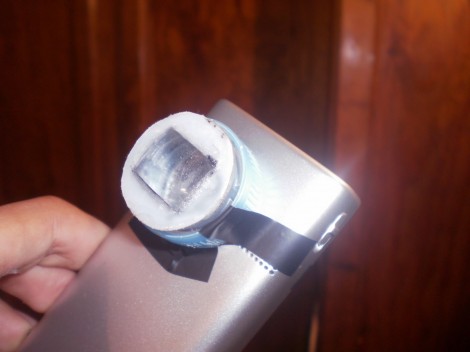
This lens adapter makes a lot of sense if you’re looking to interface with cameras that don’t have an in-built mounting option. It uses the cap and threaded neck from a soda bottle (translated) to make the lens adjustable and removable.

In the past we’ve seen this hack using a lens cap with a hole drilled in it as the mounting bracket. But that’s only useful if the lens you’ve chosen actually has a cap to use. This method lets you cut the top off of a the soda cap and mount it on the camera. Now each lens can be affixed to the threaded neck of the bottle, allowing for some adjustment of the focal point by screwing the add-on in or out.

Obviously this would work well for macro or fish-eye lenses. But there’s all kinds of other options out there like adding a microscope lens adapter, or actually attaching quality optics to your device.

Reading Diodes To Create A Thermal Imaging System

[Udo Klein] was working with some 1N4148 transistors and was interested in the specs relating to their performance at different temperatures. The forward voltage actually changes quite a bit depending on temperature and wondered if this could be reliably measured. He hacked his own LED shield for the Arduino to use as a 1×20 thermal imaging system.

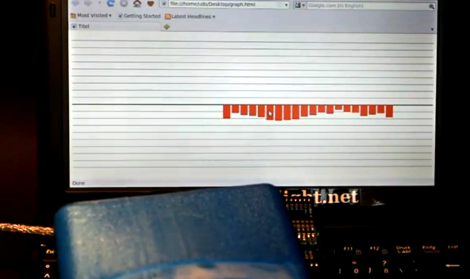
The screenshot above is mapping the voltage measurements from a row of diodes (see the video after the break to get the full picture). He’s holding an ice pack over the row of diodes and observing the change. The on-screen display is facilitated by a Python script which is pulling data from the Arduino. Since there aren’t enough analog inputs to read all twenty diodes separately they have been multiplexed. Four I/O pins each enable five of the diodes, readings are taken with five analog inputs before moving on to the next set.

What can this be used for? That is precisely the wrong question… sometimes you’ve just got to go where your curiosity takes you. Continue reading “Reading Diodes To Create A Thermal Imaging System”

Hackaday Links: February 1, 2012

The only thing he needs now is a micro and RTC

For [Dino]’s 44th Hack A Week extravaganza, he made powered window blinds in five minutes. It’s a simple build with a small gear motor and a bit of tubing to adapt the shaft to the control rod of the blinds. Good job [Dino].

BecauseCamelCaseWillKillYourPinkieFinger

The wonderful [Lizzie] over at LUSTlab realized that typing meta keys really slows down the development process. The result? Foot pedals for the Shift and Command keys. No build log for this one, but it’s just a set of old racing pedals and a disused keyboard.

So much cooler than a potato

[mdevaev] out of Russia built a fully articulated GLaDOS replica. Here’s the build album and the relevant MLP forum post. This GLaDOS is tiny – probably less than a foot long, but it moves around and speaks (Russian, which is weird). Somebody get us a couple of motorcycle fenders so we can build the 1:1 scale version.

Visualizing a plane of fog

[greg] was looking for a way to visualize the chaotic turbulence of air. He mounted a laser on a computer fan and held some dry ice above the beam. The result looks like it could make for an interesting photography project, but check out the video if you don’t believe us.

We were asking for it

We asked for battery charging circuits that don’t use specialized parts. [Petr] found this one that only uses few transistors, a MOSFET and a voltage regulator. In one of the Hackaday comments, [atomsoft] had the idea of putting a USB plug on the traces to save a bit in component costs. [mohonri] said he designed one, but we have yet to see it. Perhaps next links post…

A USB-controlled Solder Reflow Oven

[Joel] of [Helion Microsystems] is at it again with his USB controlled solder reflow oven.  You may remember him from his crazy twitter-enabled Ewok model. Although these two projects are quite different, they both use the HU-320 USB breakout board that he’s in the process of getting funding for via [Pozible], or Australian Kickstarter for Yanks.

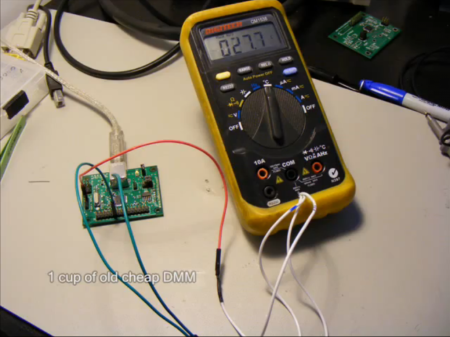
The reflow oven works using a thermocouple-enabled RS-232 voltmeter to output the temperature to the HU-320 board. [Joel] has been nice enough to provide us with the C# code to interface with many multimeters if you want to implement a similar project.  Temperature is controlled with a mechanical relay for what would appear to be a poor man’s PID controller.

Sadly, Fluke meters don’t seem to be listed, but your place of work probably wants their meter back anyway!  For another toaster reflow oven implementation, check out this [HAD] article.  Be sure to check out the video after the break for a video of the setup! (heat treat engineers may find the “recipe” format humorous).

Continue reading “A USB-controlled Solder Reflow Oven”