[Androxilogin] had a problem. An Xbox 360 Slim had shown up in the post, but failed to give much more than a beep when turned on. Disassembly revealed some missing components, but replacing them failed to breathe life into the beleaguered console. Deeper repair was needed, and that would require a special adapter which [Androxilogin] was able to whip up from scratch.
When it comes to the Corona models of the Xbox 360, it’s often necessary to use something called a “post-fix adapter” to do certain diagnostic and repair tasks. These adapters consist of a bracket which wraps around the CPU, and probes the solder ball for the POST_OUT signal which is otherwise difficult to access on the motherboard itself. Adapters are readily available online, and are usually manufactured as a PCB with a protruding contact to make a connection.
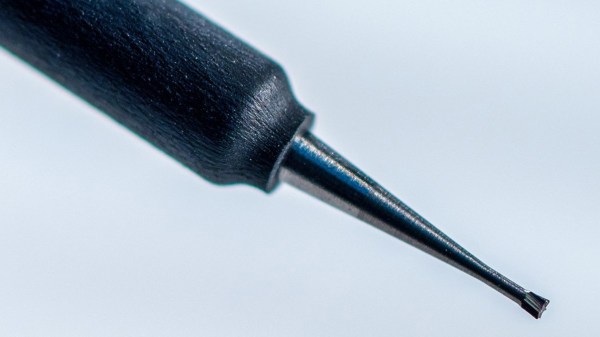
For [Androxilogin], though, time was short. Rather than wait for adapters to ship, it was quicker to whip up a custom piece to do the same job. This was achieved with a 3D print which was able to clamp around the CPU, while snugly holding a piece of tinned 30 AWG wire to poke the critical point beneath the chip. After a couple of attempts to get the sizing just right, [Androxilogin] was able to make the necessary connection which enabled installing Xell Loader on to the machine to bring it back to life.
If you’re eager to make your own post-fix adapter, files are available on Printables, with more details over on Reddit to boot. While the Xbox 360 is starting to suffer some awkward symptoms of age. we nevertheless still see a steady stream of hacks come in for this vintage machine. If you’re tackling your own retro console mods, be sure to notify the tipsline.