GSM Modem Means Wireless Serial Connections

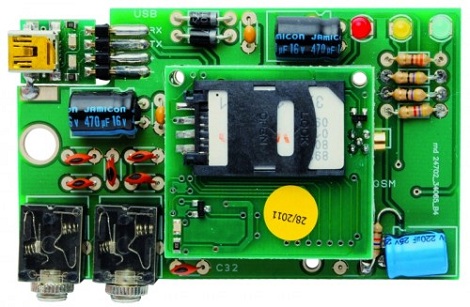
By now, most of us have seen have seen one of those GSM to wi-fi hotspot bridges. They’re interesting devices, and being able to carry a small wireless router with you at all times is very handy. Surprisingly, we haven’t seen many builds featuring these portable wireless hotspots, something probably due to the effort in breaking out a serial connection on these devices. The people at Open Electronics decided to build their own small serial-enabled cell phone modem, a boon to someone wanting a serial connection to any place with a cell tower.

The Open Electronics GSM/GPRS/GPS modem includes a header for an FTDI USB serial chip and a GSM module. Plug one into your computer and after a few short commands into a terminal, you’ve got a serial connection to nearly anywhere in the world.

The cost of the setup is a little high – around 80€ or $100 USD – and you probably should buy more than one so you can also receive data. While it is more expensive than the XBee wireless boards we see often, this GSM modem isn’t limited to the 300 foot range of the XBee. We’ll probably see this in a high altitude balloon before too long.

Displaying Bubbles In Mineral Oil

After he saw a ‘falling water display,’ [Matt] figured he could turn that idea on its head. He built a display that uses bubbles for pixels. Even though the build isn’t complete, we love the results so far.

[Matt] began his build constructing a tall, thin water tank out of acrylic. Eight solenoids were mounted in the base of the tank, attached to an aquarium air supply, plastic tubing, and one way valves. The first run of the bubble display didn’t go too well, but after adding dividers between each column the display started working.

With the dividers, [Matt] no longer had to worry about bubbles colliding or moving any direction but up. The bubbles weren’t moving consistently, so he replaced the water with mineral oil. Oil made a huge improvement, but the bubbles still float up at different speeds. [Matt] ascribes this to the unregulated air supply, but we’re thinking this problem could be mitigated with glycerine like the previous bubble display we saw.

It may still have some problems, but we love the result. Check out the video of bubbles in mineral oil after the break.

Continue reading “Displaying Bubbles In Mineral Oil”

A Simple Project To Get You Started With The Android ADK

simple-adk-exercise

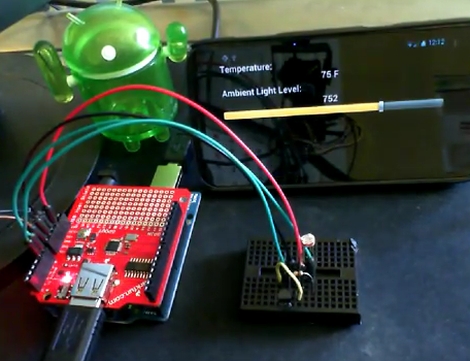
If you just got your hands on a shiny new Android phone and are looking for a fun project to try out, you might want to check out this simple Arduino exercise that [Mike Mitchel] put together. Everyone needs a starting off point for hacking, and [Mike] thought that combining and Arduino and Android handset together for the purpose of temperature sensing and light metering would be a great place to begin.

The prerequisites for this project are a bit beyond a simple breadboard and a few ICs, requiring an $80 Android ADK board to go along with your phone and Arduino. If your focus is going to be on interfacing your phone with microcontrollers however, it’s purchase you’ll make sooner than later anyhow.

The setup is pretty simple as you might expect. A photocell and TMP36 temperature sensor are connected to the Arduino, then with a bit of code and USB host magic, the Android app shows the temp and amount ambient light present in the room.

[Mike] has made all of his easy to read and well commented code available online, so be sure to check it out if you have been thinking about (but putting off) playing around with the Android ADK.

The Best LED Cube Build We’ve Seen

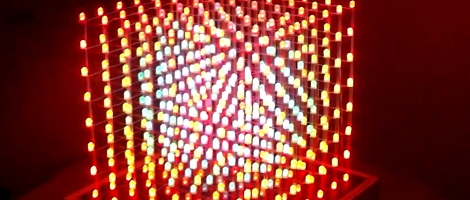
[Nick] wrote in telling us about the LED cube he built over the course of six months. He calls LED cubes ‘done to death,’ but [Nick] might be too humble. His 8x8x8 RGB LED cube is the best we’ve ever seen.

To start his build, [Nick] built a simple 4x4x4 cube as a proof of concept. The baby cube worked but the fabrication process got him thinking. Instead of building his monster LED cube in layers from the bottom up, he would need to build columns from left to right. After the construction of a jig, soldering eight panels of 64 LEDs, and buying a new soldering iron tip, [Nick] had a beautiful assembled LED cube. The only thing missing was the electronics.

Most of the LED cubes we’ve seen use the TLC5940 LED driver for hardware PWM, [Nick] decided to go with the simpler but more familiar STP16 chip. After hooking up his huge LED driver board up to a chipKIT Uno, the 80 hours of programming began.

In the end, [Nick] built the best LED cube we’ve seen (even though it isn’t the largest) and put together one of the best build logs in recent memory. Because no LED cube build is complete with out a video there’s an awesome demo after the break.

Continue reading “The Best LED Cube Build We’ve Seen”