Fail Of The Week: PCB LED Cube Fails Successfully

Remember LED cubes? We sure do — they were all the rage for a while, and then it seemed like everyone just sort of lost interest in them. There are probably a lot of reasons for that, not least of which is likely the amount of work it takes to put one together from discrete LEDs and separate pieces of wire. Could there be a better way?

Of course there could, and [Sasa Karanovic] thought he had it all figured out with this PCB-based LED cube. At first glance, it seems to make perfect sense; after all, weren’t PCBs invented to take the place of all that pesky point-to-point wiring in the early days of electronics? The boards [Sasa] designed are pretty cool, actually. They’ve each got room for 16 addressable WS2812 LEDs in 5 mm packages, with every possible bit of substrate removed to block the minimum amount of light. That left very little room for traces on the 2-mm-wide arms, so the PCBs had to have four layers, which raised eyebrows at the PCB house when [Sasa] submitted the design.

Such an airy and open design obviously has the potential for mechanical issues, which [Sasa] addressed by adding pads at three corners of each board; a vertical PCB connects to each LED board to provide mechanical support and distribute signals to the LEDs. The cube seems solid enough as a result, and even when handled the LED boards don’t really flop around too much. See the cube in action in the video below.

What’s nice about this design is the perfect spacing between the LEDs in all three dimensions, and the way everything lines up nice and straight. That would be really hard to do with wire, even for the most practiced of circuit sculptors. [Sasa] seems to agree, but still deems the build a failure because the PCBs block too much of the view. We suppose he’s got a point, and we’re not sure how well this would scale to an 8×8 cube. We’re not sure how we’d feel about paying for PCBs that are mostly air either, but as failures go, this one still manages to be pretty successful. Continue reading “Fail Of The Week: PCB LED Cube Fails Successfully”

2022 Sci-Fi Contest: Glowing LED Cubes Make Captivating Artifacts

LED cubes were once an exercise in IO mastery, requiring multiplexing finesse in order to drive arrays of many LEDs. Going RGB only increased the challenge. This build from [DIY GUY Chris] shows how much easier it is these days, when every LED has a smart addressable controller on board, and serves as a great sci-fi prop to boot.

Yes, the build relies on the venerable WS2812B addressable LEDs, soldered up in 5×5 grids on each of the six faces of the cube. Running the show is the Raspberry Pi RP2040 microcontroller, sourced here as an individual part rather than in its development board form. An SPI memory chip is on board for the code, along with a USB-C connector for programming. Signals pass around the cube via soldered connections along the edges of the custom PCBs that make up the faces of the solid.

Sitting on its 3D printed stand, the cube glows brightly while drawing a full 2 amps of power. [Chris] coded up a variety of animations, from simple color breathing routines to frantic dazzle animations sure to captivate any cyberpunk thieves that come to steal your magic glowing artifact.

If rectangular prisms aren’t your fancy, though, you can always consider building yourself a glowing D20 instead. Video after the break.

Continue reading “2022 Sci-Fi Contest: Glowing LED Cubes Make Captivating Artifacts”

Big RGB LED Cube You Can Build Too

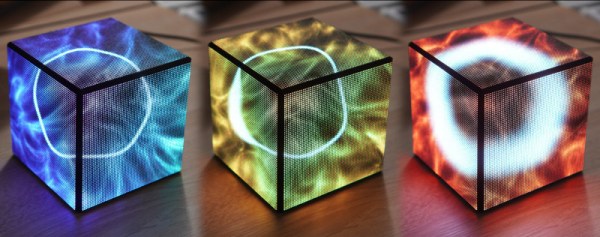
LED cubes are really nothing new, many of us consider the building of a good sized one almost an electronics rite of passage that not so many manage to find the time or have the skill to pull off. It’s our pleasure to draw your attention to a lovely build, showing all the processes involved, the problems and the solutions found along the way.

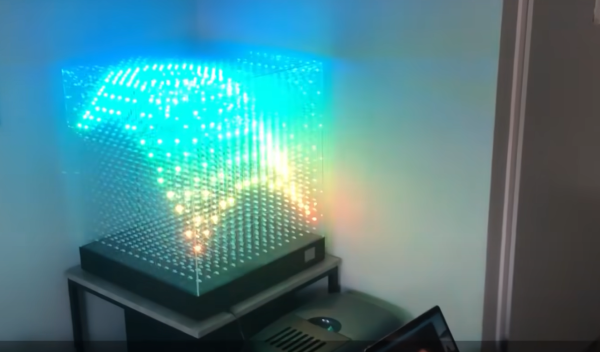
Building a small cube is somewhat of a trivial affair, especially without considering PWM colour mixing, however as simple maths will illustrate, as you increase the number of LEDs on each side, the total number will quickly get quite large. More LEDs need more power and increase control complexity considerably. A larger matrix like this 16 x 16 x 16 LED build, has a total of 4096. This would be a nightmare to drive with plain RGB LEDs, even with cunning multiplexing, but luckily you can buy indexable LEDs in a through-hole package similar to the ubiquitous WS2812-based SMT LEDs you see around. These are based on the PD9823 controller, which can be programmed as if they were a WS2812, at least according to this analysis. Now you can simply chain a column of LEDs, with the control signal passed from LED to nearest neighbour.

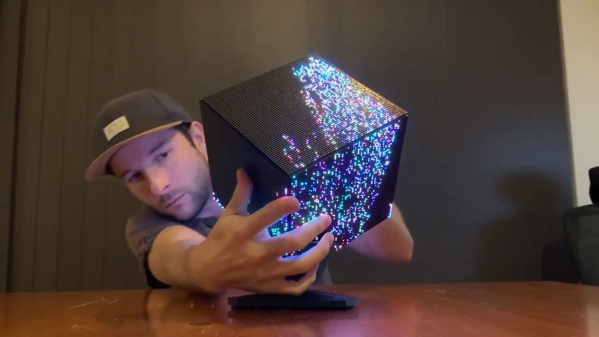
Early on in the video build log, you will note there are four power supply modules needed to feed this juice. If we assume each LED consumes 60 mA on full-white (the data for this product link shows a peak value of 100 mA) that is still a total of 246 A or around 1 kW of power. The video does shows a peak power measurement of around this figure, for the whole array on full white, so the maths seems about right.

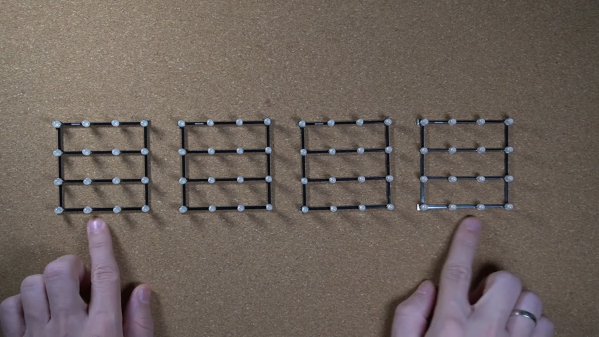
Control is via a Teensy 4.0 using the FlexIO function of the IMXRT1060RM CPU, and a bunch of 74AHCT595 shift registers giving 32 channels of up to 1000 LEDs per channel if needed. Roughly speaking, using the DMA with FlexIO, the Teensy can drive up to 1 Million LED updates per second, which works out about 32 channels of 100 LEDs per channel updated at 330 frames/sec, so plenty of resource is available. All this is with almost no CPU intervention, freeing that up for handling the 2.4-inch LCD based UI and running the animations, which looks pretty darn slick if you ask us. You can checkout the description of the firmware in the firmware section of the GitHub project. 3D printed jigs allowed for bending and clipping the LEDs leads as well as fixing and aligning the LED column units, so there really is enough detail there to allow anyone so inclined reproduce this, so long as you can swallow the cost of all those LEDs.

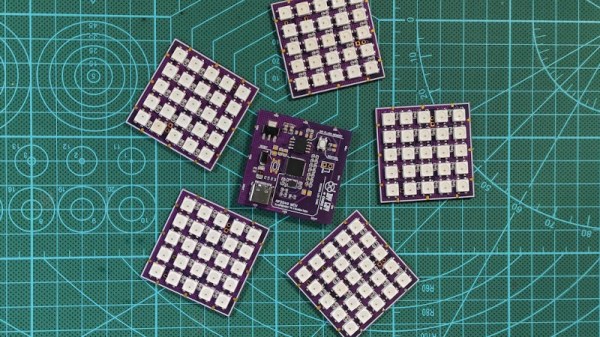
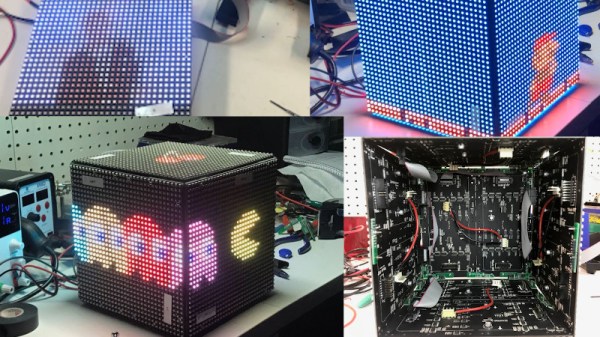
For a different approach to LED cubes, checkout this sweet panel based approach, and here’s a really small 4x4x4 module for those with less space to spare.

Continue reading “Big RGB LED Cube You Can Build Too”

DIY LED Cube For The Masses

No matter what the size or shape of an LED, it brings out the curiosity in every hardware nerd, and is the lifeblood of badge life around the planet. Then there is the LED cube that takes LEDs to all sides — literally. [Tomverbeure] had his own adventure of creating an LED Cube by piecing together Pixel Purses and a Cisco3G Modem.

A quick search for Pixel Purse on the internet reveals a toy lady’s handbag with an LED matrix embedded in one side. [tomverbeure] tore down 12 of these so as to get two panels for each side of his creation. After a little bit of experimenting with PCB corner brackets, he finally got it right and he is able to merge the pieces together to form the cube.

Next comes the brain and the elected device An FPGA from an HWIC-3G-CDMA modem. Cisco routers have extension slots and the HWIC connector on this particular piece had usable GPIOs that connect directly to the Altera FPGA. Inside the FPGA, a RISC-V soft CPU is used to generate images that get processed and dispatched in a hardware block. [Tomverbeure] does a detailed explanation of the implementation for all the blocks which were written in SpinalHDL. The video below shows the project in action.

We love the detail that [Tomverbeure] provides and hope it does not drive up the prices of the pixel purse too much. If you are looking for a more fine pitched cube, look no further than this one. If you end up making your own, be sure to send us a link.

An LED Cube To Display CPU Vitals

LED cubes are all the rage right now. High-end hardware capable of driving large arrays keeps getting cheaper in price, and 3D printers and pre-built boards can make assembly a snap. After attending a major hacker con and seeing the builds on display, [Sebastian] wanted a piece of the action, so set out to build his own.

While many elect to build an LED cube you can hold in your hand, [Sebastian] preferred a stationary tabletop design. This would reduce costs, allowing him to only use 3 LED boards, as the base and remaining two sides would face away from him and not be visible when placed on his desk. The 64×64 arrays are driven by an Adafruit LED matrix bonnet on top of a Raspberry Pi 2. The Pi was a tactical choice, as [Sebastian] had one lying around, and it packed enough processing power to run an OpenGL shader that creates an image for the cube that varies with the CPU load and temperature on his main desktop. As a nice final touch, the Raspberry Pi is set up to have a read-only filesystem. This allows the project to be turned off suddenly without risk of corrupting the SD card.

It’s a tidy build, and one which gives [Sebastian] useful information at a glance. We’ve featured a few stylish cubes before, and even a LED D20 that really breaks the bank. Video after the break.

Continue reading “An LED Cube To Display CPU Vitals”

From Zero To LED Cube In Less Than Seven Months

We know that LED video cubes are so last year, but that doesn’t mean we don’t still love to see them. Any project that incorporates over 24,000 LEDs is bound to be impressive, after all. But the more interesting bit about [Mike Cann]’s self-contained LED cube has more to do with the process he chose to get to the finished product.

There are two ways to approach a new project, especially when you’re new to hardware hacking like [Mike] is. One is to jump in with both feet and just see what happens, for good or for ill. The other is is to ease into it with a starter project, to find out where your limitations lay and work around them gradually. [Mike Cann] wisely chose the latter approach with his LED cube project, starting with an LED sand toy. The single 64 x 64 LED panel was a bit easier to work with, and got him up to speed on the care and feeding of such hardware, as well as the code needed to drive it. The video below tells the tale of scaling that project up by a factor of six to make the cube, a process that had its share of speedbumps. Everything ended up fitting together great, though, letting [Mike] get on to the software side. That’s where this project really shines — the smartphone app running the cube is really slick, and the animations are great.

There’s clearly room for new features on [Mike]’s cube, so here’s hoping he can carve out some time to make a great build even better. For inspiration he might want to check out this side-scrolling Castlevania cube, or perhaps read up on the finer points of OpenGL for LED cubes.

Continue reading “From Zero To LED Cube In Less Than Seven Months”

Gyroscopic Wi-Fi LED Die Is Pretty Fly

As cool as sculptural LED cubes are, the only thing you can really do is look at them. They’re not going to stand up to a lot of handling, and as tedious as it is to bend all those leads when building them, you probably wouldn’t want to mess with them anyway.

LED dice on the other hand are robust, blinky playthings with many possibilities, especially if they have a gyroscope and wireless control like the one [moekoe] built. Inside this tiny 25cm³ die is the equally small ESP8285-01F, which lets [moekoe] control the rainbow light show with a Blynk app.

As you will see in the excellent build video that makes this build look challenging instead of impossible, the cube gets permanently sealed up with solder joints. Most but not all of these transfer power, ground, and data around the faces.

Once the cube is together, [moekoe] uses pogo pins to program it, and can charge the little LiPo inside through contact pads. We love the idea of using a cubical printed jig to help solder the PCB edges together, but not as much as we love [moekoe]’s home-brewed SMT soldering setup.

If you want an easier way to make sculptural LED cubes, build yourself a lead-formin’ machine.

Continue reading “Gyroscopic Wi-Fi LED Die Is Pretty Fly”