Self Balancer Does It Differently Than We’re Used To Seeing

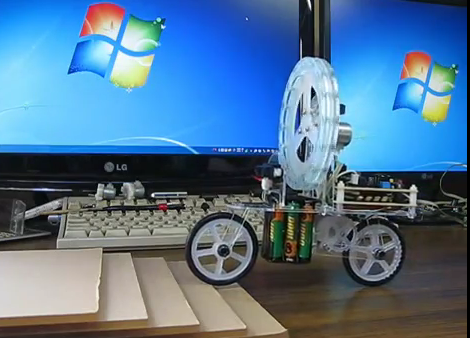
This self balancing robot still uses just two wheels, but it’s balancing very differently than we’re used to seeing. Where most of the projects use a form factor that’s similar to a Segway, this works just like a bicycle. But it doesn’t need to keep the front and rear wheels spinning to stay upright. In fact, the video after the break shows it balancing perfectly while at a complete standstill. [Aoki2001’s] creation isn’t stuck in one place. He included distance sensors on the front and back which are used to move the bike as if by repulsion.

The large wheel where the rider would be is what makes sure the vehicle doesn’t topple over. It acts as an inverted pendulum, pushing against the large wheel’s inertia by rotating the motor to which it is attached. The same concept was seen back in march on a full-sized bike. But why use two wheels when you only need one? His unicycle version can also be seen embedded after the break.

It’s worth looking at [Aoki’s] other YouTube offerings too. He’s got a small robot which balances on top of a ball. It’s the desk-sized version of this hack.

Continue reading “Self Balancer Does It Differently Than We’re Used To Seeing”

Two Retro Successes With A Commodore 64

Slowly but surely, Hackaday readers have been logging onto our retro edition with some very old hardware. Of course we’re featuring the coolest as retro successes. [azog] and [logik] entered the pantheon of brave souls who loaded up Hackaday with a Commodore 64 this week, and their builds are pretty impressive to say the least.

[logik]’s build was nearly doomed from the start: he used a C64 found dumpster diving one day with a bad power supply and half-dead VRAM chips. The first order of business was getting the C64 talking to a PC with the help of a MAX232 serial IC and loading up 64HDD to transfer a copy of Novaterm. From there it was a simple matter of connecting to an Ubuntu box and pulling up our retro site with the help of a text-only web browser.

[azog] didn’t want to abuse Lynx with his submission so he connected a Commodore 64 Ethernet card and loaded up Contiki. The banner image (above) is the ASCII Hackaday logo rendered with the C64’s PETSCII character set, something I did not foresee when I created our retro edition. Still, freakin’ awesome.

As a small aside, we’re going to open up the comments for this post to suggestions and recommendations you’ve got for the Hackaday retro edition. What would you like to see? The Retrocomputing guide is woefully inadequate, we know, but there’s a project in the works (getting WiFi over a serial port on a 68k Mac) that should be well received.

Raspberry Pi Enclosure Turns It Into A Desktop PC

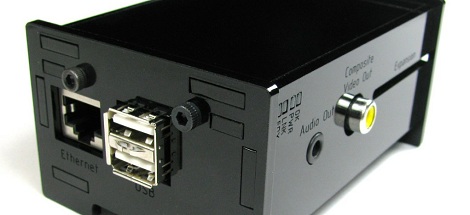
While you’re still waiting for your Raspberry Pi to be delivered, why not build an enclosure for it? This build comes from the fruitful workshop of [builttospec], and gives the Raspi a very nice case well-suited for being placed on your desktop.

Like most of [builttospec]’s case builds, this enclosure was made on a laser cutter out of acrylic and features everything you would expect in a good Raspi enclosure. All the hardware ports are available, and there’s also a slot for a GPIO ribbon cable, perfect for connecting an enclosed Raspi to whatever hardware project you’re working on.

One thing we’re loving about [builttospec]’s enclosure is the tasteful use of light pipes that funnel the light from the LED indicators on the Raspi to the surface of the case. Sure, they’re just a few bits of laser-cut polycarbonate, but its little touches like this that transform a good case build into a great one.

Files available on Thingiverse.

Two Interesting Boards Coming Down The Pipe

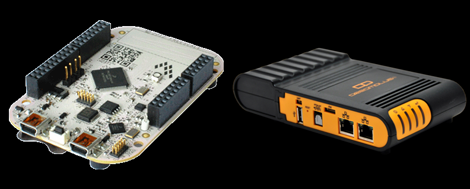
Hey, it’s a hardware twofer! Here’s two platforms coming down the pipe:

First up is the Mimo Dreamplug, the latest in a continued expansion of choices for very tiny, single-board Linux computers. The Dreamplug should be extremely capable of just about any task you can throw at it. With a 1.2GHz Marvell Sheeva CPU, eSATA, fiber optic/TOSLINK, WiFi, Bluetooth, two Gigabit Ethernet connections, and 512 MB of RAM, we’re thinking this could be used for just about anything. It’s a little pricy at $250, but that’s  what you pay for all those features. No idea when it will be available, though. Never mind, you can get the same thing for $150 here. Thanks, [Scott].

Next up is the Kinetis KL25Z Freedom Board, an Arduino-compatable, Cortex-M0+ based dev board being made available for pre-order. The specs on this machine seem pretty good – with a 48MHz ARM chip, on-board accelerometer, a capacitive touch ‘slider’ built into the PCB, and OpenSDA for a USB debug interface, you should be able to make a few cool projects with this board. As a neat bonus, it costs $13, and Freescale is giving away a version of their Codewarrior development environment (limited to 128kB, but that’s all the Flash the Kinetis has). Hopefully, it’ll be a much more open development platform than what our own [Mike Szczys] has been able to wrangle from the STM32 board that has been floating around. The Kinetis should be available this fall.

Thanks [Impulse405] and [Hussam] for sending these tips in.

MakerFaire K.C.: Hexy, The $200 Hexapod Project

I’ve always loved hexapods. Unfortunately, the cost to play with them can be rather daunting. Hexy is seeking to make a decent impact on that by being only $200. Yep, that $200 includes everything but the computer. You get the entire chassis, micro controller, servos, sensors, batteries, etc.

I ran into [Joe] from arcbotics showing off a hexy at the maker faire and had a few moments to check it out. He showed off some slick motion and explained some future upgrades. It looks like they are intending to go to metal gears in the commercial version which might push the cost to around $250. At this cost, this robot is comparable to the Lego NXT systems.

Continue reading “MakerFaire K.C.: Hexy, The $200 Hexapod Project”

Turning An Arduino Into A USB Keyboard

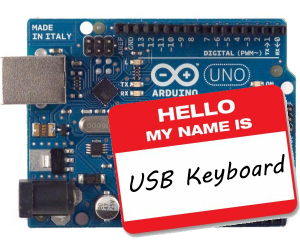
The newly released Arduino Leonardo has a few very interesting features, most notably the ability to act as a USB keyboard and mouse thanks to the new ATmega 32U4 microcontroller. This feature isn’t exclusive to the Leonoardo, as [Michael] explains in a build he sent in – the lowly Arduino Uno can also serve as a USB HID keyboard with just a firmware update.

The Arduino Uno (and Mega) communicate to your computer through a separate ATmega8U2 microcontroller. Simply by uploading new firmware with the Arduino Device Firmware Upgrade, it’s easy to have your old Arduino board gain some of the features of newer boards such as the Teensy or Leonardo.

[Michael] goes through the steps required to make this upgrade work and ends his build by showing off an Arduinofied ‘cut, copy and paste’ button project as well as a few multimedia controls. You can check those builds out in the video after the break.

If emulating a USB keyboard isn’t your thing, it’s also possible to install LUFA firmware to emulate everything from joysticks to USB audio devices. Very cool, and very useful.

Continue reading “Turning An Arduino Into A USB Keyboard”