Recording Audio With Chrome Using HTML5

recording-audio-with-chrome

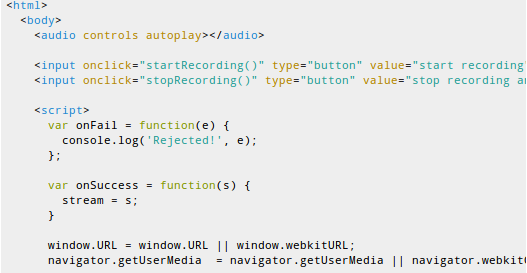
The Dubjoy project was stopped dead in its tracks when the newest version of the Google Chrome browser stopped using Adobe’s flash plugin and transitioned to their own called Pepper Flash. The aim of development was to produce a browser-based editor for translating the audio track of a video clip. After a bit of head scratching and a lot of research they decided to try ditching the use of Flash and implemented a way to record audio using HTML5.

There were quite a few issues along the way. The initial recording technique generated raw audio files, which are not playable by Chrome’s HTML5 audio player. This can be worked around by buffering the raw audio, then converting it to a different format once the recording is finished. The user also needs to monkey with the Chromes flags to enable HTML5 audio. So they did get it working, but it’s not yet a smooth process.

We love seeing the neat stuff you can do with HTML5. One of our favorites is the use of a tablet’s accelerometer as a browser game controller.

[via Reddit]

Plan 9 On The Raspberry Pi

Yet another operating system has been ported to the Raspberry Pi. No, it’s not Haiku, sadly, but it is something just as weird and interesting. This time it’s Plan 9 from Bell Labs, an 80’s era OS from the same company that brought you C and Unix.

As a research operating system, Plan 9 has a bunch of really weird, but useful features. For one, everything about a computer running Plan 9 is distributed; the memory can be running on one machine, the processor on another, and the display can run on yet another machine. This modularity gives Plan 9 the honorable title of, ‘more Unix than Unix’.

Another great feature, although somewhat of a historical note, is that Plan 9’s graphics capabilities are written into the kernel, unlike Linux and X where the display manager is floating around in user space.

It’s an interesting system, and if you’ve got enough Raspis to build your own supercomputer you might want to install Plan 9 on a few of your nodes, just to see what the future computer of ages past looked like.

Raspberry Pi Quadcopter

[youtube=http://www.youtube.com/watch?v=TjXvzMdf8Nk&w=470]

It was bound to happen sooner or later, but that doesn’t diminish the awesomeness of [Matthew]’s Raspberry Pi-powered quadcopter.

[Matthew]’s quadcopter is similar to all the other flying drones we’ve seen before with one important difference – all the processing, from reading the gyroscopes to computing exactly how much power to give each motor – is handled by a Raspberry Pi. This task is usually the domain of a microcontroller, as these calculations need to happen in real-time. The Linux distro [Matt] is running on his Pi has a lot more overhead than a simple AVR or ARM microcontroller, so doing everything that needs to be done in real-time isn’t guaranteed. With a bit of clever programming, [Matthew] managed to make sure all the necessary tasks were taken care of in time. It’s still not a real-time operating system, but for this project at least, it’s good enough.

Since the Raspberry Pi in [Matthew]’s quadcopter is much more powerful than a microcontroller, there’s plenty of head room to SSH into the ‘copter while it’s flying. There may even be enough processing power to stream video to a web server; we honestly can’t wait to see what [Matthew] does with his flying Linux computer in the future.

You can check out [Matthew]’s code over on the git or watch a few flight test videos over on his youtube.


Getting Rid Of A Tangled Web Of Phone Chargers

USB

Every night, [Roberto]’s kitchen counter is cluttered with three cell phones, three different cell phone chargers and a mess of wires until morning comes and the chargers are moved to a drawer for the following night. For [Roberto] this is a bit of a pain – a much easier solution would be to have a few USB ports embedded right into his kitchen backsplash. With the right tools, this can be easily done, resulting in a very professional looking installation for charging a trio of phones.

After removing a Euro AC outlet and replacing it with three iPhone chargers, [Roberto] simply soldered the six mains connections on the chargers to his house’s wiring. This resulted in a perfectly functional but rather ugly home project, though.

The next step was to machine a blank AC outlet cover for the three USB ports. [Roberto]’s CNC mill made quick work of this piece of plastic and turned it into a professional-looking installation.