Automated Doors For Theatre Effect

Door Actuator

For a theatre production, [Jason] needed a way to automatically open and close doors as a special effect. His solution, hosted on Github, lets him remotely control the doors, and put them into a ‘freak out’ mode for one scene in the play.

Two Victor 884 motor controllers are attached to an Arduino that controls the system. A custom controller lets [Jason] actuate the doors remotely, and LEDs are used to display the state of the system.

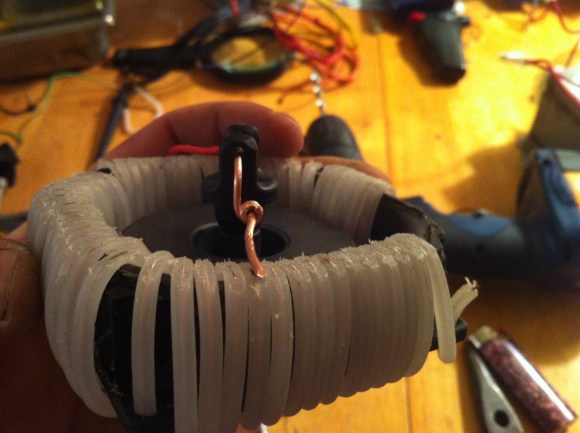
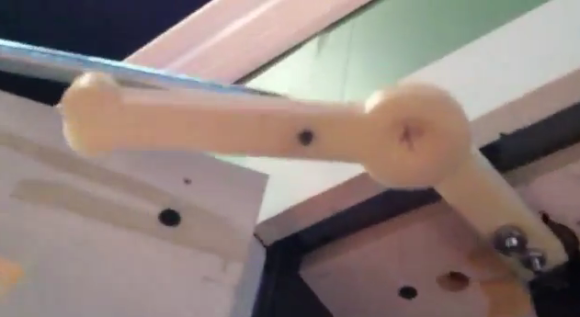
On the mechanical side, two wind shield wiper motors are used. These are connected to custom arms that were printed using a Lulzbot AO-100. The arms allow for the door to be automatically actuated, but also allow for actors to open the door manually.

The result is a neat special effect, and the 3D models that are included in the repository could be useful for other people looking to build automated doors. In the video after the break, [Jason] walks us through the system’s design and demonstrates it in action.

Continue reading “Automated Doors For Theatre Effect”

Finding The Cheapest Board House

The prices for custom made circuit boards has never been cheaper, but surprisingly we’ve never seen a comparison of prices between the major board houses. [Brad] took the time to dig in to the price of 10 boards manufactured by Seeed Studios, OHS Park, and BatchPCB. He made some pretty graphs and also answered the question of where you can get your circuits made cheaply.

[Brad] got the prices for boards up to 20 cm x 20 cm from Seeed Studio’s Fusion PCB service, OSH Park, and BatchPCB. These results were graphed with Octave and showed some rather surprising results.

For boards over 20 cm2, the cheapest option is Seeed Studios. In fact, the price difference between Seeed and the other board houses for the maximum sized board is impressive; a 400 cm2 board from Seeed costs $150, while the same board from OSH Park is close to $1000.

Of course most boards are much smaller, so the bottom line is  for boards less than 20 cm2, your best bet is to go with OHS Park. If you don’t care when your boards arrive, or you need more than 10 or so, Seeed is the way to go. As far as the quality of the boards go, OSH Park is up there at the top as well.

Ask Hackaday: What’s An Easy Way To Build A Potentiometer For A Soldering Iron?

diy-potentiometer-2

[Lee] wrote in to share the work he’s done in building a controller for his soldering iron. The idea started when he was working with an ATX power supply. He figured if it works as a makeshift bench supply perhaps he could use it as the source for an adjustable iron. To get around the built-in short-circuit protection he needed a potentiometer to limit the current while allowing for adjustments. His first circuit used a resistor salvaged from an AT supply and a trimpot from some computer speakers. That melted rather quickly as the pot was not power rated.

This is a picture of his next attempt. He built his own potentiometer. It uses the center conductor from some coaxial cable wrapped around the plastic frame of an old cooling fan. Once the wire was in place he sanded down the insulation on top to expose the conductor. The sweeper is a piece of solid core wire which pivots to connect to the coil in different places. It works, and so far he’s managed to adjust a 5V rail between 5A and 20A.

How would you make this system more robust? Short of buying a trimpot with a higher power rating, do you think this is the easy way to build a soldering iron controller? Let us know by leaving your thoughts in the comments.

Continue reading “Ask Hackaday: What’s An Easy Way To Build A Potentiometer For A Soldering Iron?”

MIT Media Lab’s Month In Shenzhen

When you’ve got a month worth of blog postings it’s pretty difficult to choose one photograph that sums it all up. This one shows the tour group from MIT Media Lab in ESD garb ready for their tour of Okano SMT and Speaker Factory. It was part of a tour of Shenzhen aimed at bringing graduate students up to speed on what it means to manufacture products in the city. Luckily, Freaklabs member [Akiba] was one of the staff members of the program and blogged extensively about the experience. At first glance his page full of post abstracts looks really boring, but click through because both his recount and the commented images associated with each day are fun and fascinating ways to tag along with the group.

If you’re really good with faces you can pick [Bunnie Huang] out of the lineup above (he’s the third from the right). He had the original idea for the program and brought aboard a few others to help make the thing a success. The group toured a wide range of factories and parts markets in the city. This included your traditional electronics manufacturing venues but there was even a side trip to a diaper and feminine napkin plant to see the non-electronic factories in operation. In addition to tours there were lectures by industry members like HAXLR8R, a group that specializes in helping start-ups navigate the manufacturing jungle.